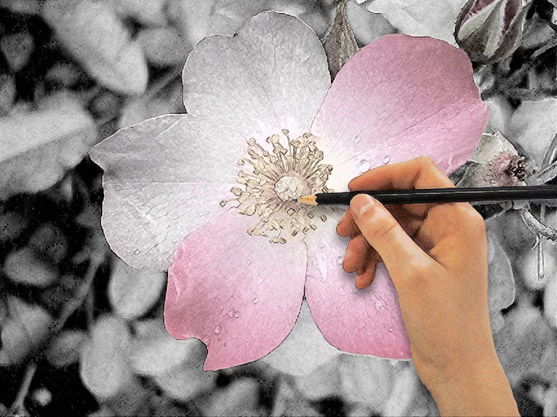
Artist at Work
The author of this example is Heike Nocher. He used the AKVIS Sketch plugin in Photoshop.
Works of art evoke our admiration for the talented artists. However, we usually see only the result, not the process of creating. In this tutorial we will try to catch a glimpse into the work of an artist. The author of the tutorial Heike Nocher reproduces the process of drawing a flower.
Using AKVIS Sketch you can repeat the steps and create you own piece of art.


Follow the instructions:
- Step 1. Open the original photo in your photo editor.
- Step 2. Duplicate the layer and rename it.
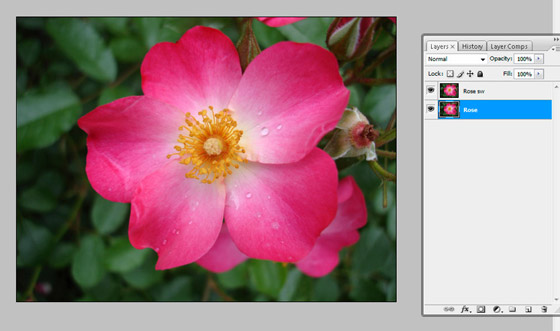
- Step 3. Transform the photo into a black and white pencil drawing.
Call AKVIS Sketch from the main menu of Photoshop: Filter –> AKVIS –> Sketch. Adjust the values of the parameters in the Settings panel .
The author set the following values: Charcoal = 2, Angle = 180, Stroke Thickness = 1, Min Length = 3, Max Length = 10, Midtones Intensity = 5, Midtones Hatching = 100.
Click on the button
 to start the process.
The result will be shown in the After tab.
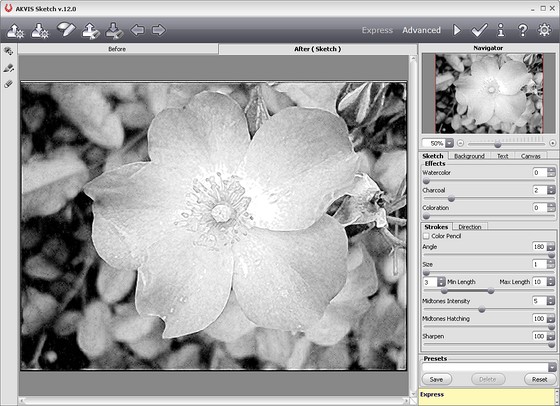
Click on the button
 to apply the result and close the plugin's window.
- Step 4. The first part of our tutorial (photo-to-sketch conversion) is done. Now we'll add color to the image, so that it doesn't no look so dull and dark.
Make the mask of the layer: for this purpose press the button Add vector mask in the Layers window.
Choose the Brush tool from the Toolbox. Change the values of the parameters: Master Diameter = 108, Mode - Normal, Opacity = 33%, Flow = 100%.
Press the Set foreground color button in the Toolbox and choose any grey color from the Color Picker dialog box. Paint thoroughly over the flower. The areas under the brush will become semitransparent and you will see the original colors through it. In this way you can get a blend of the original color image and the black and white sketch.
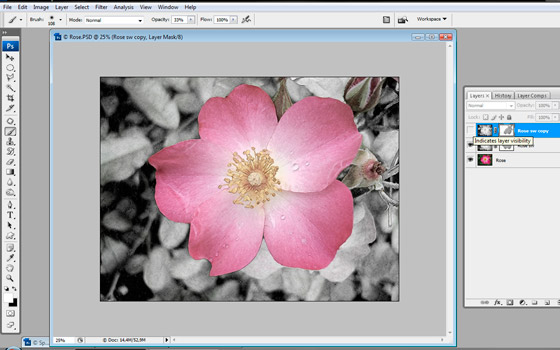
- Step 5. Copy the upper layer and work with its mask.
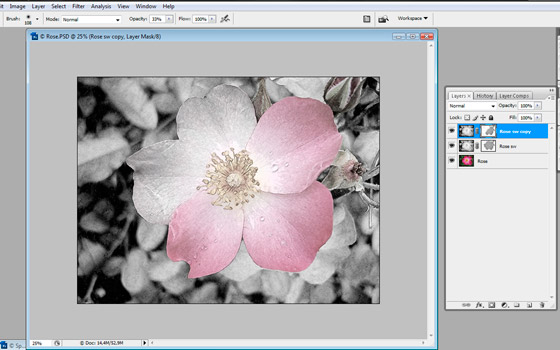
Choose the Brush tool once again, click on the button Set foreground color and choose the white color. Now we paint over the flower to get a smooth transition from black to white areas.
Here we have a double masking of the layers. The color part of the flower becomes less bright amd looks more like a pencil drawing rather than a photo.
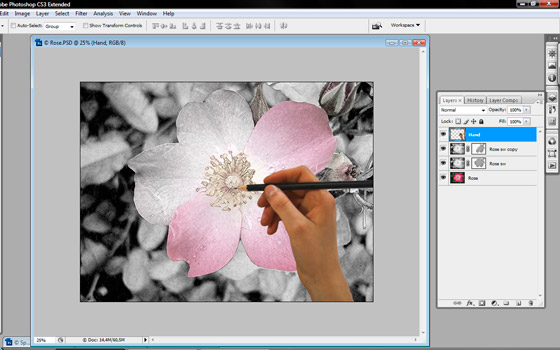
- Step 6. To enliven the drawing, we add the artist to the picture, or to be precise, his hand.
Open an image with a hand. Copy it and paste it as a new layer.
- Step 7. Convert the photo of the hand into a drawing, so that it matches the background. Call AKVIS Sketch again. Activate the check-box "Color Strokes". Set the values of the parameters.
The author used the following settings: Charcoal = 2, Coloration = 70, Angle = 120, Stroke Thickness = 2, Min Length = 0, Max Length = 7, Midtones Intensity = 6, Midtones Hatching = 100.
Press the button
 to start the conversion process.
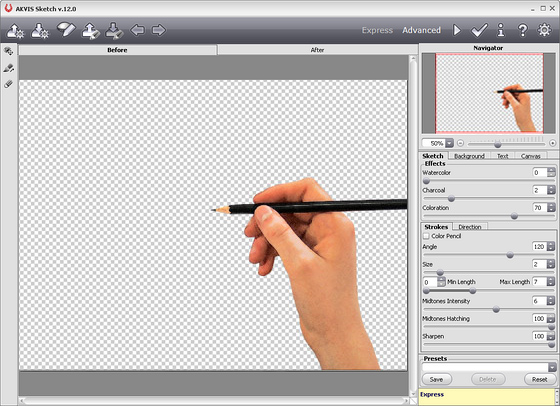
Click on the button
 to apply the result and close the plugin window.
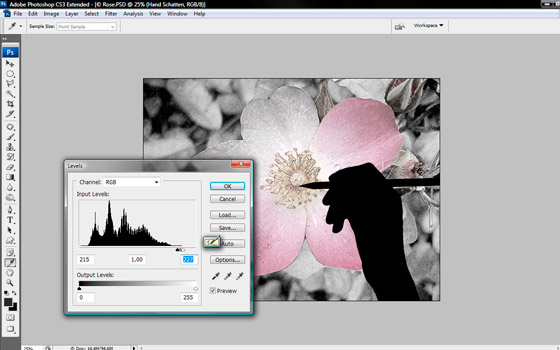
- Step 8. For the hand to look more realistic we add a shadow.
Copy the image of the hand and move it one layer below, we will make a shadow out of this hand. Choose Image -> Adjustments -> Levels from the main menu. Change the values of the parameters to make the hand and the pencil black. The author used the following values: Adjust shadow input level = 215, Adjust midtone input level = 1, Adjust highlight input level = 227.
- Step 9. Soften the shadow's borders. Choose the standard Photoshop filter: Filter -> Blur -> Gaussian Blur. Change the values of the parameters. The author set Radius=20
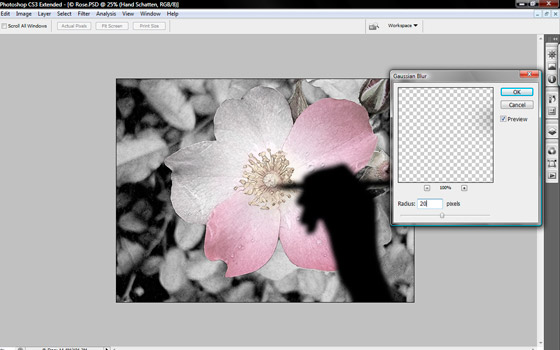
- Step 10. Now use the Move Tool to move the shadow to the left and change the value of the layer opacity in the Layers window. The author set the following value: Opacity = 50%.
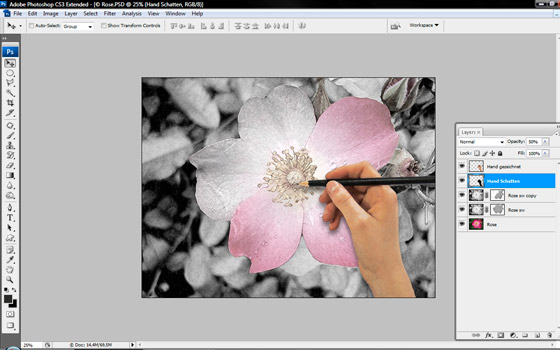
- Step 11. Here is the final result: the artist's hand drawing a flower.
