Adding AKVIS Plugins to Luminar Photo Editor on Mac
You can use Photoshop compatible plugins in Luminar graphics editor on Windows and Mac.
As a rule, Luminar automatically finds AKVIS plugins in the plugins folders of Adobe Photoshop and Adobe Photoshop Elements.
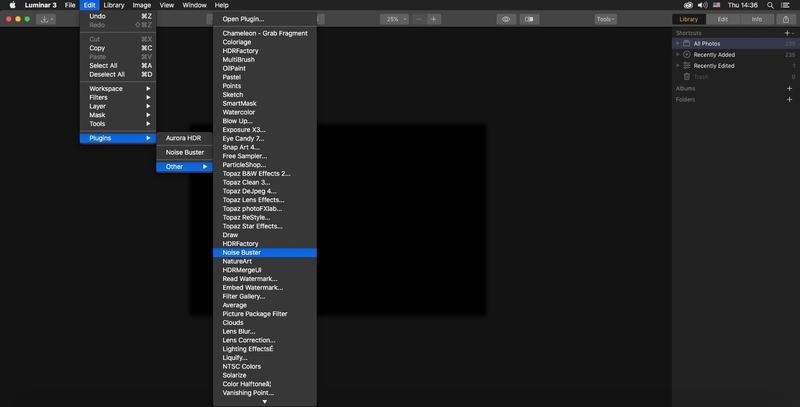
If you have problems with the plugin installation (plugin is not found or appears grayed out), you can add it manually using the Open Plugin command. To do this, follow the instructions (for Mac):
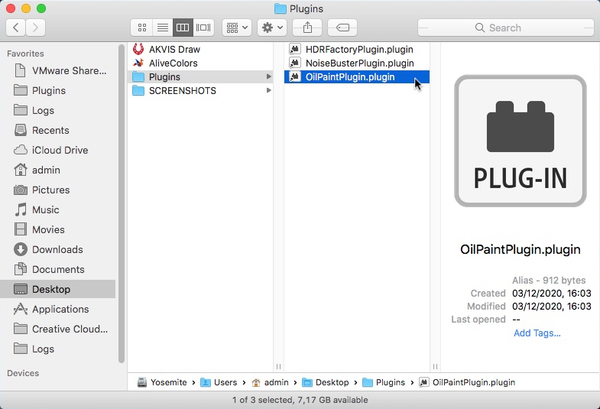
- Create a folder where links to plugins will be located (for example, the Plugins folder on the desktop).
- Go to the folder where the AKVIS plugin is located (for example, AKVIS OilPaint), right-click on the plugin and select Show Package Contents from the context menu.
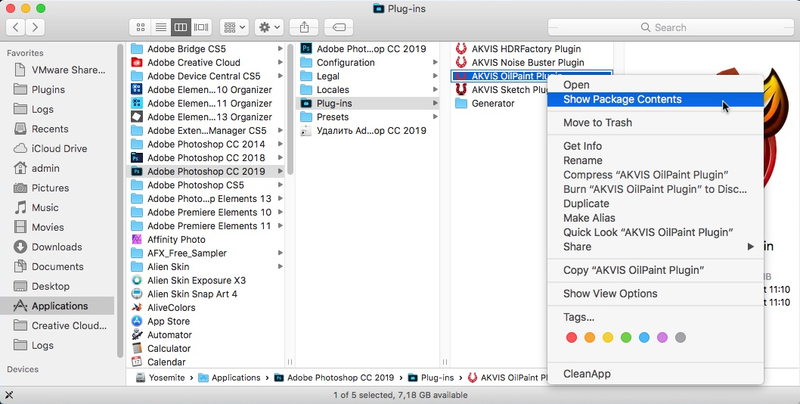
- Go to the Resources directory and select the OilPaintPlugin.plugin file. In the second Finder window, open the folder where the plugin links will be placed (see point 1).
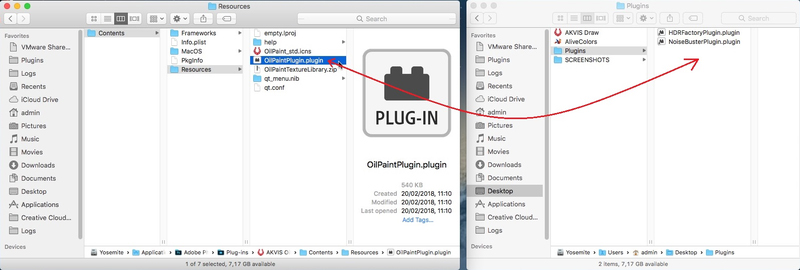
- With the left mouse button, drag the OilPaintPlugin.plugin file to the folder. A link to the plugin will appear in it:
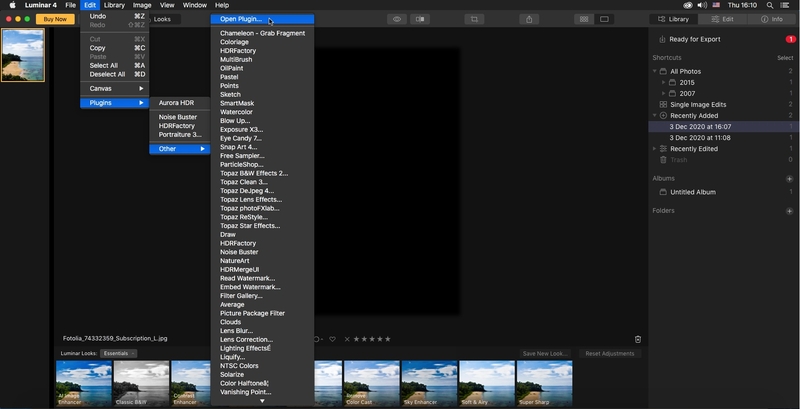
- In Luminar select Edit -> Plugins -> Other -> Open Plugin.
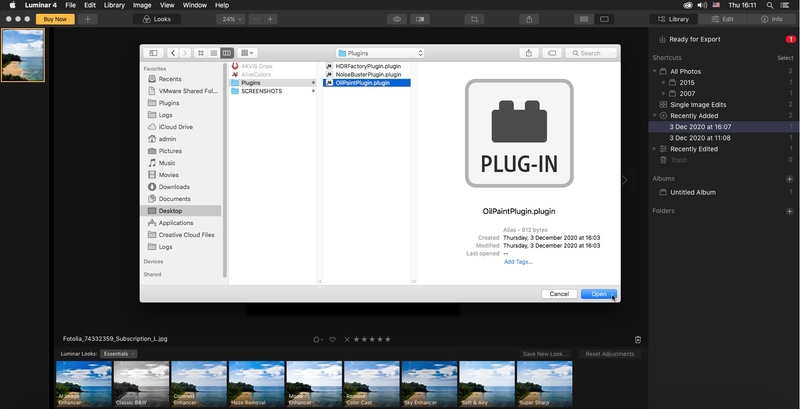
- In the window that opens, select the folder with links to plugins (see point 4), choose the desired link and click on the Open button.
