Import and Export User Presets
The AKVIS programs include a number of presets. You can also save your own presets.
Read how to import and export user presets in the AKVIS programs:
Export Presets:
- To export your presets click on
 . This command lets you save presets to a file.
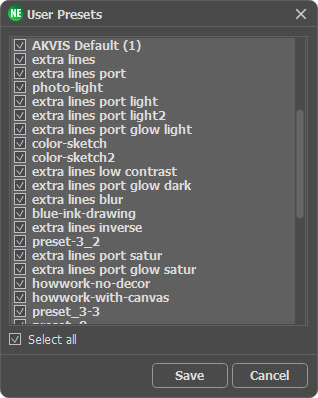
- In the User Presets dialog window choose the presets you want to export. Checking Select All will select all the presets in the list. Unchecking it will deselect all presets in the list.

- Press the Export button.
- Enter a name for the file, choose a target folder, and press the Save button.
The AKVIS presets cannot be saved to a file.
Import Presets:
- To load presets to the program click on
 .
.
- In the Import Presets dialog window choose a file and press Open.
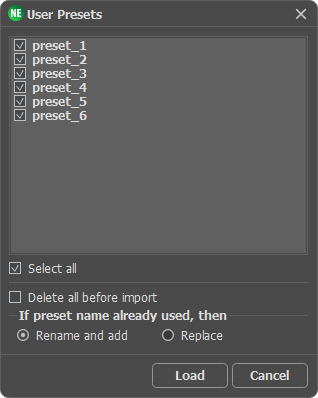
- In the User Presets dialog window select the desired presets from the list. Checking Select All will select all presets in a list. Unchecking it will deselect all the presets in the list.

- Check Delete All Before Import, if you want to clear the list of presets in the program before importing others from a file.
Note: The AKVIS presets cannot be removed.
- If Delete All Before Import is not checked, choose one of the following methods for importing presets:
- Replace: If the name of a preset in the list matches the name of a preset in the file, then it will be replaced by the preset from the file.
- Rename and Add: Presets from a file with matching names are automatically renamed and added to the list of presets in the program.
Presets whose names do not match any presets in the program's list will be added to the bottom of the list.
- Press the Import button.