How It Works
To make a collage or a composition using AKVIS Chameleon, do the following:
-
Step 1. Open two images. First, one that will be used as a background for the collage, and second, one containing a fragment which will become part of the collage.

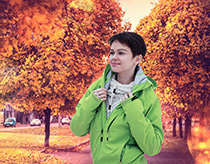
- If you work with the standalone edition (with file in BMP, JPEG, PNG, WEBP, RAW or TIFF format):
Click on
 to open an image for the background (1), then click on
  to open an image from which a fragment (2) will be taken. You can swap images with
  .
.
You can also drag the required image into the workspace of the program (just the background image - 1).
- If you work with the plugin:
Open images in your photo editor by calling the command File -> Open or using the key combination Ctrl+O on Windows, ⌘+O on Mac.
Select the desired fragment using any of the graphic editor's selection tools.
Call AKVIS -> Chameleon – Grab Fragment from the Filter menu of the photo editor.
AliveColors: Effects -> AKVIS -> Chameleon - Grab Fragment;
Adobe Photoshop: Filter –> AKVIS –> Chameleon – Grab Fragment;
Corel PaintShop Pro: Effects –> Plugins -> AKVIS –> Chameleon – Grab Fragment;
Corel Photo-Paint: Effects –> AKVIS –> Chameleon – Grab Fragment.If everything is done correctly you’ll see a message that the selected object is saved into the clipboard.
Switch to the image which will be used as the collage's background and call the command AKVIS –> Сhameleon – Make Collage from the menu Filters.
AliveColors: Effects -> AKVIS -> Chameleon - Make Collage;
Adobe Photoshop: Filter –> AKVIS –> Chameleon – Make Collage;
Corel PaintShop Pro: Effects –> Plugins -> AKVIS –> Chameleon – Make Collage;
Corel Photo-Paint: Effects –> AKVIS –> Chameleon – Make Collage.Hint. Selection made in the graphics editor and transferred to the plug-in can be edited with the Chameleon's tools.
-
Step 2. The AKVIS Chameleon window will open. The Image Window will contain the background image and the pasted object.
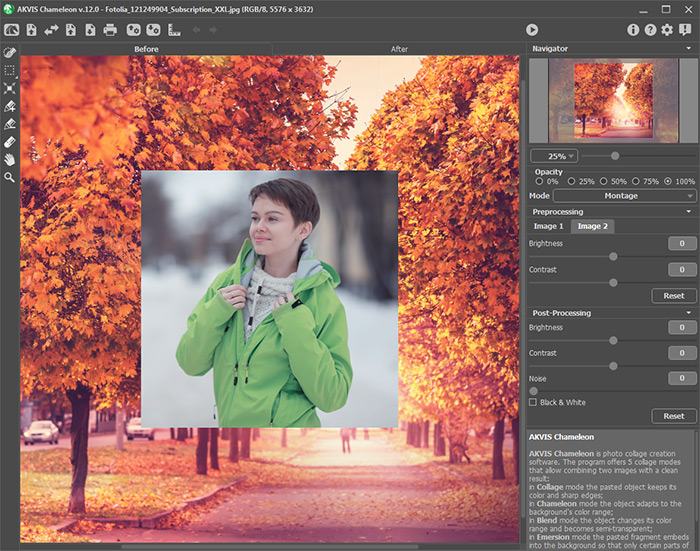
Program Window of AKVIS Chameleon -
Step 3. Select the appropriate collage mode (Montage, Chameleon, Blend, Emersion, Double Exposure) in the drop-down menu in the Settings Panel.
Montage Mode. In Montage mode the program combines images to create a seamless photo montage. It transfers selected objects to a new background and makes the irrelevant parts of the pasted fragment fade away. The object does not change its color range or opacity. This mode is good to use for creating photo collages with people (pasting a person into a new background).
Chameleon Mode. In Chameleon mode the program adjusts the inserted object to the target image color range and smoothes the object's borders. It looks similar to the way a chameleon adapts to the environment.
Blend Mode. In Blend mode, the program not only smoothes the borders of the inserted object and adjusts its color range, but it also makes the object semi-transparent, so that the texture and the relief of the primary image can be seen through. Use this mode if you want to “dissolve” the inserted image in the background.
Emersion Mode. In Emersion mode, like in Montage mode, the program combines images to create a seamless photo montage. The difference between the two is that in Emersion Mode the pasted fragment does not overlay the background, but embeds into the background so that only certain parts of the fragment are visible. This mode allows making montages with difficult objects (trees, etc).
Attention! In Emersion mode it is critical to make a precise selection. If needed, process the edges of the fragment.
Double Exposure (for Home Deluxe and Business licenses). The Double Exposure mode is based on the real-world technique used by photographers. Two images are superimposed into a single photo using different blend modes and taking into account the luminance values. The most popular is combining landscape scenes with human portraiture where a silhouette darkens an overlay photo or appears isolated on a blank background with an overlay image showing through it.
-
Step 4. Use the Transform tool
 from the Toolbar to change the size, the position, and the rotation angle of the pasted fragment on the background image.
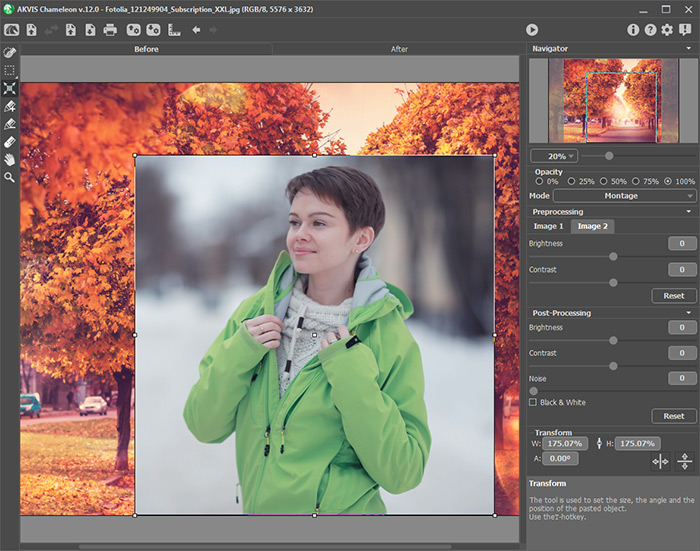
Fragment Transformation -
Step 5. Use the Guidelines option to precisely position the fragment on the background image. Guidelines are supporting horizontal and vertical lines used to specify the exact fragment location. They will not appear on the final result.
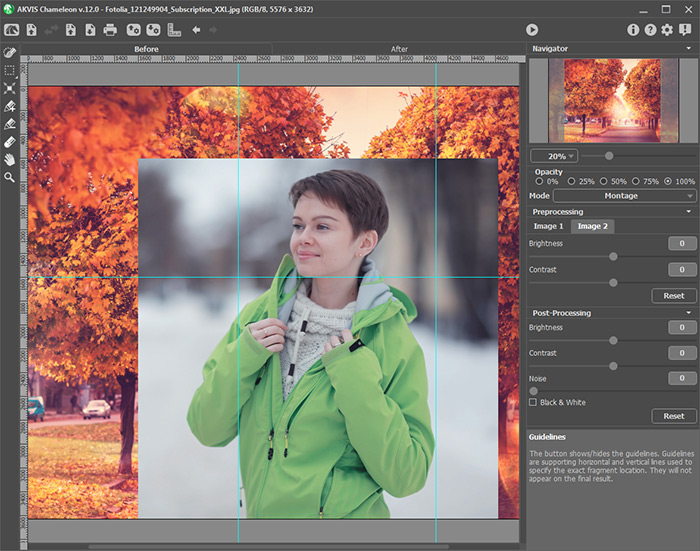
GuidelinesTo create a guideline, click the button
 on the Control Panel to show the rulers along the edges of the Image window. Hover your mouse over one of the rulers, press the left mouse button and drag the cursor to the center of the image. You will see a blue line moving with the cursor. Release the mouse button in the desired location.
To move the created guideline, hover your mouse over it (the cursor will turn into
 ), press the left mouse button and move the line to the proper place. To remove the guideline, drag it outside of the Image window.
Note: You can move the guidelines only in the Before tab with the activated Transform tool.
Click the right mouse button on
 to call the Guidelines Menu and set the visualization parameters:
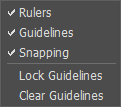
- Rulers. When this option is checked, you can see the rulers along the edges of the Image Window. Right mouse click on a ruler to select the units of measurement (pixels, inches, centimeters, etc.).
- Guidelines. When this option is checked, the previously created guidelines will be shown. When the option is deactivated, the guidelines are not displayed and cannot be created.
- Snapping. When this option is checked, the fragment's nodal points will "cling" to the guidelines when moving it.
- Lock Guidelines. When this option is checked, it is impossible to reposition the guidelines.
- Clear Guidelines. When this option is checked, all created guidelines will be deleted.
-
Step 6. To place the chosen fragment more accurately, adjust the Opacity parameter. This parameter is auxiliary and does not affect the final result. The parameter can have the following values: 0%, 25%, 50%, 75%, and 100%. With 100% the pasted object is non-transparent. The lower the value of the parameter, the more transparent is the fragment.
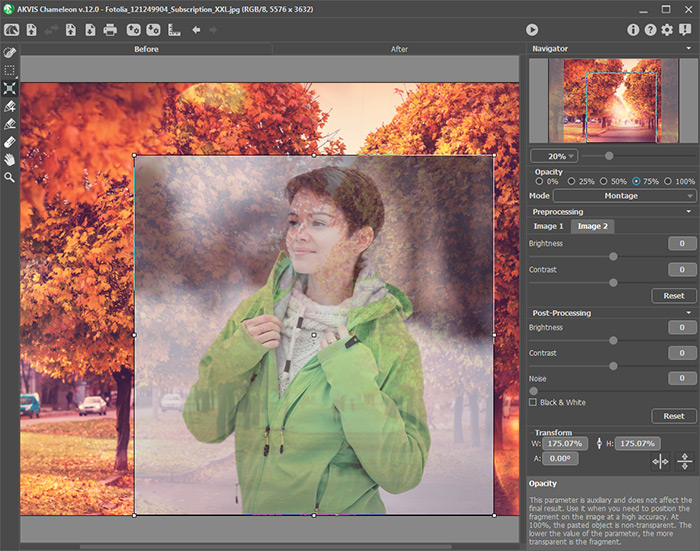
Opacity = 75% - Step 7. If necessary, you can adjust the brightness and contrast of the source images in the Preprocessing section.
-
Step 8. Use the selection tools to determine the image area that should be considered when creating a collage.
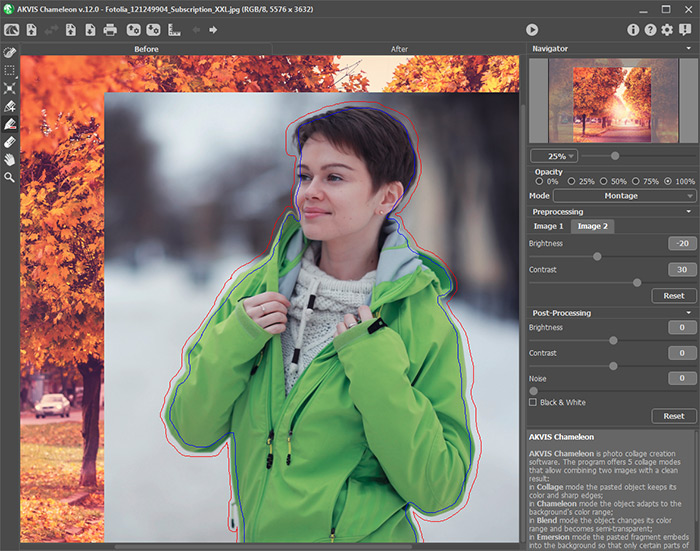
Creating a Selection -
Step 9. Click on
 to start the process of collage creation. The result will be shown in the After tab. If you are not satisfied with the result, switch to Before tab. Make necessary corrections and press the button
  again.
- Step 10. Optionally, you can adjust the Post-Processing parameters to refine the result.
-
Step 11. The collage can also be modified in the After tab using the additional post-processing tools: Smudge
 , Blur
  , and History Brush
  (available only for Home Deluxe and Business licenses).
Attention! If you change the settings and re-run the image processing, the changes made with these tools will be lost!
-
Step 12. You can save the fragment (with the strokes and the parameters) used for the collage.
Press the button
 on the Control Panel, enter a name for the file and indicate a folder to which you want to save the file.
The fragment will be saved with the .chameleonFragment extension. The file will contain information about the fragment's location, the settings and the drawn contours.
You can open the saved fragment with the button
 .
.
-
Step 13. In the standalone version, you can also print your result using
 .
.
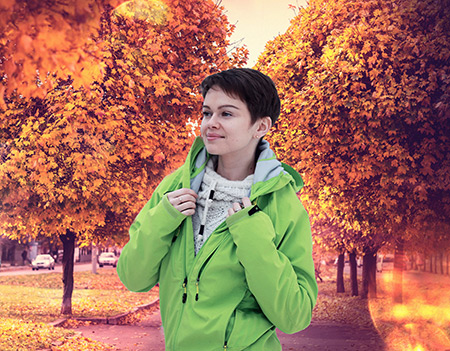
Result -
Step 14. Save the processed image.
- If you work with the standalone edition:
Click on the button
 to open the Save as dialog box. Enter a name for the file, choose the format (TIFF, BMP, JPEG, WEBP or PNG) and indicate the target folder.
- If you work with the plugin:
Press the button
 to apply the result and close the plugin window. The AKVIS Chameleon plugin will close and the resized image will appear in the workspace of the photo editor.
Call the Save As dialog box using the command File -> Save As, enter a name for the file, choose the format and indicate the target folder.
