Tools and Their Options
The left panel in AKVIS Chameleon (Toolbar) contains three groups of tools: preprocessing (selection and positioning), post-processing (adjustment and refinement), and additional (auxiliary) tools. Different tools are visible depending on the active tab - Before or After.
 |
 |
| Toolbar Before tab |
Toolbar After tab |
-
Hint:
Use the buttons  and
and  to undo/redo the operations made with the tools:
![]() ,
, ![]() ,
, ![]() ,
, ![]() ,
, ![]() ,
, ![]() ,
, ![]() .
.
Preprocessing Tools (on the Before tab):
-
You can use the standard or automatic selection tools to select a fragment for the collage.
The standard selection tools let you quickly create geometric and free-form selections. They are especially useful in order to obtain a precise selection shape.
- Selection Brush
 . With this tool, you can paint over an area to select it. The tool's size can be changed using the corresponding parameter in the Settings Panel.
 - Rectangular Selection
 . The tool lets selecting rectangular and square areas. Drag over the area you want to select with the left mouse button.
 - Elliptical Selection
 . The tool lets selecting elliptical or circular areas. Drag over the area you want to select with the left mouse button.
 - Lasso
 . The tool creates freehand selections. Drag to draw a selection line around an object. When you release the left mouse button, the contour will be closed, the final point will be connected to the start one.
Attention! When using selection tools all the changes made with other tools will be canceled. Therefore it is recommended to use the selection tools first!
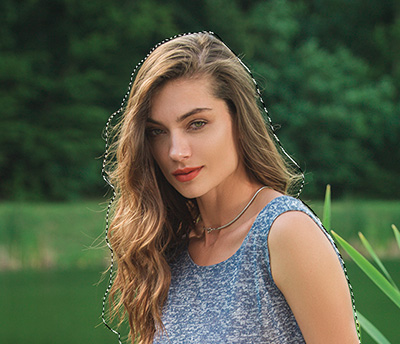
Selection with Standard ToolsHold Shift to make a square or a circle and to draw a straight line.
Use the following tools options to adjust the selection:
- New
 . When creating a new selection, the previous selection disappears.
 - Add
 . The selection area will be increased by adding new fragments.
 - Subtract
 . This mode lets removing the part of the selection.
Selection Mode defines the result of the interaction of selections:
Inverse. The option inverts the selection.
Deselect. The option clears the selection.
Apply. Press the button to exit the selection mode and place the selected fragment on the top of the background image.
- Selection Brush
- Keep Area Tool
 . Use this tool to outline the areas of the fragment that should be part of the photo collage. You can activate this tool by pressing the button K on the keyboard.
 - Drop Area Tool
 . Use this tool to outline the unnecessary parts of the fragment, the parts that should disappear. You can activate this tool by pressing the button D on the keyboard.
 - Eraser Tool
 . Use this tool to erase drawn outlines. You can activate this tool by pressing the E-key on the keyboard.
 -
Use the Transform tool
 to change the size, the position, and the rotation angle of the pasted fragment on the background image.
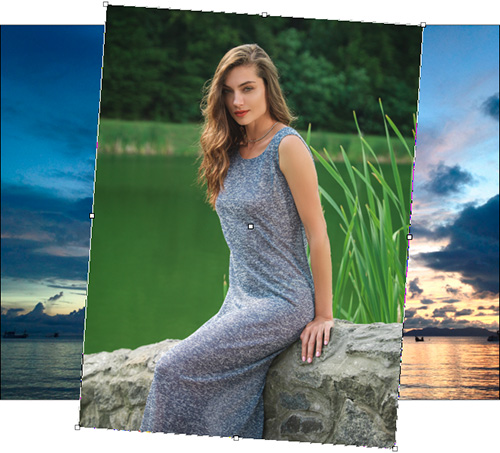
If you press the button
 (T) a frame for the inserted fragment will appear in the Image Window and the Settings Panel will show the transformation parameters.
To change the size of the object, bring the cursor to the dotted frame. The cursor will turn into a two-sided arrow
 . Keeping the left mouse button pressed, increase or reduce the size of the fragment. You can also scale the image by changing the parameters W (width) and H (height).
There is a proportion
 /
/ sign between the parameters W and H. If this option is enabled
  the image will be scaled proportionally, if it is disabled
  you can set your own parameters. When negative values are entered for W and H the image is mirrored horizontally and vertically, respectively.
To rotate an object, bring the cursor to one of the angle markers to get a rounded two-arrows pointer
 , move the pointer keeping the left mouse button pressed. You can rotate an object by setting the parameter A (Angle) to a value between -180 to 180 in the Settings Panel.
To move an object bring the cursor inside the object, the cursor will turn into a cross
 . Move the object keeping the left mouse pressed.
 Flip Horizontal
 allows you to flip the inserted fragment horizontally (interchanging the left and right sides).
Flip Vertical
 allows you to flip the inserted fragment vertically (by turning the image upside down).
The automatic selection tools allow to select a fragment for the collage by creating a rough outline.
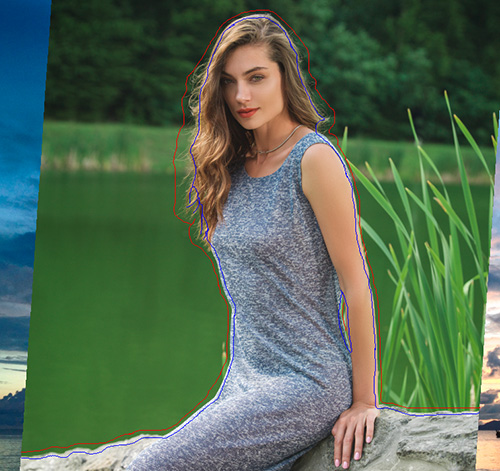
Selection with Automatic Tools
To create a straight line, draw a line while holding down Shift.
Post-Processing Tools (on the After tab, for Deluxe/Business):
Attention! The tools ![]() ,
, ![]() ,
, ![]() are only available under the Home Deluxe/Business licenses, on the After tab. Use them at the final step. If you re-run the image processing
are only available under the Home Deluxe/Business licenses, on the After tab. Use them at the final step. If you re-run the image processing  , the changes made with the post-processing tools will be lost!
The options of these tools are shown in a pop-up box which appears after right-clicking in the image.
-
Smudge
 . The tool is designed to mix colors in the image and smooth the edges of the inserted fragment.
The tool’s parameters:
Size (1-300). The maximum width of a line drawn with the tool.
Hardness (0-100). The amount of blurriness of the outer edge. The higher the value, the harder the brush edge is.
Strength (1-100). The intensity of smearing the paint in the brush stroke. The higher the value, the more color is smeared.

Before Applying the Smudge Tool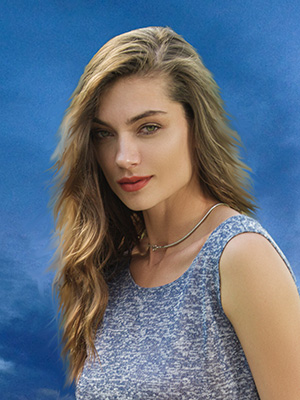
Using Smudge Tool -
Blur
 . Use this tool to reduce the sharpness of the fragment's edges.
The tool’s parameters:
Size (1-200). Blur brush size (in pixels).
Hardness (0-100). The width of the tool’s outer edge, where the image is partially blurred. The higher the value, the larger the area within the brush where blur is applied completely.
Radius (0,1-10,0). Intensity of the effect on an image. This parameter specifies the area where points are searched for blurring: at higher values the blurring radius is larger.

Before Applying the Tool
Using Blur Tool -
History Brush
 . The tool works in one of two modes: either restores the original background image (the check-box is enabled) or edits the changes made with the other post-processing tools (the check-box is disabled).
The tool’s parameters:
Size (1-1000). The maximum width of a line made by the brush.
Hardness (0-100). The blurriness of the tool's edges. The less the value the more blurry the tool's edges become. At value 100% the border between the brush’s edges and the background is very distinct; at lower values the transition between these areas is smoother.
Strength (1-100). The degree of restoration to the original state. At lower values there will be less restoration and more blending with the effect; at value 100% the original image will be restored more completely.
In the Restore drop-down list, you can choose what the tool will restore: Fragment Image, Background Image or Processing Result.

Before Applying the Tool
Using History Brush
Additional Tools (available on both tabs, for all licenses):
-
Hand
 lets you scroll the image when it does not fit within Image Window at the desired scale. To use it click on the button, bring the cursor over the image, and while keeping the left mouse button pressed move in the desired direction. The hot-key is H.
Double-clicking on the tool’s icon on the Toolbar makes the image fit the window.
-
Zoom
 lets you change the image’s scale. To zoom in left click on the image. To zoom out left click with Alt on the image. The hot-key is Z.
Double-clicking on the tool’s icon makes the image scale to 100% (actual size).
