Animated Comic of a Cat: Turn Video into Cartoon
The author of the tutorial is Robert Bates.
This tutorial was inspired by one in which a cartoon was made from a video using AKVIS Sketch.
Now that AKVIS ArtWork can remember the last settings from when it was last opened, it can be used for the same purpose. This feature is perfect for editing a video, which is composed of many frames. Without batch processing it would be an exceedingly tedious process to edit each frame individually. In this tutorial we will learn how to automate this task, and use AKVIS ArtWork to turn a video into a cartoon.
 |
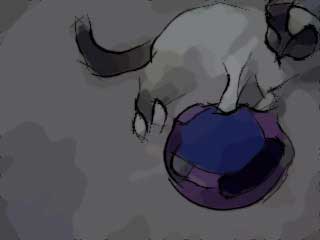 |
| Original Video Frame | Cartoon Frame |
- Step 1. Before we can edit the video in VirtualDub, we need to convert it to a format VirtualDub can use. We can use a free program, Any Video Converter, to convert the movie to an AVI file.
On Mac you can use any video editor that can separate video to frames.
- Step 2. Open the AVI file in VirtualDub by selecting File –> Open video file. You should now see your video in VirtualDub’s workspace, separated into frames.
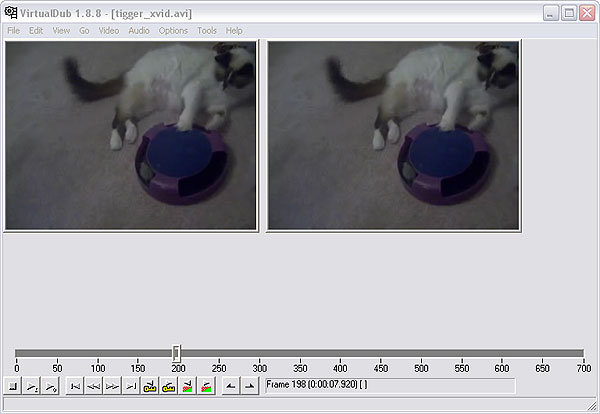
VirtualDub Workspace - Step 3. In order to work with our video in ArtWork, we’ll need to save it as individual frames. To do this, go to File –> Export –> Image sequence. A dialog window will open. Enter the filename, image format (JPEG by default), and number sequence that will be used to name your files. Next choose a directory to hold your frames and press OK. After a few moments your video will be copied into the chosen folder as individual image files. Close VirtualDub.
- Step 4. Create source ("Tigger Vid") and destination ("Tigger Vid Output") folders for the video frames. Copy the frames you saved with VirtualDub to the source folder ("Tigger Vid").
- Step 5. You’re now ready to begin editing your frames using the Batch Processing feature which lets you apply AKVIS ArtWork to a series of photos.
Note: We will use the plugin version and the batch processing mode in Photoshop.
The standalone edition also offers the batch processing feature , that's even easier to use than Photoshop's actions.
Using the plugin is helpful when you want to use several commands of image processing.Open the Actions palette in Adobe Photoshop: Windows -> Actions or Alt+F9.
Click on Create new action (5th icon) in the Actions palette. In the dialog box that appears, enter a name for the action (for example, "Cartoon").
Open the first frame of the video from the "Tigger Vid" folder, then press Begin recording (2nd icon).
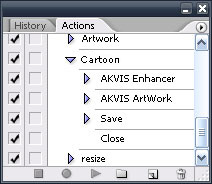
Actions Palette - Step 6. (optional) As you can see, the image is pretty muddy. This can be corrected with AKVIS Enhancer. Call the AKVIS Enhancer plug-in by selecting Filter –> AKVIS –> Enhancer. You can use the settings shown in the image below, or choose your own.
AKVIS Enhancer will remember the last settings used when it is activated again, but still it would be a good idea to save your settings as a preset. Press
 and your image will be returned to Photoshop.
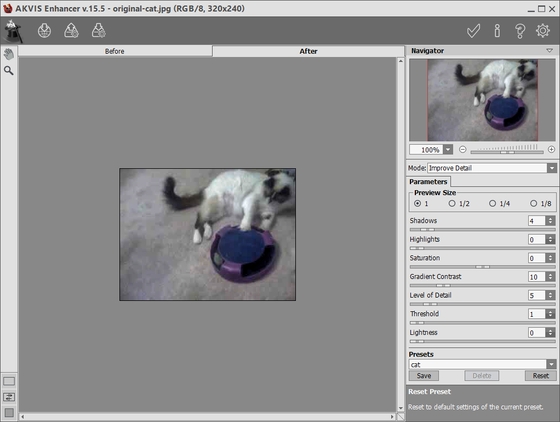
AKVIS Enhancer Workspace - Step 7. Next select the AKVIS ArtWork plug-in with Filter –> AKVIS –> Artwork. You will see the frame displayed in the plug-in’s workspace. Select the Comics style and choose the settings below or choose your own.
Press the
 to start processing and then
  to accept the result. You will now be returned to Photoshop’s workspace.
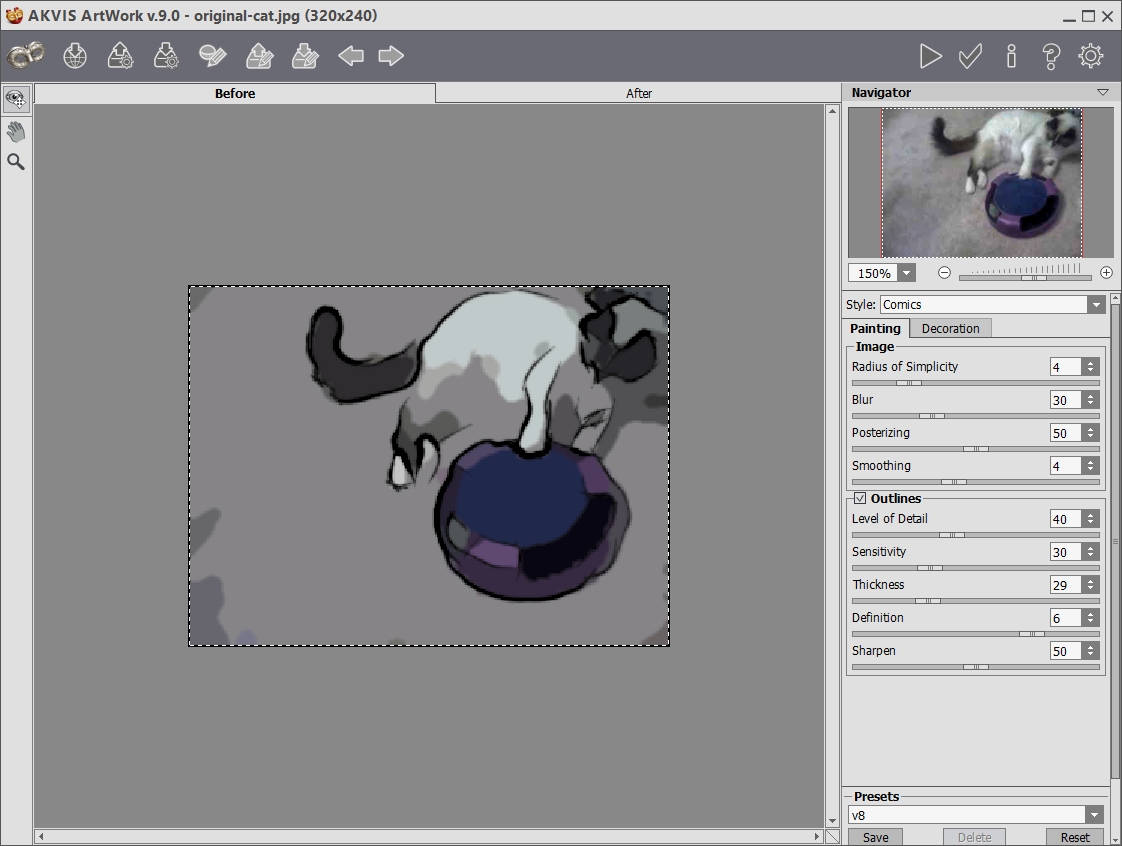
AKVIS ArtWork Workspace - Step 8. Select Save As from the File menu and save your file to the output folder ("Tigger Vid Output"). Press Stop in the Actions tab. Erase the file you have just saved in the output folder.
- Step 9. Open the batch processing dialog window by selecting File –> Automate –> Batch. Choose the settings as shown below, and press OK to begin batch processing. The process will take some time, depending on the number of frames and the speed of your computer. When the process is complete, check the output folder ("Tigger Vid Output") and you will see that it is filled with modified copies of the frames, all ready to be reassembled into a video.
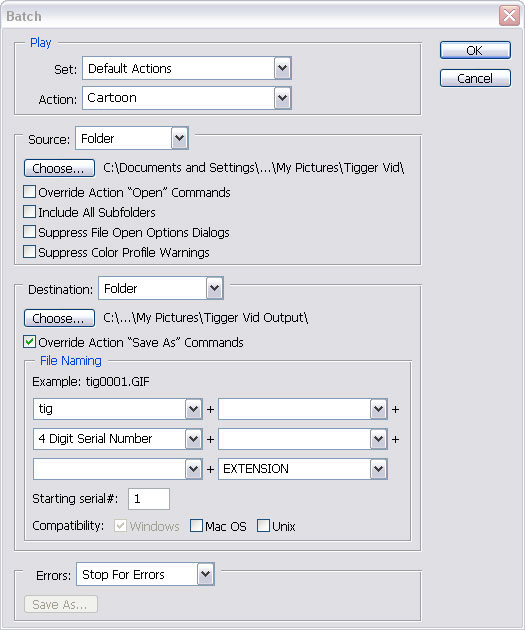
Batch Processing Dialog - Step 10. Close Photoshop and reopen VirtualDub. Select File –> Open Video File, navigate to the output folder ("Tigger Vid Output"), select the first file, and from the drop down menu next to Files of type: select Image Sequence. Press Open and VirtualDub will assemble a video from the frames in that folder. Once it is complete you can preview your movie. In this case the video moved too slowly. Go to Video –> Frame rate and select Change frame rate to (fps). The original frame rate was 25, so enter that value into the box and press OK.
- Step 11. If you want to reattach the audio from the original video select Audio –> Audio from another file, then navigate to the original video file and select it. However, since the audio for this video was not very clear, we chose a different source, some music. You can also add a dialog or other sound effects if you wish.
