How to Use The Program
AKVIS ArtWork is photo to painting software, designed to imitate different painting and drawing techniques. It can work independently as a standalone program and as a Photoshop compatible plugin.
Follow the instructions below:
- Step 1. Open an image.
- If you work with the standalone edition:
The dialog box Select File to Open appears if you double-click on the empty workspace of the program or if you click on the button
 on the Control Panel. You can also drag the required image into the workspace of the program. The Standalone edition of AKVIS ArtWork supports JPEG, WEBP, RAW, PNG, BMP, and TIFF file formats.
- If you work with the plugin:
Open an image in your photo editor by calling the command File -> Open or using the key combination Ctrl+O on Windows, ⌘+O on Mac.
Call the AKVIS ArtWork plug-in:
in AliveColors - Effects -> AKVIS -> ArtWork;
in Adobe Photoshop - Filter -> AKVIS -> ArtWork;
in Corel PaintShop Pro - Effects –> Plugins -> AKVIS –> ArtWork;
in Corel Photo-Paint - Effects -> AKVIS -> ArtWork.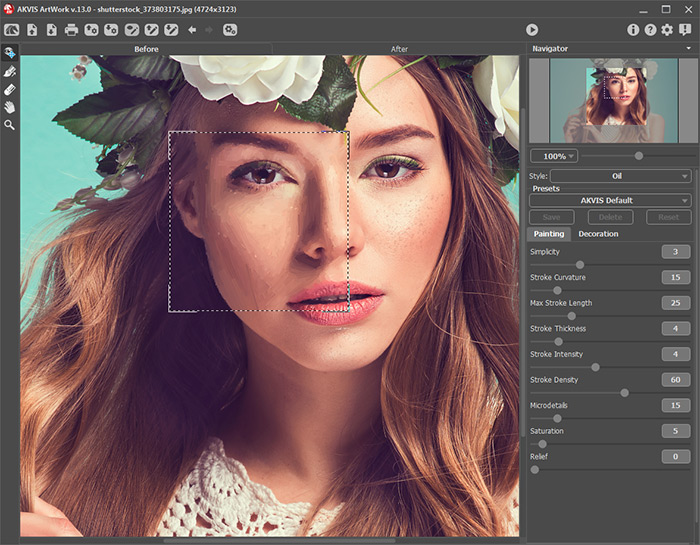
AKVIS ArtWork - Step 2. Select the painting technique in the drop-down menu Style in the Settings Panel.
There are these artistic styles to apply: Oil, Watercolor, Gouache, Comics, Pen & Ink, Linocut, Stencil, Pastel, and Pointillism.
- Step 3. Adjust the settings for the chosen painting style on the Painting tab.
The result will be immediately shown in the quick preview window which is visible in the Before tab if the button
 is pressed. It is a square frame outlined with the "marching ants" that immediately displays changes made with the image.
Note: The quick preview window is not available in Linocut effect, since the algorithm should process the entire image to produce a good result.
To drag the preview area, bring the cursor inside the square, press the left mouse button and, keeping it pressed, drag the frame to the required position. One more way to move the preview square is to double-click with the left mouse button on the required point. Every time the preview window is moved, the program processes the area within automatically.
To compare the result of automatic conversion in the quick preview window with the original picture, click on any point of the image keeping the left-button or the right-button of the mouse pressed.
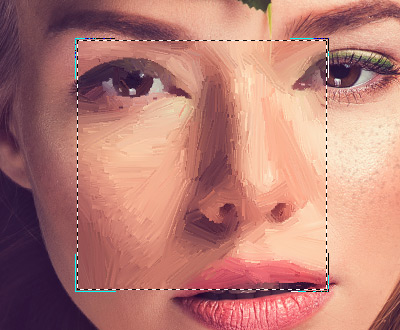
Quick PreviewThe preview window size can be adjusted in the Preferences
 .
.
- Step 4. Press the button
 to convert the entire photo into a painting.
You can observe the processing in real-time. It's possible to stop photo-to-painting rendering and save the semi-processed painting as a result. To interrupt the process, click on the button Cancel right to the progress bar.
- Step 5. In the Oil and Pastel styles, for the Deluxe/Business licenses, there is an additional smart tool - the Stroke Direction tool
 that gives you full control over the strokes and allows you to change their direction.
Use the brush to define the guiding lines, and the program will convert the image into a painting directing the strokes to follow the drawn guiding lines. With this technique, you can achieve truly realistic paintings with human hair, patterns, and textures going in the right direction.
To edit the guiding lines use the tools
 and
and  and the buttons
  and
and  (remove/restore the last drawn line).
- Stroke Direction
 . Draw with the tool over the image to define the "guiding lines", along which the strokes will be drawn. The changes will be shown in the quick preview window. To process the entire image, click on the button
  .
.
- Eraser
 . Use this tool to erase the lines. The size of the tool can be adjusted by right clicking on the image.
Hint: Guiding lines can be saved to a file with the .direction extension (with the
 button), to use them for further processing in case of work interruption. Loaded guiding lines (with the
  button) adapt automatically to the size of the image.
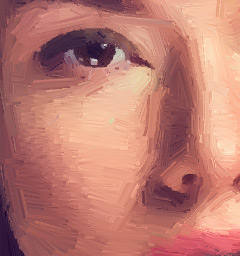
Automatic Strokes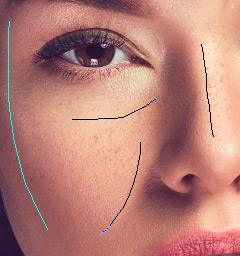
Guiding Lines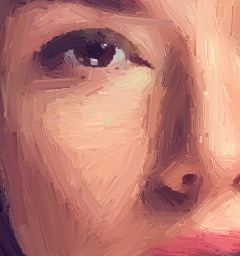
Changed Direction - Stroke Direction
- Step 6. To make your work of art even more realistic and truly impressive, you can use the Decoration options: Canvas, Frame, and Text.
Hint: The order of the application of the decoration effects depends on the position of the tabs. Drag the tabs to change the order.
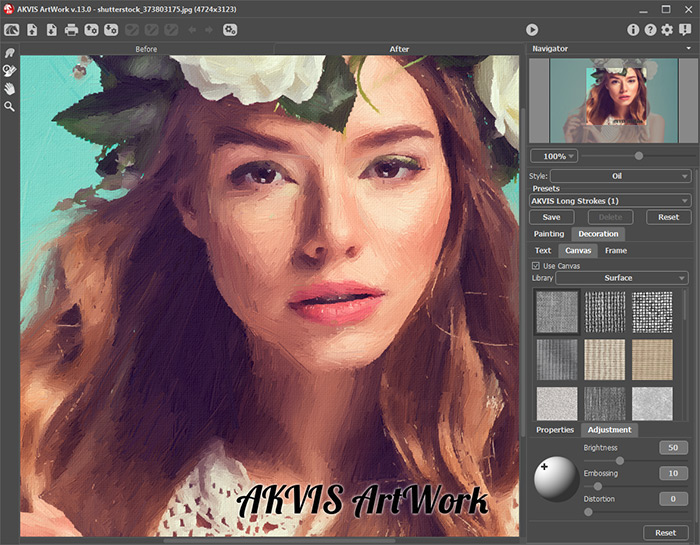
Oil Painting on Canvas with Signature - Step 7. It is possible to save the settings you like as a preset and use them in the future. A preset is shared by all tabs of settings. Learn more about the ArtWork Presets.
- Step 8. You can edit the result with the Post-Processing Tools which are available in the After tab, for the Home Deluxe/Business licenses:
- Smudge
 (in Oil, Watercolor, Gouache, and Pastel styles);
- Blur
 (in Watercolor and Gouache styles);
- Color Brush
 (in Linocut, Stencil, and Pen & Ink styles);
- History Brush
 (in all styles).
Attention! If you switch to the Before tab and run the processing
 again, the changes made with the post-processing tools will be lost!
- Step 9. In the standalone version, you can also print your picture with
 .
.
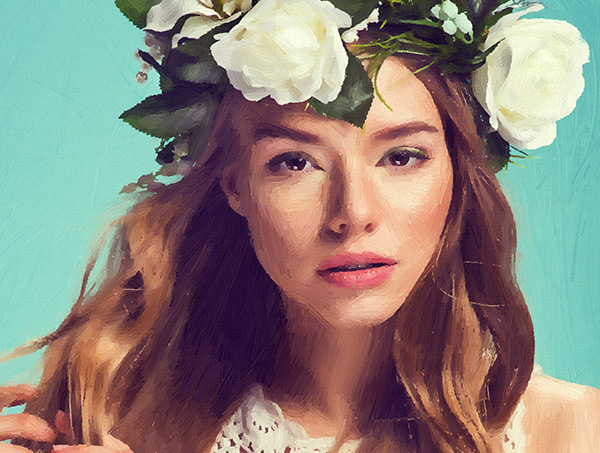
Result - Step 10. Save the processed image.
- If you work with the standalone edition:
Click on the button
 to open the Save as dialog box. Enter a name for the file, choose the format (TIFF, BMP, JPEG, WEBP or PNG) and indicate the target folder.
- If you work with the plugin:
Press the button
 to apply the result and close the plugin window. The AKVIS ArtWork plugin will close and the picture will appear in the workspace of the photo editor.
Call the Save As dialog box using the command File -> Save As, enter a name for the file, choose the format and indicate the target folder.
