Classic Mode
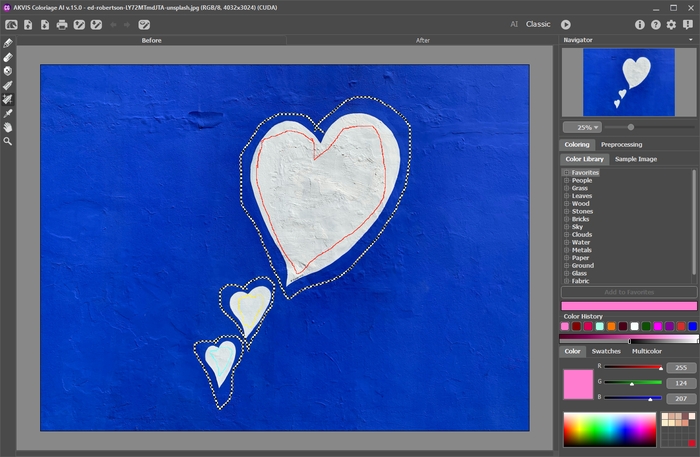
In Classic mode, you can colorize the image using colored strokes. Schematically mark areas with strokes of the desired color. The program will recognize the object's borders and apply the selected colors to the original picture.
In the Coloring tab, select colors for the object you want to colorize. There are several ways to select colors: in the Color Library, in the Color, Swatches, and Multicolor palettes, in the Select Color standard dialog, or from the Sample Image.
In the Before tab, mark areas in the original image using the Pencil  and other tools that help you to indicate colors for objects. If you do not specify a color for an object, then it will be colorized in the color of the object(s) nearest to it.
You can use the protecting Keep Color Pencil  to mark objects and areas to remain unchanged. These protecting stokes are shown as lines with checkerboard fill.
A selection made in the graphics editor will be transferred to the plug-in and displayed as the outline made with  .
.

The Eraser tool  helps to remove or edit the drawn strokes.
Use the Tube  and Magic Tube
  to quickly change colors of the drawn strokes.
It is recommended to save the color strokes into a file (*.strokes) by clicking  . Later, you can load the saved stroke map using
  .
In case of some unexpected event (such as a power loss, etc.) the program automatically saves the strokes into the coloriage-autosave.strokes file each time when you run processing
  .
.
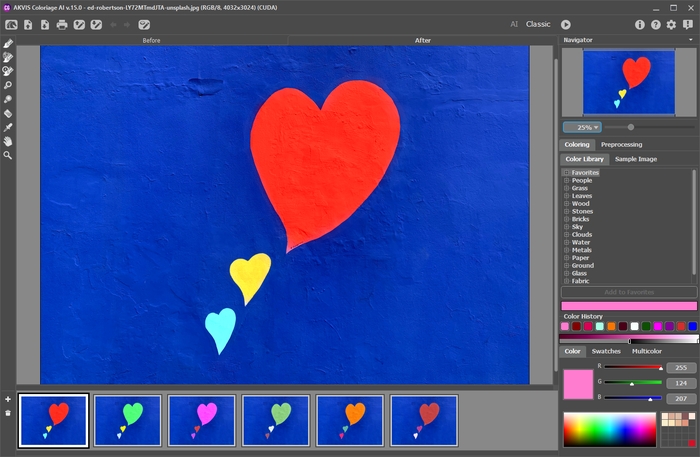
Press the Run button  to start the coloring process. The colorized image will be shown in the After tab.
If you want to edit the colorization result (remove some strokes, add new strokes, change the color of the objects), switch to the Before tab and make the necessary corrections. Click  again to re-start image processing.

Colorization Result
In the After tab, you can edit the colorized image using the post-processing tools:  ,
,  ,
,  ,
,  ,
,  ,
,  .
.
