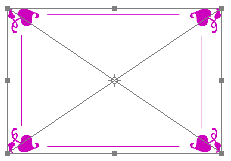
Using Custom Shapes in Photoshop
Adobe Photoshop is a bitmap editor but it has some vector graphics tools too. For example, the Custom Shape tool.
What is the difference between bitmap images and vector graphics?
Bitmap images consist of a matrix of pixels each having one definite color. If you resize such images you will notice that they lose quality because some pixels have to be thrown away. Vector graphics are completely described using mathematical definitions. The advantage of vector drawings is that they can usually be scaled without any loss in quality. The shapes offered by Photoshop are exactly like that.
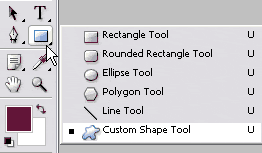
The Photoshop vector tools are located in one section of the Toolbar. There are some simple forms like Rectangular Tool, Line Tool, etc.
In this tip we will look at the Custom Shape Tool and draw a frame using the shape presets.
Step 1. Activate the Custom Shape Tool.
Step 2. The Options palette will show the settings for the tool. When you click the triangle near the word Shape, you see a drop-down palette with available shapes. We have chosen a shape from the "Ornaments" shape presets.
- Tip 1. You can download free shape presets on the web (they should have the ending *.csh).
To add the presets to Photoshop place them into the folder Custom Shapes in Photoshop Presets folder, for example:
C:\Program Files\Adobe\Photoshop\Presets\Custom Shapes\. - Tip 2. To load other shape presets, press the triangle
 in the right upper corner of the Custom Shape window (see below). You will see a drop-down list where you can choose the presets you like. We did so to choose the "Ornaments" presets.
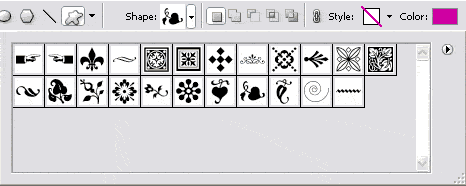
The rectangle near the word Color shows the color that will fill the shape when you draw it. Note that it will be filled only if you use the mode "Shape layers" or "Fill pixels". It is defined in the Options palette, too. Here we have selected the "Shape layers" mode ![]() .
.
Step 3. We will create a frame that can be used for a letter of congratulation, or a notice or a visiting card. Actually there are ready to use frame presets in the Custom Shape presets too, but we will create one of our. We have chosen a decoration and now draw the shape in the left lower corner of the sheet. A new layer appears in the Layers palette:
- Tip. To draw a shape with fixed height/width ratio, hold the SHIFT-key.
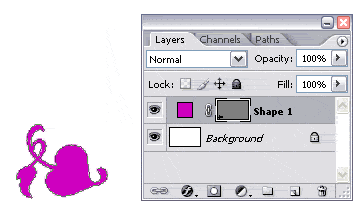
Step 4. We want to put this flower decoration into 4 corners of the card. We copy the layer with the decoration by right-clicking on the Shape 1 layer and selecting the Duplicate Layer command from the drop-down menu. Or you can just drag the Shape 1 layer to the icon ![]() to the same effect.
to the same effect.
The card will look better if all buds of this flower decoration will point to the center. It's easy to flip or rotate the copied decoration.
Activate the copy of the Shape 1 layer and call the command Edit => Transform Path => Flip Horizontal. The decoration will be mirrored horizontally. Now use the Move tool  from the Toolbar to drag the decoration to the right lower corner. You can also use Shift + the right arrow key on the keyboard to move the ornament to the right smoothly.
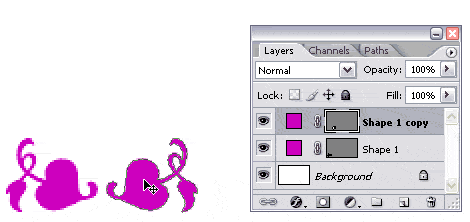
Step 5. Having put the second decoration to the right lower corner, we activate the Line Tool to draw a line for the frame. The Line Tool is located under the same icon as the Custom Shape Tool. You can activate the Line Tool right in the Options palette. See the image below:
We draw a line between the two decorations. To draw a straight line hold the SHIFT key while drawing:

Step 6. What we need now is to copy this part to form the upper part of our frame. For this purpose we put the cursor to the Shape 1 copy layer, right-click it and select the command Select Similar Layers from the drop-down menu. All vector layers will be selected.
Then right-click the active layers once again select the command Duplicate Layer from the drop-down menu.
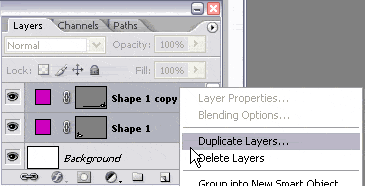
Step 7. The duplicated layers are active and we call the command Edit => Transform => Flip Vertical to mirror the copied decoration vertically. Now use the Move tool  from the Toolbar to drag the decoration upwards. You can also use Shift + the Up arrow key on the keyboard to this effect (only when the Move tool is active in the Toolbar).
Step 8. In the next step we draw vertical lines as described in Step 5 and get the following result.
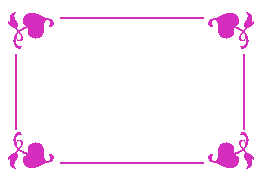
Step 9. The frame is ready, but it is not easy-to-use, as lines and decorations are on different layers. To be able to edit the frame as a whole, to move and scale it we should group the layers.
Put the cursor to one of the shape layers in the Layers palette, for example, on Shape 1 layer. Right-click on the layer and choose the command Select Similar Layers. All layers with shapes will be activated.
Now right-click the layer again and select the command Group into New Smart Object.
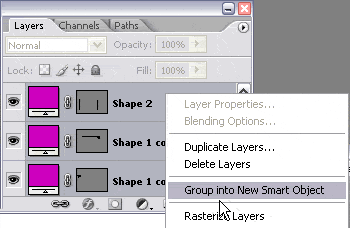
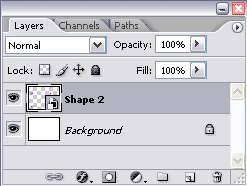
Step 10. As a result all layers with shapes form one "smart object". In the Layers palette you see that they reduce to one layer (layer Shape2 below).
Step 11. Now you can easily scale the frame with the command Edit => Free Transform. You will see markers along the frame's borders that you can drag with the left mouse button to change the frame's dimensions. To scale the frame keeping the width/height ratio, hold the SHIFT key while dragging. When ready, press Enter on the keyboard to apply the changes.
