Image Optimization for Web
Optimization of graphics for the web is an art of creating attractive images with the smallest file size possible. Internet surfers will not wait till your wonderful pictures load if it takes too much time. So adjusting your pictures for the web is a vital task. Adobe Photoshop offers you an easy way to find the balance between the quality and size your pictures. In this tip we will look into its Save for Web command.
Pictures for the web are usually saved as GIF or JPEG. The JPEG format is best for optimizing continuous-tone images, such as images with gradients or glows. The GIF compression gives the best fit for optimizing flat or simple images with one-color areas, such as logos, illustrations, cartoons, line art.
In the following example we will compress a simple picture with few colors and no gradients, so GIF file format will suit us best.
Step 1. We open a logo in Adobe Photoshop. It's a psd file, 2,73 Mb. It definitely needs optimizing if prepared for the web.
Call the command File => Save for Web and you will see the following dialog box with the logo in it.
Hint: You can adjust the scale of the picture in the dialog box using the Zoom tool in the left panel. Click on the picture to zoom in or ALT+click to zoom out. You can also set the percentage in the field in the left lower corner.
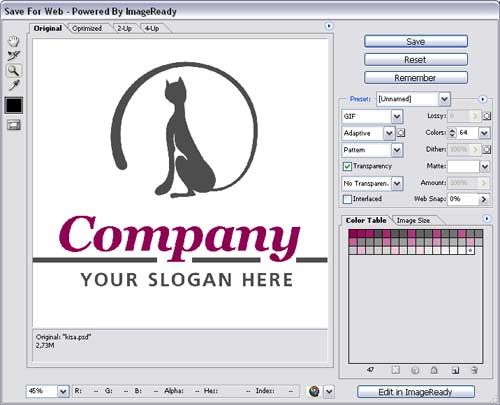
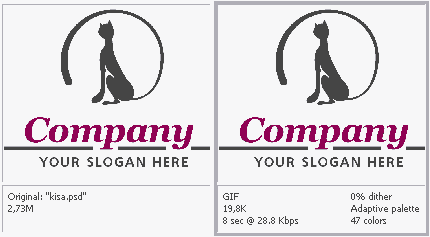
Step 2. In the upper part of the window there are tabs: Original, Optimized, 2-Up, 4-Up. We choose the 4-Up tab. It will show the original picture and 3 optimized versions with different settings. So you already have a choice and can pick up the image that looks better. On the photo below we showed only two pictures - the original and one of the optimized pics. The optimized picture has a gray frame around it. This means that it is activated and the right panel shows the settings for it. Have a look at the info under the right picture, it says the image size in KB, the load time at certain speed, the number of colors on the picture, etc.
Step 3. We see that the load time is too long for such a simple image and there is room for improvement.
Below are the settings for the right (optimized) image. It is in the GIF format but you can choose another format from the drop-out menu. We can also notice that the data of the right image (above) show 47 colors while the settings below - 64 colors. It means that the picture contains less colors than 64, and it shows its maximum. The Color Table displays all colors present on the picture.
What can we do to reduce the size of an image in GIF format? (1) Reduce the number of colors, (2) Reduce the amount of dithering, (3) Add lossy compression, (4) Change color reduction algorithm.
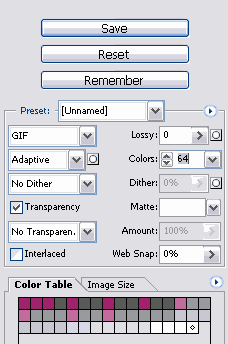
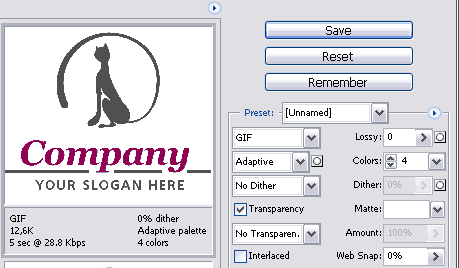
Step 4. You can adjust the parameters experimentally. That's especially true for the color reduction algorithm and lossy compression. They are helpful in many cases. It didn't help much in this case. We only reduced the number of colors. It turned out that 4 colors were enough for this image without much loss in quality.
Thus, we were able to reduce the size of the picture from 2,73 Mb to 19,8 Kb, and finally to 12,6.
Step 5. Save the optimized picture by pressing the button Save. In the next dialog box you will be offered to enter the file name and select the target folder.