Adobe Bridge Tips
Adobe Bridge is an efficient standalone file manager coming bundled with Adobe Photoshop (since CS2) and replacing the File Browser of the previous versions.
The following tips will help you to manipulate metadata of your files when working in Adobe Bridge.
Tip 1. Edit Metadata
If you have a large photo collection you may find it difficult to search your files. Thanks to the metadata editor incorporated into Adobe Bridge you have a tool to personalize your files.
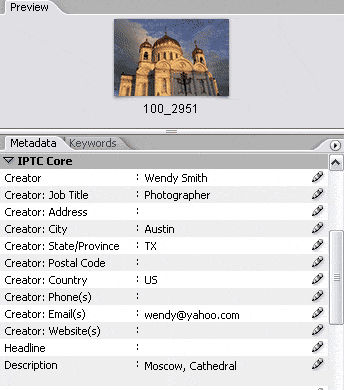
When you click a photo in the Adobe Bridge window, the box in the left lower corner displays the metadata for the file. It shows File properties, Camera data (if you shoot with a digital camera) and IPTC Core. Only the last one is available for editing (you can see a pen near the fields). You can enter your personal data and state the copyright, add keywords and comments. If you submit such a photo to a magazine, for instance, they will not lose your contacts, as the file contains all necessary data. On the picture below we filled in some of the fields.

Next time you search for this file you can use the information you once typed in.
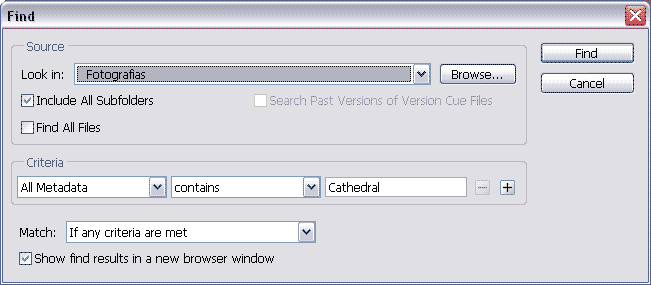
Call the command File => Find or just press the hot key Ctrl+F to open the Find dialog box.
Specify the folder to search in. Set the search parameters in the Criteria field.
In the dialog box below we search All metadata that contain the word Cathedral. As a result we find the photo shown above.

Tip 2. Preferences for Metadata
Metadata show a lot of information, but for your everyday work you may not need all these bulky data. You can adjust the metadata to display only the fields that are important to you.
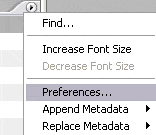
Click the arrow
 in the right upper corner of the metadata window.
 Select the item Preferences in the menu.

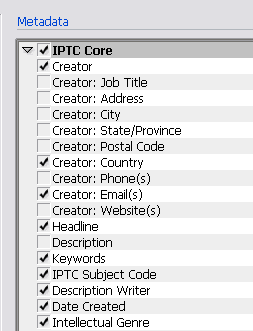
- We see a list of the fields available. Left-click the checkbox to activate or deactivate the field. the deactivated fields will be invisible in the Metadata window when showing information for the photos.

- We see a list of the fields available. Left-click the checkbox to activate or deactivate the field. the deactivated fields will be invisible in the Metadata window when showing information for the photos.