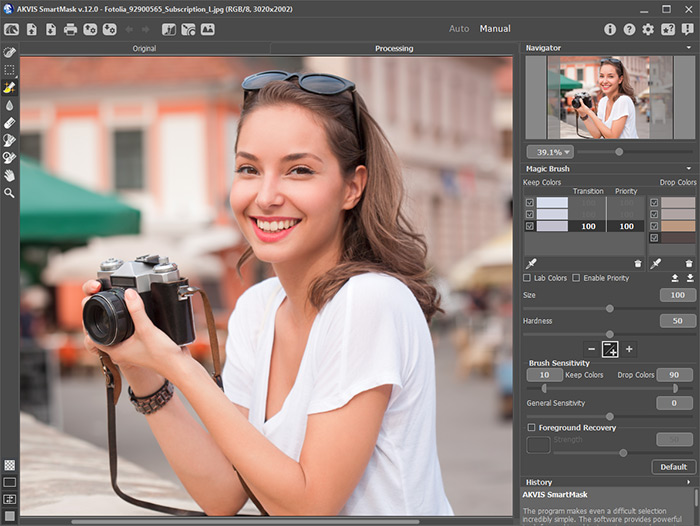
How to Use The Program
AKVIS SmartMask AI is an efficient AI-powered object selection tool that saves you time and is fun to use. The software can be used as a standalone program as well as a plugin to a photo editor.
Follow these instructions to cut out an object using AKVIS SmartMask AI:
-
Step 1. Open an image.
- If you work with the standalone edition:
The Select File to Open dialog box appears if you double-click in the empty workspace of the program or if you click
 on the Control Panel. You can also drag the required image into the workspace of the program.
The standalone version of AKVIS SmartMask AI supports BMP, JPEG, PNG, TIFF, WEBP, TGA, RAW, and AKVIS file formats.
- If you work with the plugin:
Open an image in your photo editor by calling the command File -> Open or using the key combination Ctrl+O.
Then call the AKVIS SmartMask AI plugin in the Filter/Effects menu of the photo editor:
in AliveColors: Effects -> AKVIS -> SmartMask AI;
in Adobe Photoshop: Filter –> AKVIS –> SmartMask AI;
in Corel PaintShop Pro: Effects –> Plugins -> AKVIS –> SmartMask AI;
in Corel Photo-Paint: Effects –> AKVIS –> SmartMask AI.Attention! Before you call the plugin you must copy the image to a separate layer. Or just unlock the layer.

AKVIS SmartMask AI -
Step 2. Process the original image using the AI-based selection tools, the Quick Selection tool, the standard selection tools, or the Magic Brush tool.
You can often get professional results simply by using the AI-powered tools.
- Step 3. To remove a monochromatic background, use the Chroma Key mode (only for Home Deluxe and Business licenses).
- Step 4. Using the Refine Edges mode (only for Home Deluxe and Business licenses) you can quickly adjust edges of selections or cutout objects.
- Step 5. To add the cut-out object to a custom background, activate the Custom Background mode (available only in the standalone version).
-
Step 6. You can save your project into an .akvis file by clicking on
 . Load it with
  .
.
The AKVIS file contains the original image, the image in the current state, the tools’ parameters, the color groups, and the checkpoints (for the Deluxe/Business licenses) if they were created.
-
Step 7. In the standalone version, you can also print your picture with
 .
.
-
Step 8. Save the processed image.
- If you work with the standalone edition:
Click
 to open the Save as dialog box. Enter a name for the file, choose the format (TIFF, BMP, JPEG, WEBP, PNG, TGA, or AKVIS) and indicate the target folder.
Note: If you activate the Color Background option in the Mask View Modes please keep in mind that the result will be saved on the selected color background, just as you see it in the Image Window.
Hint: To save the selected object on a transparent background please choose the corresponding mask view option and use the PNG format when saving the image (or other formats that support transparency).
- If you work with the plugin:
Press the button
 to apply the result and close the plugin window. The AKVIS SmartMask AI plugin will close and the fragment will appear in the workspace of the photo editor.
Call the Save As dialog box using the command File -> Save As, enter a name for the file, choose the format and indicate the target folder.

Result
