Portrait out of a Newspaper Clipping
This tutorial for AKVIS Sketch was created by Gordon Sisson. Gordon uses the Sketch plugin in this tutorial, but you can take the standalone edition and use the same parameters to achieve this result.
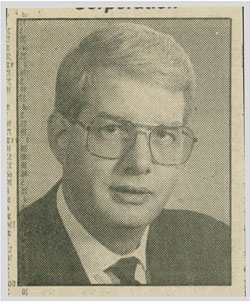
The author writes: "AKVIS Sketch offers a unique opportunity to create delightfully unusual graphic effects from ordinary photographs and drawings. I wanted to show a use of the plugin that would be a little different. I had the transformation of a newspaper clipping from which I created a color portrait of an old friend."
 |
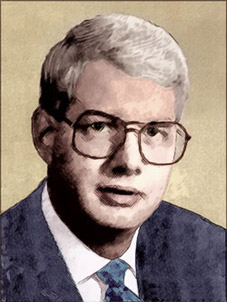 |
| Original Image | Result |
Gordon describes the process:
Here is a brief description of the original transformation before I get to the color picture from which I did the AKVIS Sketch magic.
Preprocessing:
- Step 1. Scanned the photo at 2400 dpi with the descreening filter set for newspaper – 85 dpi. Then applied the Kodak Digital GEM plugin for noise and grain suppression (AKVIS Noise Buster would have been better but it was not yet invented).
- Step 2. Then I enlarged our photo to almost four inches wide and reduced the resolution to 400 dpi.
- Step 3. Applied a little bit of focus with Acclaim Software’s Focus Magic plugin (or you can use AKVIS Refocus), a little bit of surface blur and increased contrast and I had a nice black and white portrait.
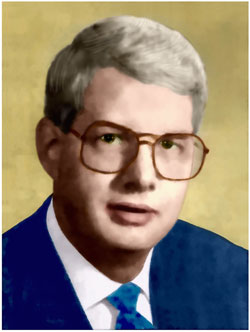
- Step 4. Much later, colorized the image with the AKVIS Coloriage plugin — this picture was the result:
 |
| Click the image to open its larger copy in a new window |
Now I will see what I can do with Sketch:
-
Step 1. Call AKVIS Sketch and consider the controls offered, the detailed explanations are very helpful. I will first create a charcoal sketch.
Choose an Angle that suits the graphic elements of the picture. It is best to go with any natural lines such as hair. For this picture, 45 degrees was ideal.
Adjust the stroke’s size, intensity and hatching based on your own intuition.
Sketch also provides a sharpen feature which is so important for this type of illustration.
For the charcoal sketch I am seeking, I set the Charcoal slider at 4, Stroke Thickness at 5, Length at 6 & 10, Midtones Intensity at 8, and Midtones Hatching at 100. Note your settings in case you want to redo.
-
Step 2. Press the arrow Run button
 and you will see the result in the AKVIS Sketch window. If you like it, press the Apply button
  and you will be back in your graphics application. Save your work immediately.
If you want to do something differently, start again and redo your settings.
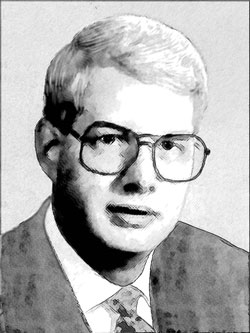
Here is the resulting charcoal sketch. A classy rendition of a very ordinary photograph that started with a newspaper clipping.
 |
| Click the image to open its larger copy in a new window |
Now back to the color photograph to ask AKVIS for a color sketch:
-
Step 1. Call AKVIS Sketch and consider the controls offered and their explanations.
For the color sketch we moved the Charcoal slider up to 5 and set Coloration at 100. Set Stroke Thickness at 3, Length at 6 & 10, Midtones Hatching.
Note your settings in case you want different results and need to rerun the procedure to make adjustments.
-
Step 2. Press the Run button
 and you will see the result in the Sketch window. If you like it, apply the result
  and you will be back in your graphics application. Save your work immediately.
Here is what you now see in the AKVIS Sketch window. This is quite a nice result, but not enough of the sketch look for this particular art requirement.
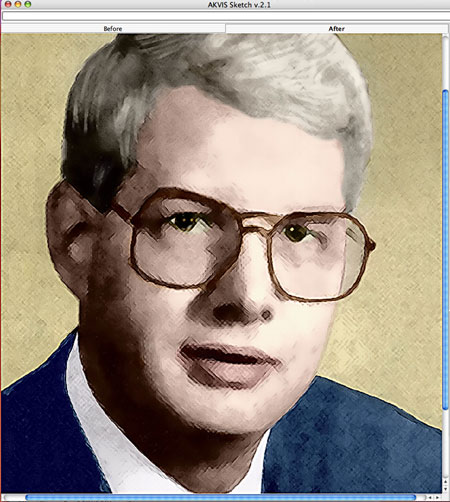
For more of a sketch look, let’s try another AKVIS plugin — AKVIS Noise Buster.
Using Noise Buster:
-
Step 1. Call AKVIS Noise Buster plugin and adjust the settings.
Sharpen Edges is the Noise Buster setting we want for this task. We set Fade at 12%, Luminance Noise at 4 and Color Noise at 6. We left the Smooth Levels = 0.
-
Step 2. Run the processing with
 and you will see the result in the AKVIS window. Apply the result with
  to return to your graphics application. Save yourwork immediately.
To accentuate (or exaggerate) the sketch look, we repeated the application of the Noise Buster magic.
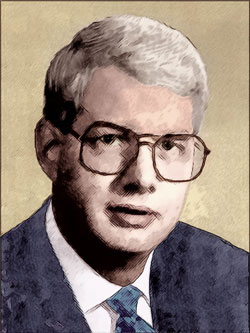
Here is the finished sketch, a great victory for AKVIS Sketch plugin with a little help from AKVIS Noise Buster:
 |
| Click the image to open its larger copy in a new window |
