Toolbar
The Toolbar in AKVIS LightShop contains the light effect tools and the additional tools. Their options are shown in the Tool Options panel and in a pop-up box which appears after right-clicking in the image.
Light Effect Tools:
-
Transform tool
 lets you transform and move the light effect.

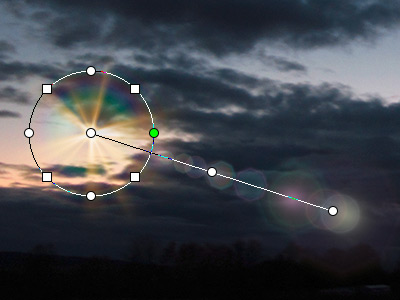
Effect TransformationAdjust the effect area with the markers that appear over the image:
- The center of circle determines the position of the light source. Place the cursor over the circle line, it will look like a double arrow
 , and drag with the left mouse button. All elements of the effect will be resized.
- To move the light source, place the cursor inside the circle, it will turn into crossed arrows
 , and drag with the left mouse button.
- Use dots over the circle to stretch or compress all elements of the effect.
- To rotate the effect, place the cursor over a square marker, it will turn into a rounded double-sided arrow
 , and move with the left mouse button.
- The straight line defines the direction of appearing halos and glares and moving the elements. Dragging the line
 you can move the effect as a whole.
- The end point of the straight line lets you rotate the line around the light source and change its length.
You can reset the changes and restore the markers to their initial states using the commands in the pop-up menu that appears when right-clicking in the image: Reset Transform, Reset Scale, Reset Position, Reset Aspect, Reset Angle. Also, you can use the Reset Transform button in the Effect Parameters.
-
Sparkle Brush
 lets you add multicolor particles to the image. Read more about this tool.

Starry Sky -
Eraser
 helps to remove the particles drawn with the Sparkle Brush tool.
-
Exclusion Tool
 lets you select the areas that should be excluded from the effect. The tool protects the selected areas keeping their initial state. It helps to remove or reduce the light effect.
Attention! This tool is only available for the Home Deluxe and Business licenses, in Advanced mode.
You can show/hide the protective areas with the button
 in the Control Panel. You can also choose how these areas will look (when visible) using the options:
Filled with Color. The selections are filled with a color, by default red. To change the color, double-click on the plate and use the Select Color dialog.
Chess Field. The selected areas are filled with a grid of alternating black and white squares.
Opacity (10-90). The parameter adjusts the opacity of the selection.

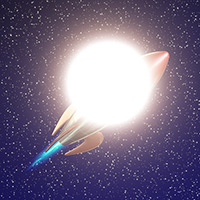
Light Effect
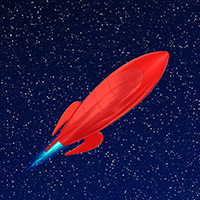
Excluded Area
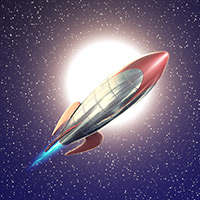
Result - Eraser
 lets you edit the excluded area (protective mask).
You can adjust these general options available for all tools:
Brush Size affects the tool's diameter.
Hardness defines the blurriness of the tool's edges. The less the value the more blurry the tool's edges become.
Strength adjusts the intensity of the effect of the tool.
Spacing changes the distribution of the elements which create the line of the brush.
To draw a straight line with the tools use the Shift-key.
Additional Tools:
-
Hand tool
 lets you scroll the image when it does not fit within Image Window at the desired scale. To use it click on the button, bring the cursor over the image, and while keeping the left mouse button pressed move in the desired direction.
Double-clicking on the tool's icon
 on the Toolbar makes the image fit the Image Window.
-
Zoom tool
 changes the image's scale. To zoom in left click on the image. To zoom out left click with Alt on the image. Press Z to quickly access the tool.
Double-clicking on the tool's icon
 makes the image scale to 100% (actual size).
Also, in the Toolbar, in Express mode, there is the button ![]() /
/ ![]() that lets you show/hide the Effects panel. In Advanced mode you can drag and minimize all panels with the mouse.
that lets you show/hide the Effects panel. In Advanced mode you can drag and minimize all panels with the mouse.
