Light Effects
AKVIS LightShop lets you create amazing light effects.
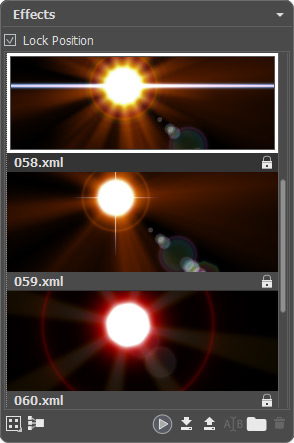
The Effects panel offers a number of ready-to-use light effects (presets) that can be applied in their initial version or can be modified. First you can train on available light effects and then create your exclusive ones.

Effects Panel
You can use these buttons at the bottom of the Effects panel:
To customize the effects view in the panel, click on ![]() and choose between the options (small or large icons).
and choose between the options (small or large icons).
To collapse all groups use this button ![]() .
.
To apply the chosen effect to an image, double click on it or use the icon  at the bottom part of the panel. To apply all effects to the same position and with the same size, defined with the Transform tool
 ![]() , activate the Lock Position check-box in the top part of the panel.
, activate the Lock Position check-box in the top part of the panel.
To save a new effect, click on ![]() and specify the group and the name.
and specify the group and the name.
To import an effect to the program, click on ![]() and choose an xml file.
and choose an xml file.
To create a new group, click on ![]() .
.
To rename an effect or a group, click on ![]() and enter a new name.
and enter a new name.
To remove the chosen effect/group, click on ![]() or drag the effect to this icon. You can also use the Delete-key.
or drag the effect to this icon. You can also use the Delete-key.
Note: You cannot overwrite, remove, or rename the effects marked with  - these are the build-in AKVIS light effects.
All commands are also available by right-clicking within the panel.
Read more how to use the Effects panel.
Have a look at the ready-to-use AKVIS light effects available in the program:
                                                                                                                                                     |
