How It Works
AKVIS LightShop can be used as a standalone program and as a plugin to a photo editor.
In order to add a light effect to an image, follow the instructions:
- Step 1. Load an image into the software.
- If you work with the standalone version:
The dialog box Select File to Open appears if you double-click on the empty workspace of the program or if you click on
 on the Control Panel. The program supports JPEG, PNG, BMP, WEBP, RAW, and TIFF file formats.
- If you work with the plugin:
Open an image in your photo editor by calling the command File -> Open or using the key combination Ctrl+O on Windows, ⌘+O on Mac.
Then call the AKVIS LightShop plugin in the Filter/Effects menu of the photo editor:
in AliveColors: Effects -> AKVIS -> LightShop;
in Adobe Photoshop: Filter -> AKVIS -> LightShop;
in Corel PaintShop Pro: Effects -> Plugins -> AKVIS -> LightShop;
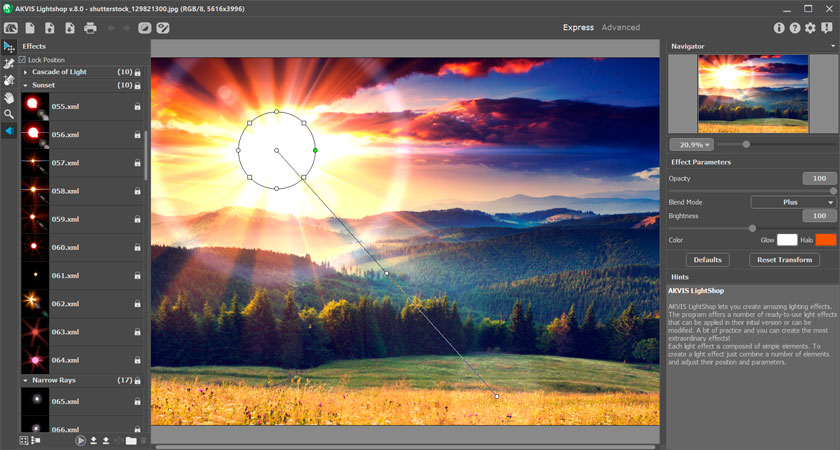
in Corel Photo-Paint: Effects -> AKVIS -> LightShop. - Step 2. The first time the program starts it will be in Express mode, with a simplified interface and a minimal set of tools designed to quickly achieve a satisfactory result.

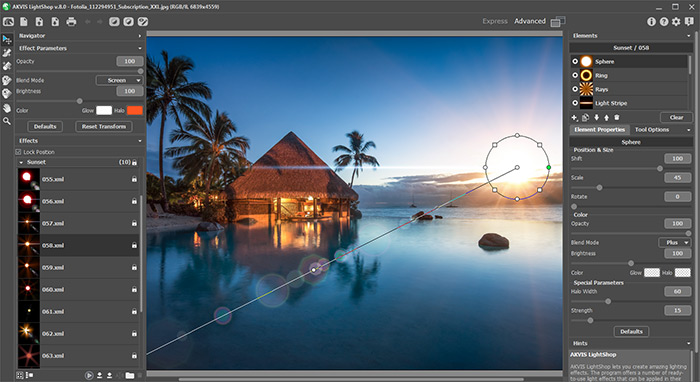
AKVIS LightShop Workspace (Express)Experienced users can work in the advanced editing mode. Switch to this mode by clicking Advanced in the Control Panel: the interface's appearance will change, providing access to the full functionality of the program.

AKVIS LightShop Workspace (Advanced) - Step 3. In the Effects panel, you can choose one of the ready-to-use light effects or create your own effect.
- Step 4. You can add multicolor particles on the image using the Sparkle Brush
 .
.
- Step 5. In Advanced mode, it's possible to remove or reduce the light and star effects on certain parts of the image using the Exclusion Tool
 . It is only available for the Home Deluxe and Business licenses.
- Step 6. In the standalone version, you can also print your result using
 .
.
- Step 7. Save the result:
- If you work with the standalone program:
Click on the button
 to open the Save as dialog box. Enter a name for the file, choose the format (TIFF, BMP, JPEG, WEBP, or PNG) and indicate the target folder.
- If you work with the plugin:
Apply the result by pressing
 . The AKVIS LightShop plugin will close and the image will appear in the workspace of the photo editor.
Call the Save As dialog box using the command File -> Save As, enter a name for the file, choose the format and indicate the target folder.

Light EffectNote: To get a light effect on a transparent background, hide the background image
 , then apply/save the result. In the standalone version use the PNG format.
