New Life of an Old Photo
Our users continue to send us their works. This time Olga shares her experience of how to use AKVIS plug-ins to restore an old photo. Olga worked with the AKVIS MultiBrush, AKVIS Retoucher, and AKVIS Coloriage plug-ins and the photo editor Adobe Photoshop.
Note: This tutorial was created in the old version of Retoucher. Learn here how to use the new version with all its features! Though it processes images in a similar way, new Retoucher offers selection and retouch tools and advanced features.
Olga writes:
In this lesson I would like to show you an example of how to change an old photo by fixing and colorizing it with the AKVIS Retoucher, AKVIS MultiBrush, and AKVIS Coloriage plug-ins, and the graphics editor Adobe Photoshop.
 |
 |
 |
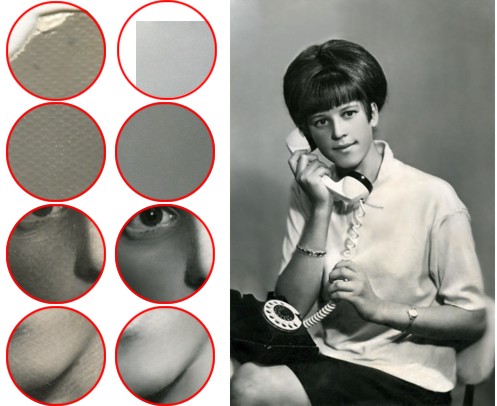
For this example I have used an old black-and-white photo printed on textured paper. It has suffered a lot of damage. It was missing one corner and the other corners were crumpled. It also had fine scratches and cuts.
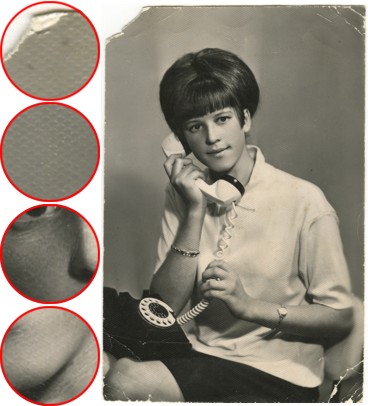
- Step 1. First we shall remove the yellowish tint from the photo with Adobe Photoshop. Go to the menu and choose Image -> Adjustments -> Desaturate. We shall convert the image to RGB.
- Step 2. Now we call the AKVIS MultiBrush plug-in (in the menu Filter -> AKVIS -> MultiBrush) to remove the rough texture of the paper.
Let’s increase the scale of the image so that it will be easier to see and remove the defects of the paper. Choose the Chameleon Brush tool and change its size to 4. In the plugin window we shall repair the damaged fragments of the photo by cloning its intact areas.
- Step 3. Next we shall remove the cracks and restore the missing parts of the photo. For this we shall take advantage of the AKVIS Retoucher plug-in.
Once again we increase the scale of the image so as to not miss any scratches. We accurately select all the defects in Quick Mask mode. Activate it by pressing the button
 in the toolbar or the Q key. Select the Pencil tool by either pressing the button
  or the B key.
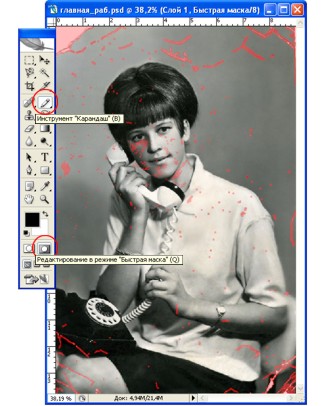
- Step 4. Now return to Standard Mode (press the button or Q key) and from the menu choose Select -> Inverse (or Shift+Ctrl+I). This will select all the scratches in the picture.
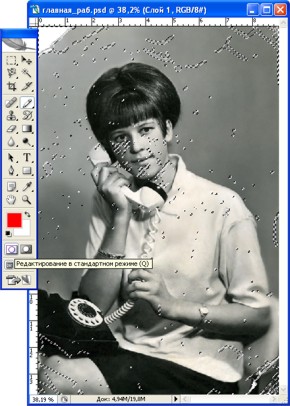
- Step 5. Next we shall call the AKVIS Retoucher plug-in (in the menu Filter -> AKVIS -> Retoucher), and press the button
 to begin the retouching process. We can simply observe how the selected defects disappear.
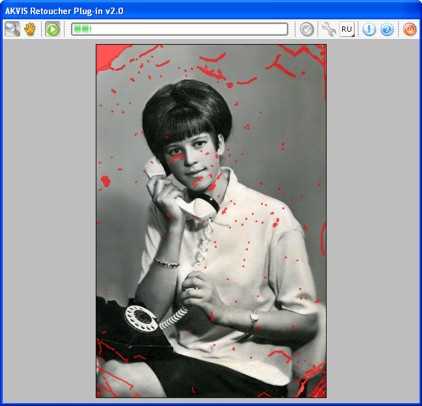
When the processing is finished, press the button
 if the result is acceptable. Remove the selection from the photo by choosing from the menu in Adobe Photoshop Select -> Deselect, (or Ctrl+D). Here is the restored photo:
- Step 6. Now we can begin with the most exciting part – photo coloring. With the AKVIS Coloriage plug-in this process will take a few minutes.
Let’s call the AKVIS Coloriage plug-in (in the menu Filter -> AKVIS -> Coloriage).
With the Eyedropper tool (the button
 or I key) choose the necessary colors from the Colors palette or from the Color Library. Then use the Pencil tool (the button
  or B key) to draw a contour within the areas that must take on the selected color.
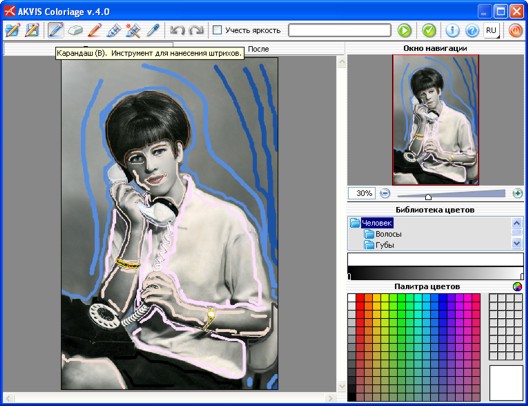
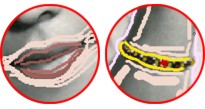
Such details as the watch, bracelet, lips, etc. must be outlined with the color we’ve chosen for the skin. This will prevent the colors of the watch, lips, etc from spreading about.
For the background to look more subdued, we will create a smooth transition from the dark side with a dark blue color and a lighter shade for the more lit areas of the background. In order to achieve this, the strokes should be some distance apart. The farther the strokes are from one another, the smoother the transition from one color to the other.
- Step 7. Now we press the button
 and, voila, in the After tab we see the colorized portrait. We press the button
  to accept the result:

