Retouching photos in 7 steps
The author of the tutorial is Andrey Shevchuk. He used AliveColors and plug-in AKVIS Retoucher to retouch a photo from his family archives.
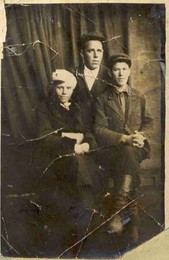
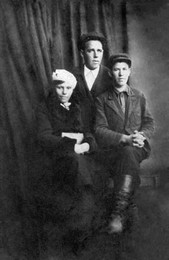
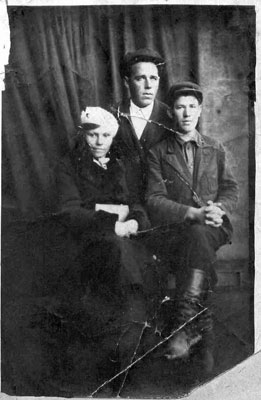
Here is the photo that Andrey decided to retouch. The retouching didn't take much time, but it required assiduity and eargeness to achieve the best possible result.

- Step 1. The photo is faded and has a yellowish tint, therefore, first we should convert the photo to greyscale and increase the image contrast.
Apply the commands Auto Levels and Auto Contrast in AliveColors. If you are not satisfied with the result, you can also do the levels correction manually. When the first step is done, the contrast will be improved and the yellowish tint will become less pronounced.
Then we apply the command Image -> Adjustment -> Black & White of AliveColors and the photo finally becomes black and white.
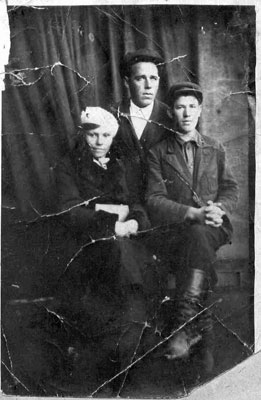
- Step 2. Well begun is halfway done. Now it'll be easier to proceed. We will remove scratches using the plug-in AKVIS Retoucher. First call the plug-in AKVIS Retoucher.
You should select the scratches. Use the tool Selection Brush
 to paint over the scratches on the photo. The selection will be highlighted in semitransparent red.
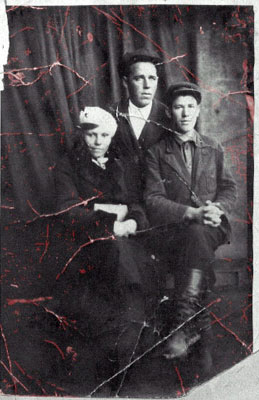
Press the button
 and you will see the scratches disappearing.
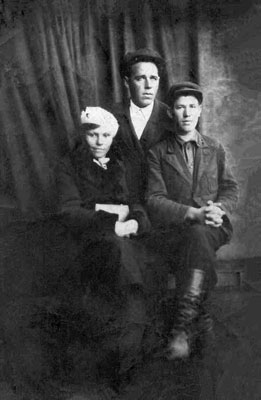
- Step 3. We continue retouching the photo: we retouch the frame, the torn corner and the scratches that cross the people in the photograph. We repeat the actions: select the defects and start the restoration process.
- Step 4. Edit the photo with the Chameleon Brush tool
 .
.
First we use Chameleon Brush to restore the shirt's collar of the man in the middle. It won't take long.
- Adjust the size of the brush. For our task we need a smaller brush of 7-9.
- Press the Alt key and use the left mouse button to select the intact part of the collar as a pattern for cloning (we will clone the line and an area around it).
- When you click the chosen area with the mouse keeping the Alt-key pressed, this pattern is saved in the plug-in's memory buffer. Now make a left-click (without the Alt-key) on the area of the image where the collar should appear and paste the selected pattern. You can insert the pattern as many times as you like. It is possible to cancel the last action with the key combination Ctrl+Z.
- Now you can smooth the colors of the shirt by selecting a one-color pattern under the collar and pasting the pattern into damaged parts.
As a result you will see the following picture.
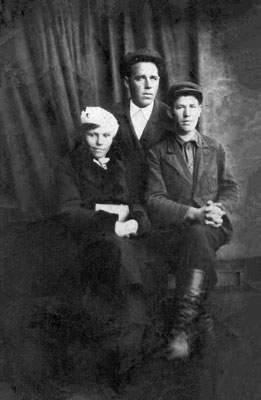
- Step 5. In the previous step we showed you how to clone a part of an image using Chameleon Brush. The peculiarity of the tool is that when you paste the cloned pattern, it automatically adjusts to the color range and the texture of the background.
We will use this feature to remove small defects and the surface imperfections. As a result we see the following picture:
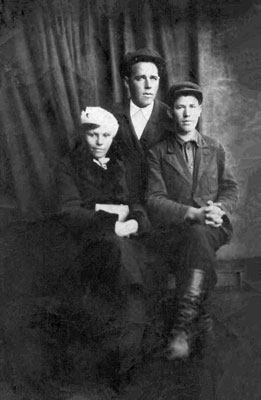
- Step 6. At this step you will see one more feature of Chameleon Brush. The author of the tutorial calls it "puttying".
After the restoration of the missing part of the image we can still notice some imperfections on the restored parts.
We will sample a smooth pattern on the right of the people and we will use it to smooth down the backgroud. We will use this technique to remove small defects on the suit of the standing man. As a result we get the following photo.
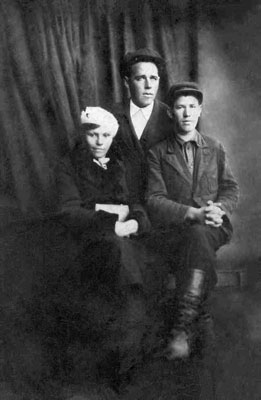
- Step 7. Here you will see one more feature of the plug-in Chameleon Brush - reconstruction of missing details. Let's take the curtains, for example. We can notice that they do not reach the ceiling. We will extend them to the ceiling using Chameleon Brush. We can increase the brush size to 61, clone the pattern in the upper part of the curtain and copy it to the upper part of the photo.

The changes were introduced so gradually that one could think the photo has always been like that. But if we put the original photo and the restored photo side by side we will see that much work has been done.
If you are satisfied with the result, press the button
 to apply the restoration result and close the plug-in window.
