Tools and Their Options
In AKVIS Neon different tools become visible depending on the active tab, Before or After.
 |
 |
| Toolbar, Before tab | Toolbar, After tab |
The tools in the program are divided into the groups: pre-processing (Before tab), post-processing (After tab), and additional tools (Before and After tabs).
Hint:
Use the buttons  /
/  to undo/redo the operations made with the tools
 ![]() ,
, ![]() ,
, ![]() ,
, ![]() .
.
Pre-Processing Tools (on the Before tab):
- Quick Preview
 switches on/off the preview window. It is a square frame outlined with the "marching ants" that immediately displays changes made with the image.
You can drag the preview square to any position with the left mouse button or with the double click. This lets you quickly preview the effect in different areas of the image. To compare the result of automatic conversion with the original picture, click and keep mouse pressed within the preview area.

Preview WindowYou can adjust the preview window size in the program's preferences
 .
.
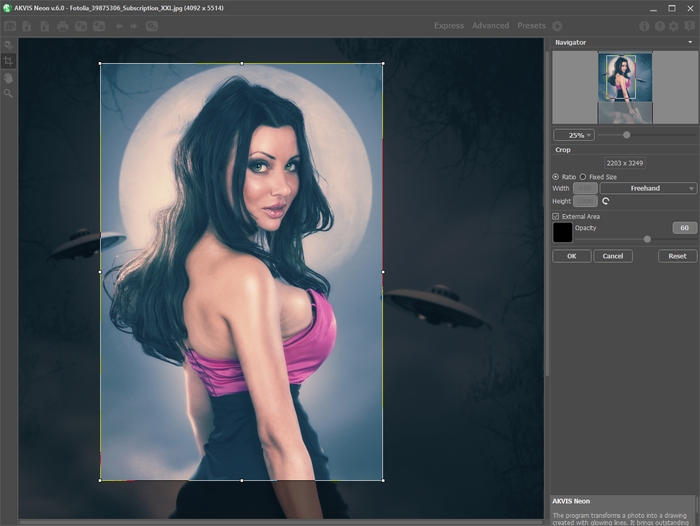
- Crop
 (in the standalone version) lets you cut off unwanted areas in the image. The tool is useful when you want to improve the image composition, straighten a crooked photo, turn a horizontal photo into a vertical one and contrariwise.
Note: This tool is applied to the original image! Use it before the neon effect.
You can change the crop area by dragging the sides and the angles of the bounding frame.
To apply the result and remove the areas outside the frame, press OK or use Enter. To cancel the operation and exit the tool, press Cancel or use the Esc-key. To restore the original area keeping the tool active, press Reset button.

Crop ImageAdjust the crop options:
You can choose the size of the crop rectangle using the Ratio or Fixed Size options.
If the External Area check-box is enabled, you can change the color and opacity of the outer parts.
Post-Processing Tools (on the After tab, for Deluxe/Business):
Attention! The tools ![]() ,
, ![]() ,
, ![]() ,
, ![]() are only available under the Home Deluxe/Business licenses, on the After tab. Use them at the final step. If you re-run the image processing
are only available under the Home Deluxe/Business licenses, on the After tab. Use them at the final step. If you re-run the image processing  , the changes made with the post-processing tools will be lost!
The tools' options are shown in a pop-up box which appears after right-clicking in the image.
- Smudge
 is designed for mixing colors in the picture and removing irregularities.
The tool's parameters:
Size (1-300). The maximum width of a line drawn with the tool.
Hardness (0-100). The amount of blurriness of the outer edge. The higher the value, the harder the brush edge is.
Strength (1-100). The intensity of smearing the paint in the stroke. The higher the value, the more color is smeared.

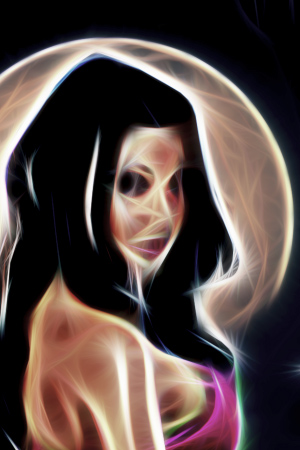
Neon Effect
Using Smudge - History Brush
 lets you fade the neon effect and restore the image to its original state.
The tool's parameters:
Restore to Original. If the check-box is enabled, the brush weakens the neon effect, as well as the result of the manual processing made with the tools. If it is disabled, the brush edits only changes made with the tools, but does not affect the neon effect.
Size (1-1000). The maximum width of a line made by the brush.
Hardness (0-100). The blurriness of the tool's edges. The less the value the more blurry the tool's edges become. At value 100% the border between the brush's edges and the background is very distinct; at lower values the transition between these areas is smoother.
Strength (1-100). The degree of restoration to the original state. At lower values there will be less restoration and more blending with the effect; at value 100% the original image will be restored more completely.

Neon Effect
Using History Brush - Lighten
 tones an image by enhancing the brightness of colors. The effect is increased with each successive brush stroke.
The tool's parameters:
Size (1-1000). The diameter of the tool.
Hardness (0-100%). The amount of blurriness of the outer edge. The higher the value, the harder the brush edge is.
Strength (1-100). The intensity of the effect in the brush stroke.
Range. The drop-down menu contains three ways to process pixels:
- Shadows. Darker areas are processed more than lighter areas.
- Midtones. The brush affects both light and dark areas equally.
- Highlights. Lighter areas of the image are processed more than darker areas.

Neon Effect
Using Lighten Tool - Darken
 tones an image by decreasing the brightness of colors.
The parameters are the same as for the Lighten tool.

Neon Effect
Using Darken Tool
Additional Tools (available on both tabs, for all licenses):
- Hand
 lets you scroll the image when it does not fit within Image Window at the desired scale. To use it click on the button, bring the cursor over the image, and while keeping the left mouse button pressed move in the desired direction. The hot-key is H.
Double-clicking on the tool's icon
 on the Toolbar makes the image fit the window.
- Zoom
 lets you change the image's scale. To zoom in left click on the image. To zoom out left click with Alt on the image. The hot-key is Z.
Double-clicking on the tool's icon
 makes the image scale to 100% (actual size).
