Workspace
AKVIS Neon lets you transform a photograph into a neon drawing. The software can be used independently as a standalone program or in a photo editor as a plugin filter.
- Standalone is an independent program; you can open it by clicking on the program's icon.
To launch the standalone version, run the program directly:
On a Windows computer - select it from the Start menu or use the program's shortcut.
On a Mac computer - launch the app from the Application folder.
- Plugin is an add-on for a photo editor, for example for Photoshop.
To call the plugin, select it from filters of your image editing program.
The workspace will be arranged according to the interface mode chosen in the Control Panel: Express, Advanced, or Presets.
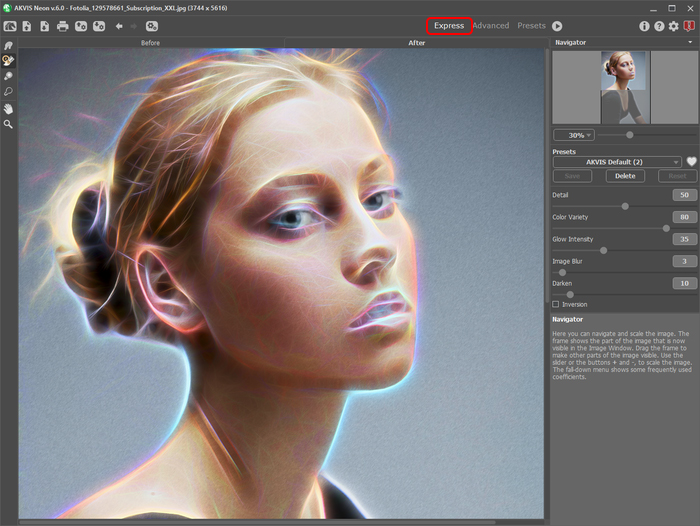
The first time you run the program, it is displayed in Express mode, with a simplified interface and a minimal set of sliders, which help to quickly obtain a satisfactory result.

Workspace of AKVIS Neon (Express)
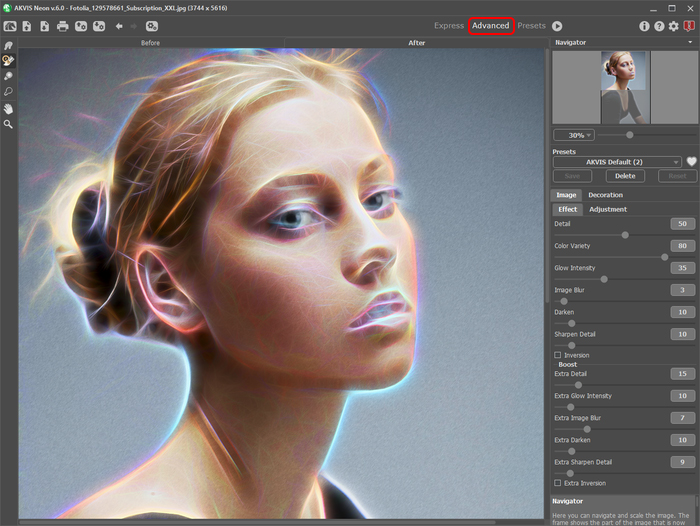
Experienced users who are familiar with the capabilities of AKVIS Neon can switch to Advanced mode: the interface's appearance will change, granting access to the full functionality of the program.
Note: All features and parameters work in Express mode as well; some are hidden and the program uses values of a chosen preset.

Workspace of AKVIS Neon (Advanced)
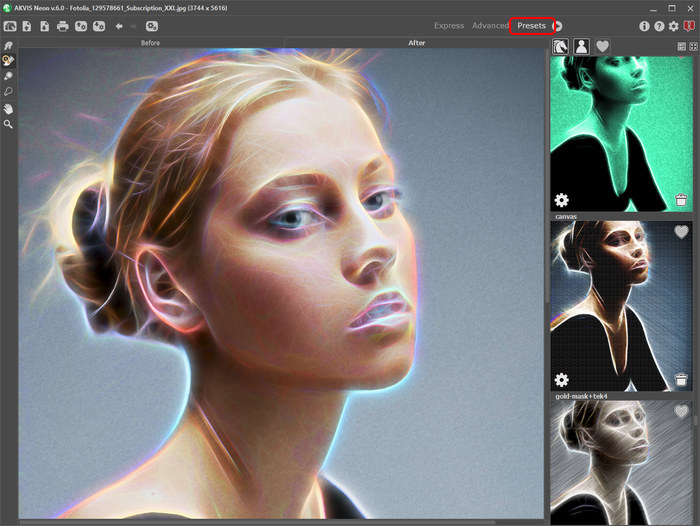
The Presets button in the top panel allows you to switch to the visual display mode of presets (Presets Gallery).

Workspace of AKVIS Neon (Presets Gallery)
The left part of the AKVIS Neon window is taken by the Image Window with two tabs: Before and After. In the Before tab you can see the original photo. The After tab shows the resulting image. You can switch between them by left-clicking on the tab with mouse button. To compare the original and the resulting images, click on the image and hold the button pressed - the program will currently switch between the tabs.
In the upper part of the program's window you can see the Control Panel with these buttons:
- The button
 opens the home page of AKVIS Neon.
- The button
 (only in the standalone version) opens an image for processing. The hot-keys are Ctrl+O on Windows, ⌘+O on Mac.
Right mouse click on this button displays the list of recent files. You can change the number of recent documents in the program's preferences.
- The button
 (only in the standalone version) saves image to the disk. The hot-keys are Ctrl+S on Windows, ⌘+S on Mac.
- The button
 (only in the standalone version) calls the Print dialog box. The hot-keys are Ctrl+P on Windows, ⌘+P on Mac.
- The button
 imports a list of user presets (from the .neon file).
- The button
 exports user presets. You can save any presets to a .neon file.
- The button
 cancels the last operation (with the tools). It is possible to cancel several operations in a row. The hotkeys are Ctrl+Z on Windows, ⌘+Z on Mac.
- The button
 returns the last cancelled operation. It is possible to return several operations in a row. The hotkeys are Ctrl+Y on Windows, ⌘+Y on Mac.
- The button
 (only in the standalone version) opens the Batch Processing dialog to automatically process a series of images.
- The button
 initiates image processing with the current settings. The resulting image is shown in the After tab.
- The button
 (only in the plugin version) applies the result to the image and closes the plugin.
- The button
 shows information about the program: version, trial period, license.
- The button
 calls the Help files. The hot-key is F1.
- The button
 calls the Preferences dialog box for changing the program's options.
- The button
 opens a window showing the latest news about Neon.
On the left side there is the Toolbar with different tools appearing in the Before/After tabs.
Pre-Processing Tools (in the Before tab):
- The button
 switches on/off the quick preview window.
- The button
 (only in the standalone version) activates the Crop tool which allows cutting off unwanted areas in the image.
Post-Processing Tools (for Home Deluxe and Business licenses in the After tab):
- The button
 activates the Smudge tool that lets you quickly add a handmade touch to your drawing. It mixes colors by displacing pixels, like a finger passing through wet paint.
- The button
 activates the History Brush tool which lets you fade the effect and restore the image, partially or fully, to its original state.
- The button
 activates the Lighten tool which allows you to increase the brightness in certain parts of your image.
- The button
 activates the Darken tool which allows you to reduce the brightness.
Additional Tools:
- The button
 activates the Hand tool which allows you scroll the image when it does not fit within the window at the desired scale. Bring the cursor over the image, and while keeping the left mouse button pressed move in the desired direction.
Double-clicking on the tool's icon makes the image fit the window.
- The button
 activates the Zoom tool which changes the image's scale. To zoom in left click on the image. To zoom out left click with Alt on the image. Press Z to quickly access the tool.
Double-clicking on the tool's icon makes the image scale to 100% (actual size).
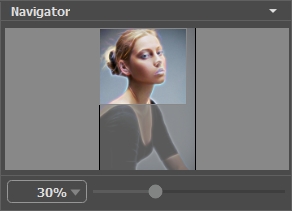
Navigate and scale the image using the Navigator. The frame in the Navigator surrounds the area of the image which is visible in the main window; the area outside of the frame will be shaded. The frame can be dragged, thereby changing the visible portion of the image. To move the frame, place the cursor within it, left click the mouse, and then drag.

Navigator
To scroll the image in the window you can press the spacebar on the keyboard and drag the image with the left mouse button. Use the scroll wheel of the mouse to move the image up/down, by keeping the Ctrl key pressed – to the left/to the right, by keeping the Alt key pressed − scale the image. Right-click on the scroll bar to activate the quick navigation menu.
Use the slider to scale the image in the Image Window. When you move the slider to the right, the image scale increases. When you move the slider to the left, the image scale reduces.
You can also change the image scale by entering a new coefficient into the scale field. The fall-down menu shows some frequently used coefficients.
You can use hot-keys to change the image scale + and Ctrl++ on Windows, ⌘++ on Mac to increase the image scale and - and Ctrl+- on Windows, ⌘+- on Mac to reduce the scale.
Under the Navigator there is the Settings Panel with the Image and Decoration tabs:
Image: Here you can adjust the parameters of the neon effect.
Decoration: You can add text to your image, adjust the canvas, and apply a frame.
Below, in the Presets field you can save the current settings as a preset to use them in the future. The current settings can be saved, edited, deleted. When you launch the program, it opens with the last applied parameters.
Under the settings you can see Hints for the parameters and buttons when you hover over them with the cursor. You can choose where the hints will be shown or hide them in the program's Preferences.
