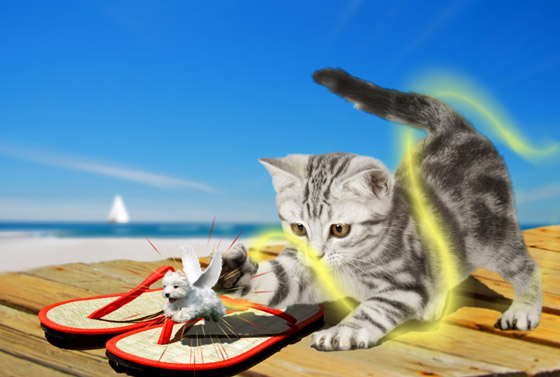
Cat and Dog: a Fantasy Collage
The example was made in the old version of SmartMask. Now, you can achieve this effect more easily with the new AI-based tools.
In this tutorial we created a fantasy collage in AliveColors with the AKVIS SmartMask and AKVIS LightShop plugins.
The AKVIS SmartMask plugin quickly and precisely makes selections of difficult objects. The AKVIS LightShop can be used to create and add a variety of lighting effects to images.
Original images:

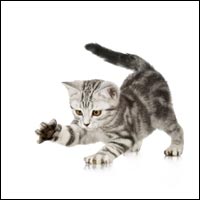
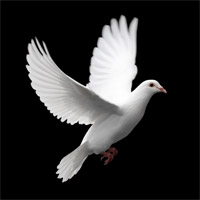
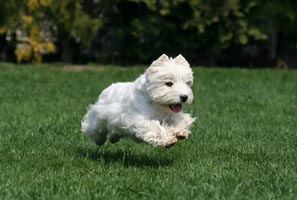
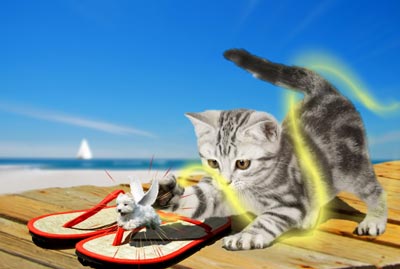
Result:
- Step 1. Open the original images in AliveColors.
-
Step 2. Go to the picture with the cat. Create a duplicate layer (Layers -> Duplicate). Call the AKVIS SmartMask plugin (Effects -> AKVIS -> SmartMask).
The program will start in Auto mode by default.
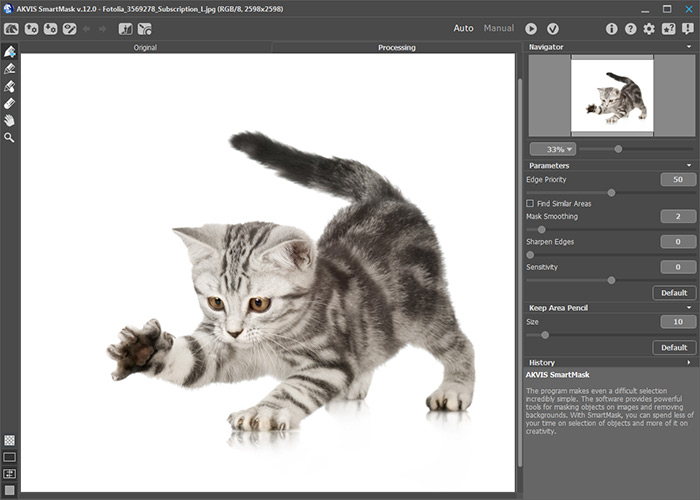
Since the cat has irregular fuzzy edges, select
 and increase the brush size to 30. Outline the cat's silhouette.
Draw the blue strokes within the outline and the red - outside it.
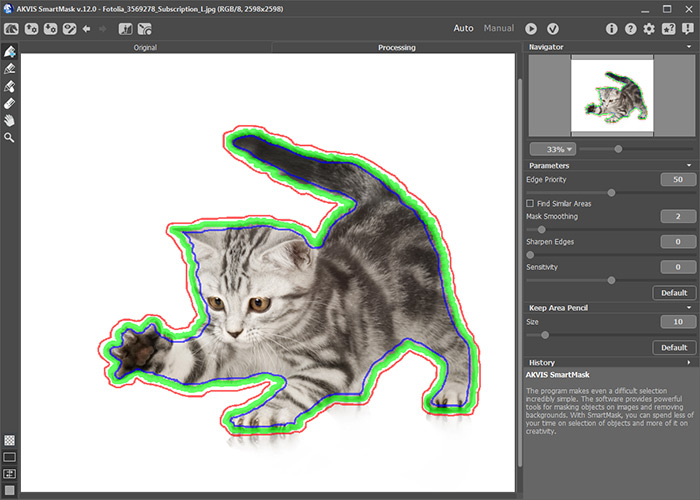
Click
 to start processing the image. The red area will be removed, and the cat, which was outlined in blue, will remain and be placed on a transparent background. Press
  to apply the result.
Copy the cat and paste it above the background image.
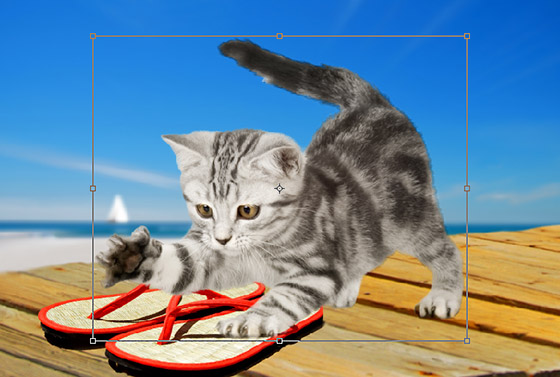
Reduce the cat's size and place it on the background image with the command Edit -> Free Transform. To resize the cat proportionally, press
 .
.
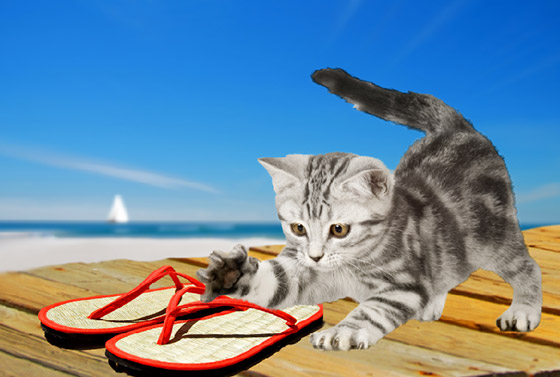
Make a copy of the cat's layer. It will be used later to create a shadow.
-
Step 3. Go to the picture of the running dog. Cut out the dog in the same manner as was done with the cat:
Make a duplicate layer and call the AKVIS SmartMask plugin. Outline the silhouette of the dog with the green pencil. Fill the area within the outline with blue and the outside with red.
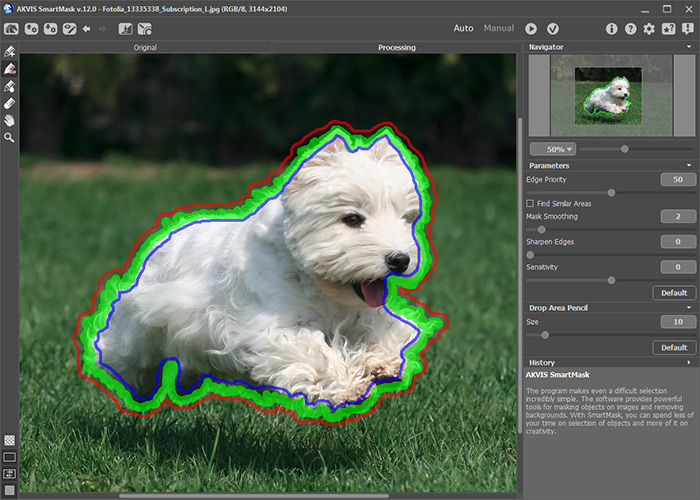
Press
 to process the image and then
  to apply the result.
-
Step 4. Next choose the dog's wings. Go to the picture of the dove on a black background. Copy the layer and launch the SmartMask plugin.
Use the Quick Selection
 tool to select the black background.
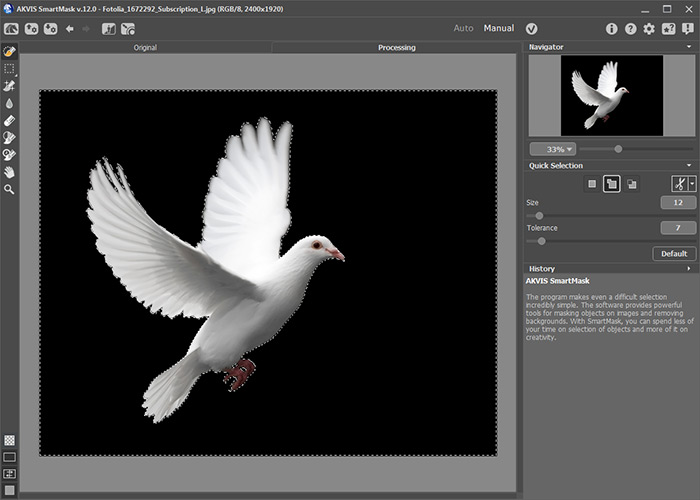
Right mouse click opens the tool's menu. Select the corresponding option (Remove Selected Areas) to remove the background.
Use the Background Eraser and remove the body of the bird, but keep the wings.
Apply the result.
Copy the wings, paste them to the dog's image and adjust them to fit the dog. If the wings are too big for the dog, reduce them with the Free Transform tool and then merge the two layers (Layers -> Merge Layers).
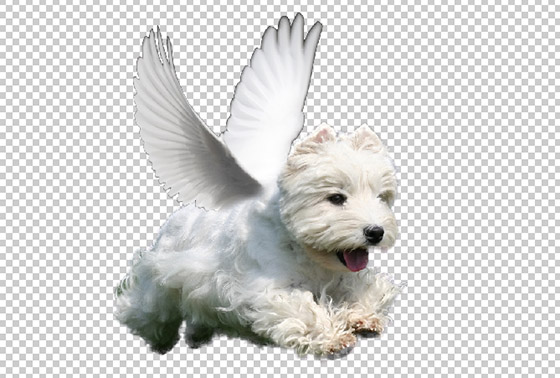
Copy the winged dog to the background image. Use the command Edit -> Transform -> Flip Horizontal to flip its orientation from right to left. Then reduce the size of the dog (proportionally) and copy its layer to make a shadow later.
-
Step 5. Now add the glowing trail which the dog leaves. Add a new layer (Layers -> New -> Raster Layer) and call the AKVIS LightShop plugin (Effects -> AKVIS -> LightShop).
In the Elements panel click on
 to add a new element. Choose Ring from the list of the elements.

Change the parameters as shown below. A yellow color was chosen for the ring but you can use another color if you wish.
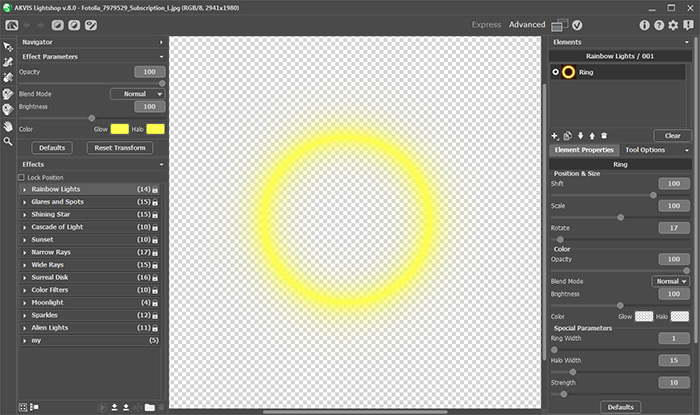
Press
 to apply the result and return to the graphics editor.
-
Step 6. Create four copies of the rings. Change the size, shape, and position of the rings as shown below.
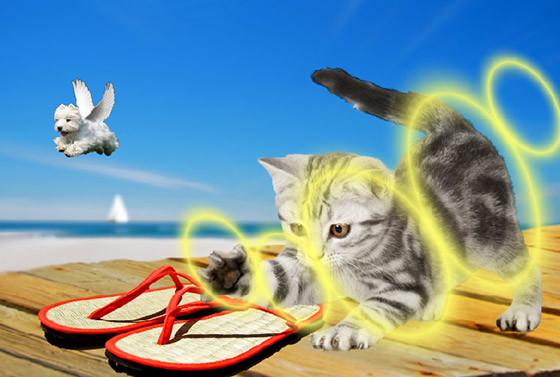
Use the Eraser
 with a soft edge, and switching between the layers, remove unnecessary parts of the rings to create a spiralling path. Place the winged dog at the end of its trajectory.
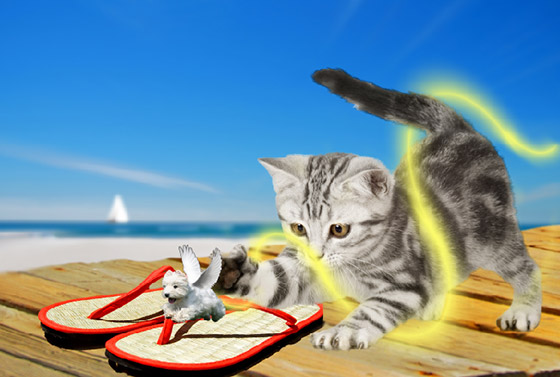
Create a fading effect for the glowing trail. Do this by gently applying the Eraser with an Strength of 30. Note that the farther the trail extends from the dog the weaker it should become. Therefore, process the end of the glowing trail a few times until it almost blends with the background.
-
Step 7. Create another new layer and call the AKVIS LightShop plugin. Choose Particles from the list of the elements and adjust the parameters.
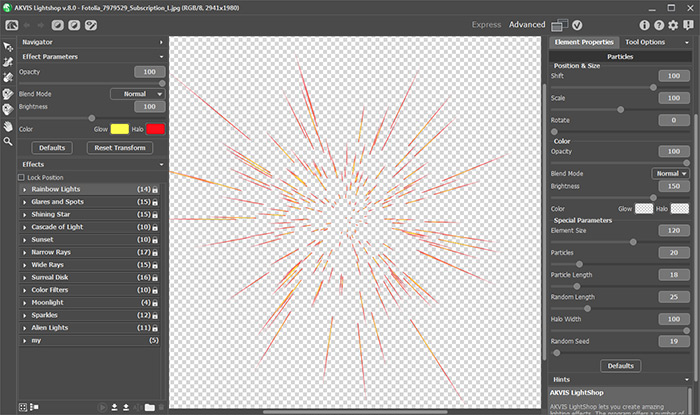
Click on
 to return to the graphics editor.
In AliveColors, reduce the size of the sparks to be just larger than the dog and place them over it. Use the Eraser to create the effect of sparks radiating from the dog.
-
Step 8. Now create the shadows. Move the two layers (one with the cat and the other with the dog) which we created for this purpose to the bottom of the list of layers. The only layer that should be below them is the background image's layer. For convenience, hide the other layers. Move the dog image so that it is at the tip of the cat's paw. Combine the two layers. Use the Magic Wand
 to select the background and then invert the selection. Activate the Color Brush
  and paint over the selection in black.
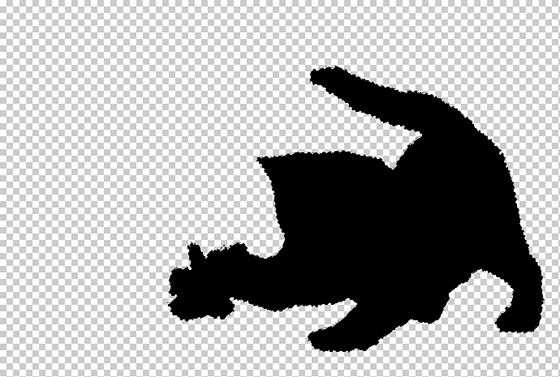
Use the Perspective command (Edit -> Transform -> Perspective) to modify the resulting image so that it appears like a shadow of the dog and cat.
To make sure that the shadow is aligned well and is on the proper plane, make the background layer and the layer with the cat visible. Pay special attention to how the cat's paws and their shadow converge on the floor.
Then make the shadow semi-transparent by reducing the layer's Opacity to 65 percent.
-
Step 9. Combine all the layers. Do this with the Layers -> Merge Layers command from the menu after selecting all the layers in the Layers palette. Finally, go over the borders of the image with the Blur Tool
 to make them appear more fluid and less distinct.
The final result is a fantasy collage of a cat chasing a miniature flying dog.
