Iris Blur Mode
Iris Blur mode creates shallow depth-of-field effect, blurring the background while keeping the subject in focus. In contrast to Tilt-Shift mode, this one lets you specify the shape of the sharp area (ellipse, rectangle).
Real photographers can achieve this effect by opening aperture and using different lenses. With AKVIS Refocus AI you can create a blur background in a click.


Note: This mode is only available for the Home Deluxe and Business licenses. Compare the licenses here.
Follow the steps below to apply this effect to a photo:
Step 1. Adjust the Preview option:
Fast Preview - this option lets you try the settings on a smaller copy of the original image.
Full Processing - the image in its original size will be processed with the chosen parameters.
Processing will start automatically, in the visible part of the image, every time you change a parameter or the effect area.
Once you have adjusted the parameters, it is recommended to try the full processing to make sure that the best settings are chosen. Choose the Full Processing option or click on  to process the entire image.
Step 2. Activate the Blur Area tool ![]() and adjust the effect area with the markers that appear over the image in the After tab.
and adjust the effect area with the markers that appear over the image in the After tab.
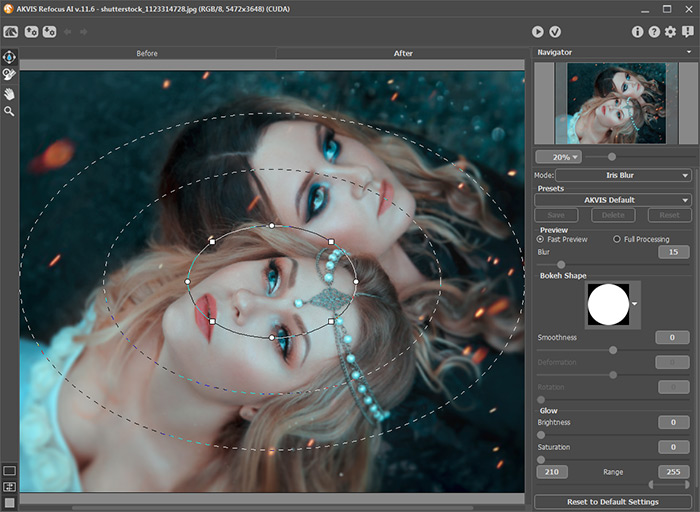
- solid line helps to adjust the size of the un-blurred area;
- dots are used to rotate, stretch, or compress the effect area;
- square markers help to change a form of an ellipse.
- internal dashed line lets adjusting smooth transition between blurred and un-blurred areas;
- external dashed line defines the area of maximum blur.
To move the area, place the cursor in the un-blurred part (it will turn into crossed arrows ![]() ) and drag holding down the left mouse button.
) and drag holding down the left mouse button.
To re-size any section, put the cursor on the line bounding this area (it will look like a double arrow ![]() ) and drag with the left mouse button.
) and drag with the left mouse button.
To rotate, stretch, or compress the area, place the cursor over a dot (it will turn into a rounded double-sided arrow ![]() ) and move holding down the left mouse button.
) and move holding down the left mouse button.
To change a form of the area, drag a square marker.
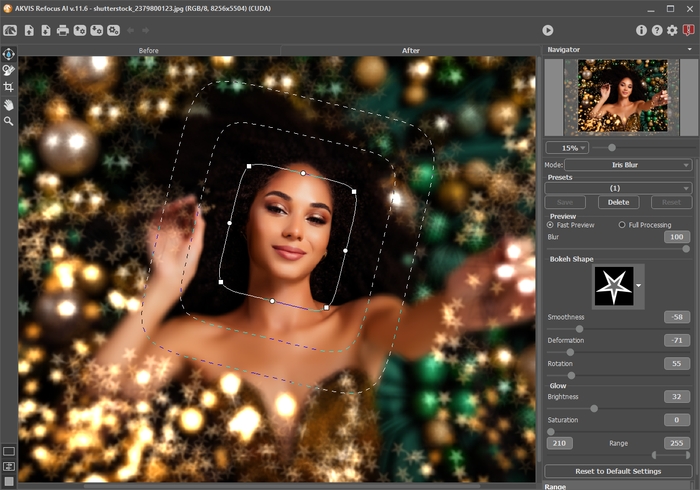
Hint: You can hide the lines by deselecting the tool ![]() .
.
Step 3. Use one of the ready-to-use presets or adjust the parameters.
The Blur parameter lets you adjust the strength of the blur effect. The higher the value, the greater the blur is.
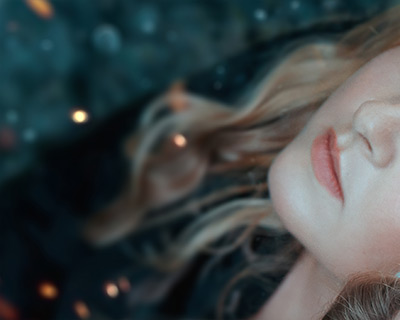
Blur = 25
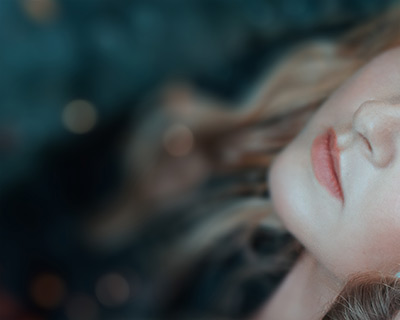
Blur = 50
Step 4. All light spots in the out-of-focus region take the form of bright glare. By default, they look like round discs.
You can change their shape by adjusting the parameters of the Bokeh Shape section.
Using the Glow parameters, you can increase the brightness and saturation of light spots.
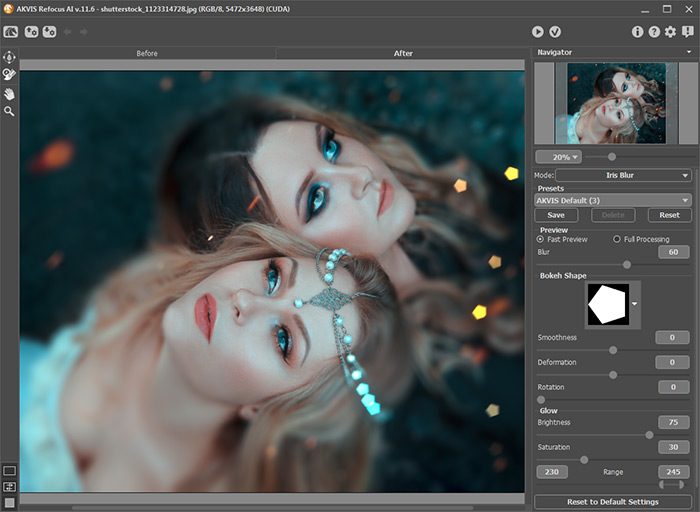
Iris Blur Effect
Step 5. Press the button  to start processing of the entire image.
Step 6. The program lets you save your favorite settings as a preset and use them in the future.
Note that the presets save only the parameters values in the Settings Panel, and do not save the effect area.
