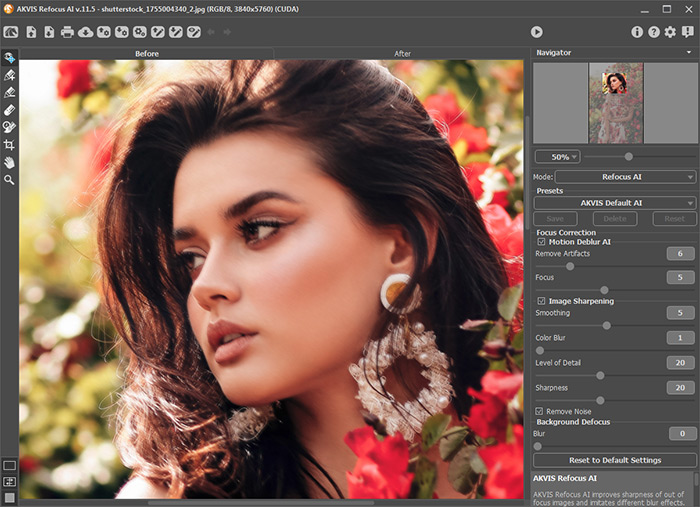
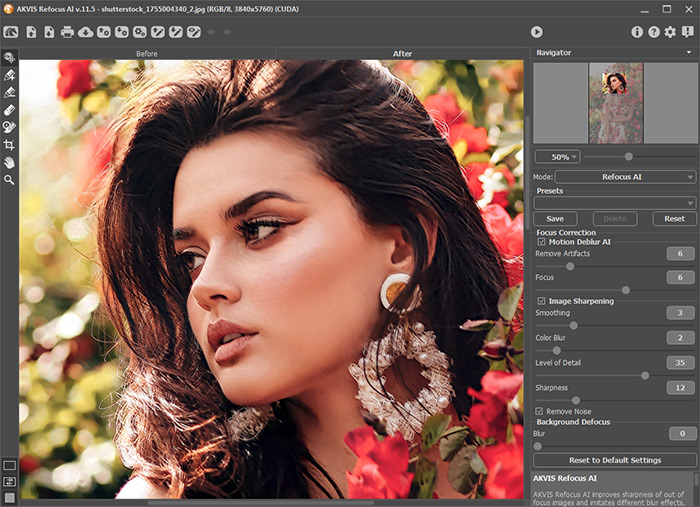
How It Works
AKVIS Refocus AI improves sharpness of out of focus images and adds artistic blur effects to your photos. The software can work independently as a standalone programas well as a plugin to a photo editor.
Follow the instructions below:
- Step 1. Load an image into the software.
- If you work with the standalone edition:
To open an image in the program, you can double-click in the empty workspace of Refocus AI or drag the image into the workspace, or press
 on the Control Panel. The program supports BMP, JPEG, PNG, TIFF, WEBP and RAW file formats.
- If you work with the plugin:
Open an image in your photo editor by calling the command File -> Open or using the key combination Ctrl+O on Windows, ⌘+O on Mac.
Then call the AKVIS Refocus AI plug-in:
In AliveColors: Effects -> AKVIS -> Refocus AI;
in Adobe Photoshop: Filter -> AKVIS -> Refocus AI;
in Corel PaintShop Pro: Effects -> Plugins -> AKVIS -> Refocus AI;
in Corel Photo-Paint: Effects -> AKVIS -> Refocus AI.
- Step 2. Select the processing mode in the drop-down menu in the Settings Panel:
- Refocus AI mode improves sharpness of out-of-focus images and fixes motion blur problems. You can re-focus the entire image or only certain details.
- Tilt-Shift mode adds the objects on the photo a toy look. This effect "miniaturizes" the image, blurring the outer parts and making the objects appear as if they are models.
- Iris Blur mode creates shallow depth-of-field effect, blurring the background while keeping the subject in focus. This mode is only available for the Home Deluxe and Business licenses.
- Motion Blur. This blur method imitates the straight line motion of a camera.
- Radial Blur. This method imitates the effect of rotating camera and blurring from the center.
Note that Refocus AI mode sharpens the image, and the other four are the blur effects. Usually (but not obligatory) Iris Blur fits better for portraits, Tilt-Shift - for landscapes, Motion Blur - for linear moving objects (for example, a car), Radial Blur - for circular objects (for example, wheels of a moving car).
- Step 3. Adjust the parameters in the Settings Panel.

- Step 4. It is possible to save the settings you like as a preset and use them in the future.
Note that the presets save only the parameters values in the Settings Panel, and do not save the lines which define the effect area.
To save a preset, enter a name for the preset into the Presets field and press the button Save. Now, as you start the program, it will use the settings of this preset. If you change the values of the parameters, you can always come back to the default settings of the preset by pressing the Reset button.
To delete a preset, select it from the list and press Delete.
To process an image with the settings of a certain preset, select it from the drop-down menu.
- Step 5. In the standalone version, you can also print your image with
 .
.
- Step 6. Save the resulting image.
- If you work with the standalone program:
Click on the button
 to open the Save As dialog box. Enter a name for the file, choose the format (TIFF, BMP, JPEG, WEBP or PNG) and indicate the target folder.
- If you work with the plugin:
Apply the result by pressing
 . The Refocus AI plugin will close and the picture will appear in the photo editor's workspace.
Call the Save As dialog box using the command File -> Save As, enter a name for the file, choose the format and indicate the target folder.
