Tools and Their Options
In AKVIS Points, different tools become visible depending on the active tab, Before or After:
 |
 |
| Toolbar, Before tab | Toolbar, After tab |
The tools in the program are divided into the groups: pre-processing (Before tab), post-processing (After tab), and additional tools (Before and After tabs).
Pre-Processing Tools (on the Before tab):
-
Quick Preview
 switches on/off the preview window. It is a square frame outlined with the "marching ants" that displays changes made in the Painting and Decoration tabs.
You can drag the preview square to any position with the left mouse button or with the double click. This lets you quickly preview the effect in different areas of the image. To compare the result of automatic conversion with the original picture, click and keep mouse pressed within the preview area.
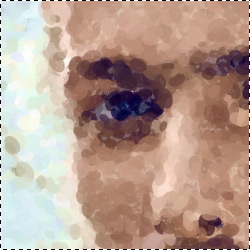
Preview WindowYou can adjust the preview window size in the program’s preferences
 .
.
- Crop
 (in the standalone version) lets you cut off unwanted areas in the image. The tool is useful when you want to improve the image composition, straighten a crooked photo, turn a horizontal photo into a vertical one and contrariwise.
You can change the crop area by dragging the sides and the angles of the bounding frame.
To apply the result and remove the areas outside the frame, press OK or use Enter. To cancel the operation and exit the tool, press Cancel or use the Esc-key. To restore the original area keeping the tool active, press Reset button.
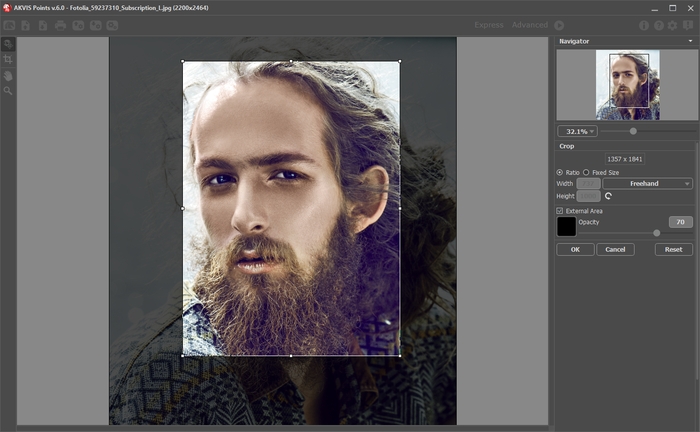
Crop ImageAdjust the crop parameters:
You can choose the size of the crop rectangle using the Ratio or Fixed Size options.
If the External Area check-box is enabled, you can change the color and opacity of the outer parts.
Post-Processing Tools (on the After tab, for Deluxe/Business):
Attention! The post-processing tools ![]() ,
, ![]() and
and ![]() are only available under the Home Deluxe/Business licenses, on the After tab. Use them at the final step. If you re-run the image processing
are only available under the Home Deluxe/Business licenses, on the After tab. Use them at the final step. If you re-run the image processing  , the changes made with the post-processing tools will be lost!
The tools' options are shown in a pop-up box which appears after right-clicking in the image.
You can use the buttons  and
and  to undo/redo the operations made with these tools. The hotkeys are Ctrl+Z and Ctrl+Y on Windows, ⌘+Z and ⌘+Y on Mac.
-
Pointillist Brush
 lets you add color dots to the painting. It's possible to change the points with the following parameters:
Size (10-200). The parameter changes the tool's diameter.
Size of Dots (10-100). The parameter adjusts the maximum size of points drawn with the brush.
Density (10-100). The parameter changes the number of points in one movement. The higher the value, the more dots appear.
Saturation (0-100). The parameter defines the color intensity of the points. At the value = 0, they have saturation of the original image. When increasing the parameter, the colors become brighter and more saturated.
Intensity (0-100). The parameter controls the degree of the visibility of the points. The lower values give more transparent and blurred dots. When increasing the parameter, the dots become more vivid and noticeable.
Aspect (0-100). This parameter regulates the shape of the points. At the value = 0, they have a circular shape, when increasing the parameter they turn into ellipses.
Relief (0-100). This parameter gives volume to the strokes. At low values the points are flat. The higher the value the more pronounced the strokes are.
Color Variety (0-100). When increasing the parameter, some of the points will change their color. The higher the value, the more colors appear in the image and the more saturated they become.
Hard Edges. The check-box allows you to determine the blurriness of points. When the check-box is disabled, the edges of points are blurry. When the option is enabled, the edges appear more defined.
Original Colors. If the check-box is enabled, the brush uses the original colors in the processed area. If the check-box is disabled, the brush draws with the color shown on the square button on the Toolbar. Read below how to change the color.
Use Effect Settings. The button lets you set the tool's parameters at the same values as used for the photo-to-painting conversion.
Show Original (0-80). When increasing the parameter, the original image becomes visible through the effect. This parameter is auxiliary, it is useful for more precise drawing with the brush and does not affect the result.
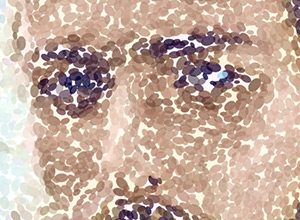
Pointillism Effect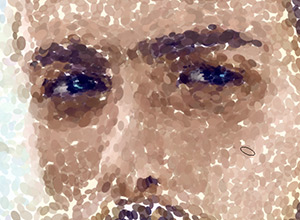
Using Pointillist Brush- Gradient line with the current color in the center. On the left side is +30% black, and on the right side +30% white.
- The previously selected color.
- The current color of the pixel where the cursor is.
- Colors of surrounding pixels.
- Average colors from areas of 3x3, 5x5, 11x11, 31x31, 51x51, 101x101 px.
Color. The color for the brush is displayed on the square button on the Toolbar. There are two ways to change colors for the brush: double-click on the square and choose a color from the dialog or left-click on the square (I-key) to activate the eyedropper and pick a color from the image.
Around the eyedropper's tip over the image there is a color ring that helps you select colors more precisely. If it's hard to catch a certain color, you can see adjacent tints and select the color on the ring while holding the Ctrl-key.
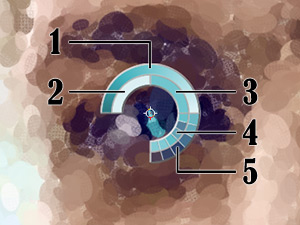
There are 5 sectors on the color ring:
-
Eraser
 lets you erase color points, both generated with the effect and drawn with the brush. Processed areas are filled with white color of various transparency.
Size (1-1000). The maximum width of a line made by the brush.
Hardness (0-100). The amount of blurriness of the tool's edge.
Strength (1-100). The influence of the tool on an image.
Show Original (0-80). When increasing the parameter, the original image becomes visible through the effect. This parameter is auxiliary, it is useful for more precise drawing with the brush and does not affect the result.
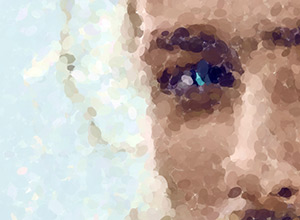
Pointillism Effect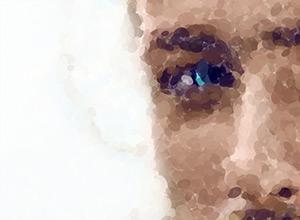
Using Eraser -
History Brush
 lets you fade the painting effect and restore the image to its original state. You can choose the mode of the tool: edit all changes or only tools keeping the pointillism effect.
The tool’s parameters:
Restore to Original. If the check-box is enabled, the tool lets weakening the painting effect, as well as the result of the post-processing tools. If the check-box is disabled, the brush edits only the tools but does not affect the result of the image processing.
Size (1-1000). The maximum width of a line made by the brush.
Hardness (0-100). The blurriness of the tool’s edges. The less the value the more blurry the tool’s edges become. At value 100% the border between the brush’s edges and the background is very distinct; at lower values the transition between these areas is smoother.
Strength (1-100). The degree of restoration to the original state. At lower values there will be less restoration and more blending with the effect; at value 100% the original image will be restored more completely.
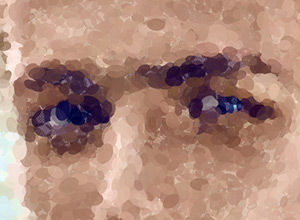
Pointillism Effect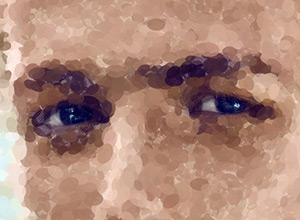
Using History Brush
Additional Tools (available on both tabs, for all licenses):
-
Hand
 lets you scroll the image when it does not fit within Image Window at the desired scale. To use it click on the button, bring the cursor over the image, and while keeping the left mouse button pressed move in the desired direction. The hot-key is H.
Double-clicking on the tool’s icon
 on the Toolbar makes the image fit the window.
-
Zoom
 lets you change the image’s scale. To zoom in left click on the image. To zoom out left click with Alt on the image. The hot-key is Z.
Double-clicking on the tool’s icon
 makes the image scale to 100% (actual size).
