How to Use The Program
AKVIS Magnifier AI lets you change the size of an image without loss in quality. The software allows enlarging an image to a super-high resolution. Whether creating poster-size images, adding resolution for printing, or reducing image size, AKVIS Magnifier AI will make your images look crisp and clear!
Compare the image increased by 300% with the original one.


AKVIS Magnifier AI can work independently as the standalone application and as plugin in Adobe Photoshop and Photoshop Elements.
In order to resize an image, perform the following steps:
- Step 1. Open an image.
- If you work with the standalone edition (use a file in JPEG, RAW, PNG, BMP, WEBP, or TIFF format):
The dialog box Select File to Open appears if you double-click on the empty workspace of the program or if you click on the button
 on the Control Panel. You can also drag the required image into the workspace of the program.
- If you work with the plugin:
Open an image in your photo editor by calling the command File -> Open or using the key combination Ctrl+O on Windows, ⌘+O on Mac.
Attention! Unlike other AKVIS plugins (which are available in Filter menu), you will find the Magnifier AI plugin in the automation features of Photoshop.
Make sure that layers are merged otherwise the plugin can't be called, and select the menu item:
File -> Automate -> AKVIS Magnifier AI in Adobe Photoshop;
File -> Automation Tools -> AKVIS Magnifier AI in Adobe Photoshop Elements.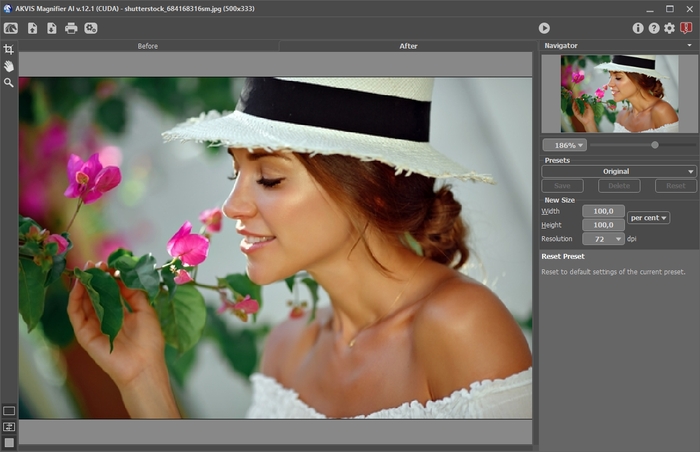
AKVIS Magnifier AI - Step 2. Before resizing, in the standalone version, you can use the Crop tool
 to trim a part of the picture. The tool is useful when you want to improve the image composition, straighten a crooked photo, turn a horizontal photo into a vertical one and contrariwise.
Note that the tool is applied to the original image! First use the tool, then change the image size.
Change the crop area by dragging the sides and the angles of the bounding frame. Use the buttons in the Settings Panel to control the tool. To apply the result and remove the areas outside the frame, click OK or use Enter. To cancel the operation and exit the tool, press Cancel or use the Esc-key. To restore the original area keeping the tool active, press Reset.

Crop - Step 3. You can choose one of the built-in presets or set the required size change (New Size) into the Width or Height field (in pixels, per cent, cm, mm or inches). You can enlarge an image up to 800%.
Adjust the Resolution. If you are going to print the image it's recommended to use 300 dpi, for web - 72 dpi.
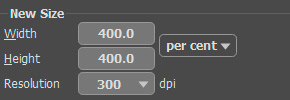
Resize Image - Step 4. Depending on the New Size value, different additional parameters will be active: Upsize or Downsize.
Upsize (Image Enlargement)
For image upscaling, the program uses innovative technologies of artificial intelligence and machine learning.
Select an image resizing algorithm depending on the AI model:
A. Standard. It allows you to enlarge photos, preserving details and texture and enhancing contrast. It's recommended to process photos of good quality without noticeable noise and compression artifacts.
B. Intensified. It allows you to enlarge images providing noise removal and defects compression, emphasizing edges on a picture. It works great for illustrations, artworks, images with text, low-res images from the Internet, and for preparing super-large prints.
The AKVIS presets created using a particular mode are labeled A or B, respectively.
Standard Mode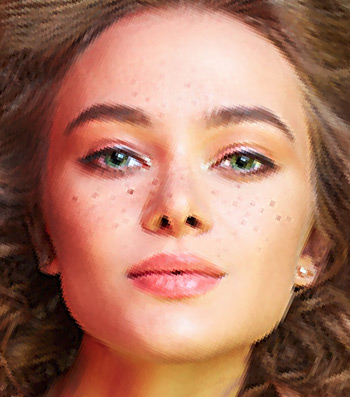
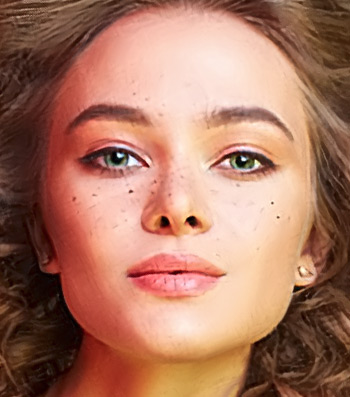 Intensified Mode

In different cases, different methods work better. The choice of a neural network depends on the original image quality, as well as on the desired result. Compare modes.
In addition to the work of the neural network, you can adjust an auxiliary parameter:
Smoothing (0-25). Preliminary smoothing of irregularities in the image. Higher values cause blurring.

Smoothing = 0
Smoothing = 20Downsize (Image Reducing)
Adjust the parameters:
Sharpness (0-100). The parameter increases image sharpness by intensifying the color contrast between the neighboring pixels. The higher the value of the parameter, the sharper the image becomes.

Sharpness = 0
Sharpness = 80Remove Noise (0-25). The parameter lets removing noise and defects by increasing the level of smoothness. The higher the value, the smoother the result is.
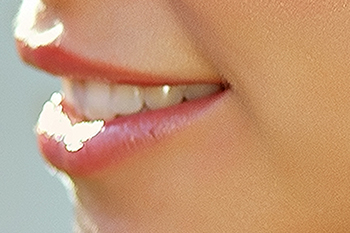
Remove Noise = 0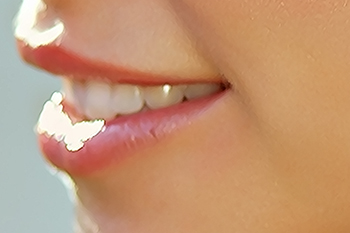
Remove Noise = 25 - Step 5. If you do not use Autorun Mode, click
 to process the image with the adjusted settings.
To be able to see the result of the parameters' change at once it is recommended to activate Autorun Mode (see Preferences). The image will be scaled to 100%. In this mode any change in the settings or navigation on the image will result in an automatic start of image processing.
To interrupt the process, click the Cancel button right to the progress bar.
Attention! Increasing an image's size is a resource-intensive process and requires a substantial RAM capacity and 2-3 Gb of free space on disk C:/ for swap-files. When increasing a 5-10 megapixel image by 400%, the image area increases by 16 times + 200-300 Mb; in this case the processing will consume about 1.5 Gb RAM.
- Step 6. It is possible to save the settings you like as a preset and use them in the future. To save a preset, enter a name for the preset into the Presets field and press the button Save.
The settings of the selected preset will be used as default settings. If you change the values of the parameters, you can always come back to the default settings of the preset with a click on the button Reset. To process an image with the settings of a certain preset, you should select it from the drop-down menu and press the button
 . To delete a preset, select it from the list and press Delete.

Presets - Step 7. In the standalone program, you can also print your result using
 .
.
- Step 8. Save the processed image.
- If you work with the standalone edition:
Click on the button
 to open the Save as dialog box. Enter a name for the file, choose the format (TIFF, BMP, JPEG, WEBP, or PNG) and indicate the target folder.
- If you work with the plugin:
Press the button
 to apply the result and close the plugin window. The AKVIS Magnifier AI plugin will close and the resized image will appear in the workspace of the photo editor.
Call the Save As dialog box using the command File -> Save As, enter a name for the file, choose the format and indicate the target folder.
Below you can see the result of image scaling with parameters, presented in the screenshot.
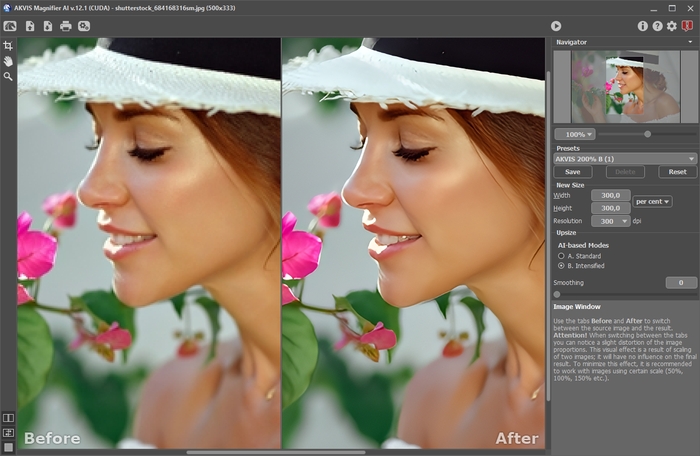
Magnified Image Fragment
