How To Get Shots With Different Exposures
To generate an HDR-image you need a series of shots of the same scene taken with different exposures. It is possible to use Manual mode or Automatic Bracketing mode.
Let's look at the second option in detail. Follow the instruction below to take a series of shots with different exposure settings using automatic bracketing:
- Set your digital camera to automatic bracketing mode (AEB). Generally, this mode allows you to take a series of three shots: normal, underexposed and overexposed. Some digital cameras allow you to take a series of 5 and more shots.
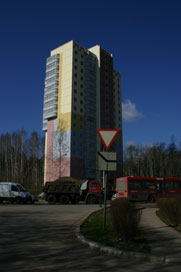
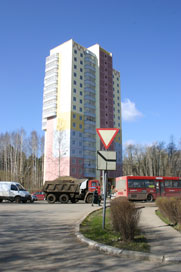
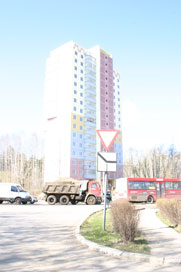
- Set the range of exposures for automatic bracketing. We recommend the following values: -2, 0,+2.
- Set the ISO parameter to a value not higher than 100; otherwise, the shots may have too much noise, which is difficult to handle.
- Choose the maximum image size.
- Select a subject for shooting. When shooting outside you can encounter some problems. The scene is rarely static. If there are people and cars moving, wait till they leave the scene. As for leaves trembling in the wind, there is no way to change it and it is not critical - it will not have a considerable impact on the result. If the trees themselves are shaking, it is better to delay shooting the subject, as it may cause the branches to double on the final image.
- Set the camera on a tripod or on a stable surface. If you fix the camera, shift when shooting will be minimized.
- Take a series of shots.
- Transfer the shots to the computer.
Attention! Do not alter the photos.


Photos with the exposure settings -2, 0 and 2
