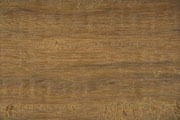
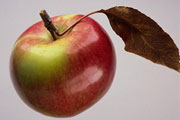
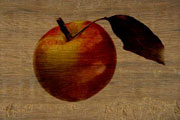
Working with AKVIS Chameleon V.1.x-4.x in Corel Photo-Paint
In its old versions AKVIS Chameleon applied automatically right after you launched it from the menu Filter. It didn't have an interface and offered only two modes of collage creation.
Look how you could work with the old Chameleon:
The AKVIS Chameleon Plug-in offers two modes of photo collage creation: Standard and Snapshot.
In Standard mode of collage creation the program adjusts the inserted object to the target image color range and smoothes the object's borders.
To create a photo collage in Corel Photo-Paint in Standard mode follow the instructions below:
- Step 1. Select an object for the photo collage with any mask tool. Make sure that the button Anti-aliasing in the Options palette of the chosen selection tool is deactivated (the box Anti-aliasing must not be pressed). Read more about mask tools here.
- Step 2. Copy the selection using the command Edit -> Copy.
- Step 3. Activate the background image and paste the copied object with the command Edit -> Paste -> Paste as New Selection.
- Step 4. Do not remove the mask!
- Step 5. Adjust the position of the pasted object on the photo using the Object Pick Tool. It's crucial to do it at this moment, because it won't be possible later on.
- Step 6. Call the command Mask -> Invert twice. That's the trick. Nothing changes in the appearance but it becomes possible to call the plug-in.
- Step 7. Call AKVIS Chameleon by selecting the command Effects -> AKVIS -> Chameleon.
- Step 8. Remove the mask with the command Mask -> Remove.


In Snapshot mode, the program does not only smoothes the borders of the inserted object and adjusts its color range, but it also makes the object semi-transparent, so that the texture and the relief of the primary image can be seen through.
Follow the instruction to process a photo in Snapshot mode in Corel Photo-Paint:
- Step 1. Select an object with any mask tool. Make sure that the button Anti-aliasing in the Options palette of the chosen selection tool is deactivated (the box Anti-aliasing must not be pressed). Read more about mask tools here.
- Step 2. Copy the selection using the command Edit -> Copy.
- Step 3. Activate the background image and call the command Effects -> AKVIS -> Chameleon (Take Snapshot).
- Step 4. Still on the background layer paste the copied object with the command Edit -> Paste -> Paste as New Selection.
- Step 5. Do not remove the mask!
- Step 6. Adjust the position of the pasted object on the photo using the Object Pick Tool. It's crucial to do it at this moment, because it won't be possible later on.
- Step 7. Call the command Mask -> Invert twice. That's the trick. Nothing changes in the appearance but it becomes possible to apply the plug-in.
- Step 8. Call the plug-in AKVIS Chameleon by selecting the command Effects -> AKVIS -> Chameleon (Use Snapshot).
- Step 9. Remove the mask with the command Mask -> Remove.


Attention! If the pasted object does not fit into the background you should adjust its size before copying it into the main picture.
