Walking the Dog
AKVIS OilPaint Video stylizes a video using an oil painting technique. You can keep the original colors in the video or play with the parameters of the Abstract Art group - for example, make the strokes bright and explosive. Turn an ordinary video into a fun trending clip!
The tutorial is made using Adobe After Effects. You can use any compatible video editor with AKVIS OilPaint Video plugin.
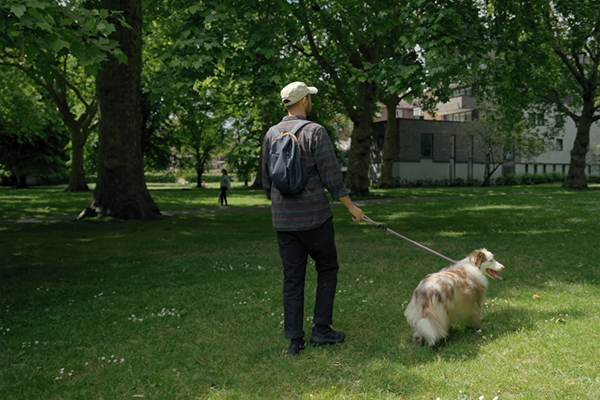
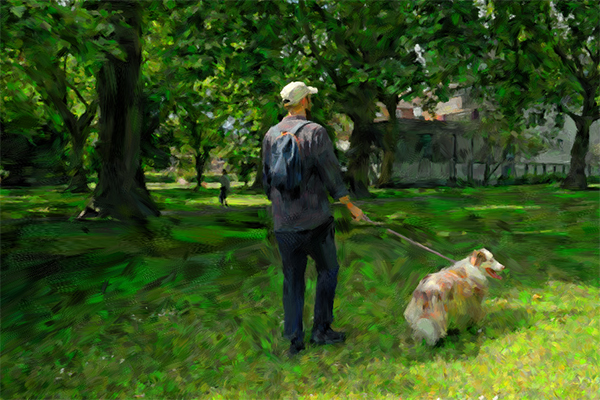
Video Frame: Oil Painting Effect
- Step 1. Run the video editor and open your video file (File -> Import -> File...). Here, place also a track, to which we will adapt the clip. Create a composition (File -> New Comp from Selection).

- Step 2. Next, taking into account the music, speed up or slow down some parts of the clip. We will speed up the second half of the video, where the music is fast. Right-click the track and select Time -> Enable Time Remapping from the context menu.
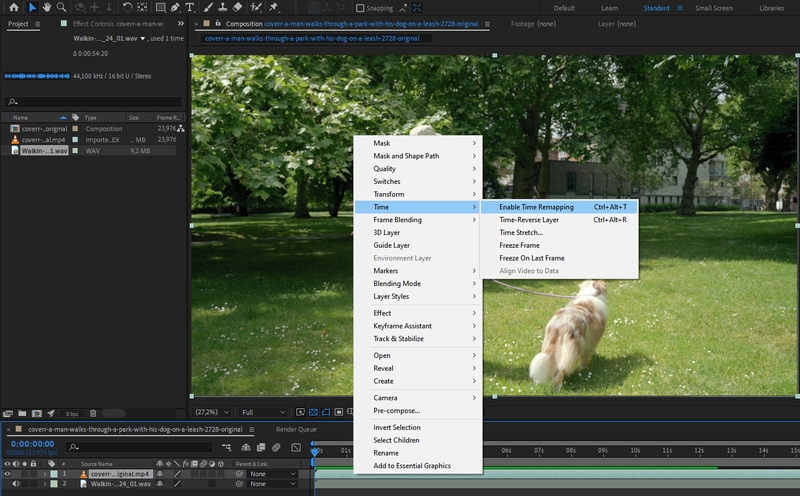
Under the track, you will see diamonds that mark the keyframes. Move them as shown in the screenshot.

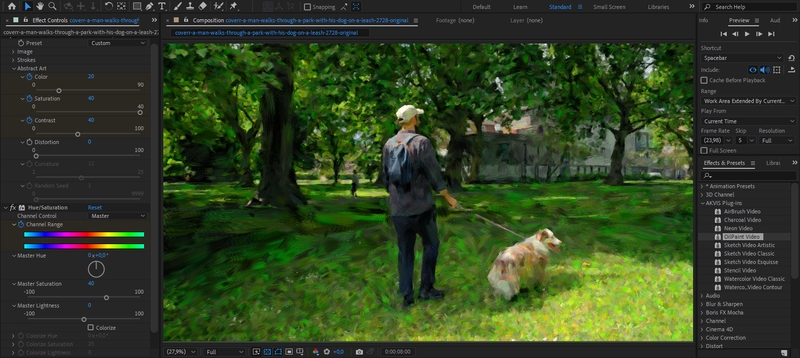
- Step 3. Apply the effect: in the Effects & Presets panel, select AKVIS Plug-ins -> OilPaint Video and drag it to the Timeline. The plugin will be applied with the default settings. The colors in the image are calm and subdued.
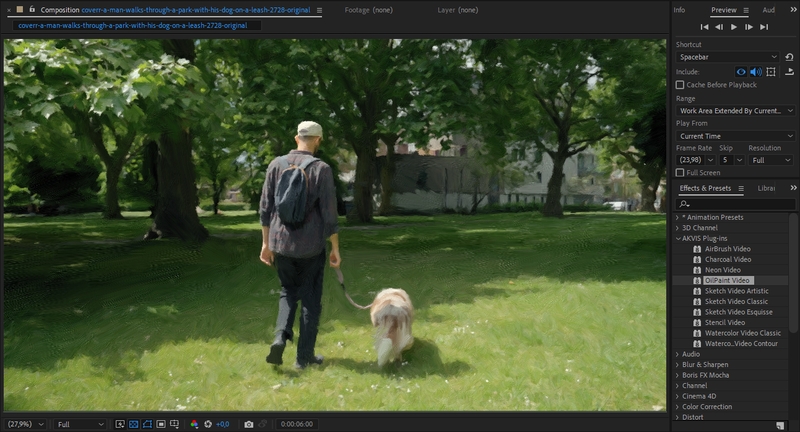
- Step 4. To get bright, noticeable brush strokes, increase the saturation with the Hue/Saturation filter and change the parameters of the Abstract Art group, which are responsible for color variations. Animate both effects by turning on the stopwatch and creating a keyframe with maximum values:
Color = 20;
Saturation = 40;
Contrast = 40.The video has become brighter and much more expressive.
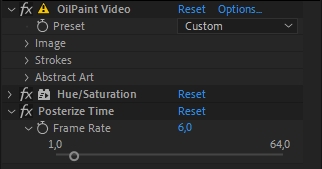
- Step 5. To remove the flickering of brush strokes, apply the Posterize Time filter with a value of 6 (Time -> Posterize Time).
- Step 6. Start video processing (Composition -> Add to Render Queue) and save the result.
So we can make our dog video even more cheerful and engaging!
