Texture
The Texture effect imitates a drawing on an uneven surface, such as corrugated paper, brick wall, metallic or ceramic coating, etc.

Original Image

Texture effect
The process can be divided into two stages:
- Adjustment of texture properties.
- Adjustment of texture application parameters.
It is possible to adjust the following texture properties:
- Texture. The program comes with a rich collection of textures. The most suitable patterns for this effect can be found in the Surface group of the Library.

The selected (current) texture is displayed in a square button which also lets opening the Library.

Click the square to see all the textures in the selected group. Select a texture with a click.

Hint: It is possible to apply your own textures. It can be any image in these formats: JPEG, BMP, TIFF, or PNG.
To load your own texture, select <Custom>... in the list of the Library.
- Scale (10-400). The parameter sets the size of the repetitive pattern. By default the Scale is set to 100%. The higher the value of the parameter, the larger the pattern is.

Scale = 20%
Scale = 200% - These are the following options that define the way the texture is generated:
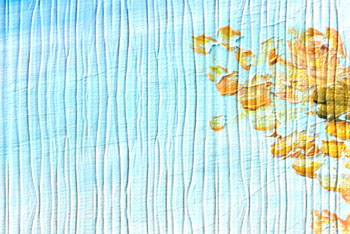
Repetition. When this option is selected, the texture is generated by simple repetition of the given pattern.

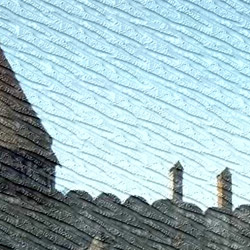
RepetitionReflection. When this option is selected, the texture is generated by repetition of the given pattern. The difference from the Repetition mode is that the ends of the patterns are joined at mirror reflection.
ReflectionAlignment. This option helps when the initial texture has an uneven pattern. If we apply the texture as it is, we will see texture joins. To avoid it, we should activate the option Texture Alignment.
Alignment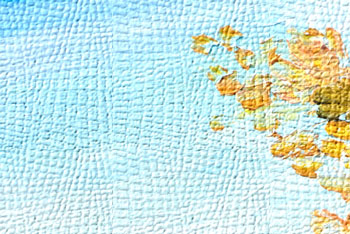
Other option
It is possible to adjust the following texture appication parameters:
- Light Source. Use the dagger on the ball to set the probable light source during the shooting. The position of the light source influences the texture wrapping. To change the position of the light source, click in the ball.

- Brightness (0-150). This parameter changes the texture brightness. The brightness of the original texture is 90. The higher the value of the parameter, the lighter the texture is. As a result, the output image gets lighter.

Brightness = 10
Brightness = 90 - Embossing (0-150). This parameter allows a texture to be embossed. At 0, the texture is flat. As you increase the value of the parameter, the texture gets more prominent.

Embossing = 30
Embossing = 150 - Reveal Texture (0-40). The parameter defines to what extent the texture is shown through the image. The higher the value, the more distinct the texture is and the less visible the original image is. A higher value of the parameter also increases the influence of the Brightness parameter and the texture contrast.

Reveal Texture = 10
Reveal Texture = 35 - Distortion (0-50). This parameter defines the clearness of the resulting image. The higher the value of the parameter, the more distorted and blurred the images is.

Distortion = 5
Distortion = 50
Hint: Most of the processing time is taken by the first stage (texture generation). Therefore, it is recommended to adjust the texture's properties at first. Then you can try different settings for texture application parameters.
ArtSuite v. 21.1 - Free 10-day Trial
