Texture
L’effetto Texture imita un disegno su una superficie irregolare, come cartone, muro, stoffa, ceramica o rivestimento metallico, ecc…

Immagine originale

Effetto Texture
Il processo può essere suddiviso in due fasi:
- Modifica delle proprietà della texture.
- Regolazione dei parametri di applicazione della texture.
1. Modifica delle proprietà della texture:
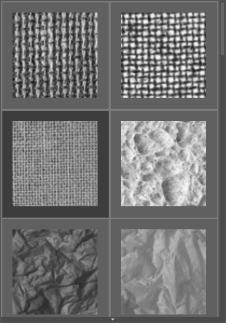
- Texture o trama. Il programma viene fornito con una ricca collezione di texture. I modelli più adatti per questo effetto possono essere trovati nel gruppo Superfici.

La texture scelta (quella corrente) viene visualizzata in un pulsante quadrato, che permette anche l'apertura della Libreria.

Per aprire la Libreria con tutte le texture del gruppo selezionato, fare clic con il tasto sinistro del mouse sulla casella del campione. Ora è possibile selezionare quella desiderata cliccando su di essa.
Nota: È possibile anche applicare le proprie texture (immagini JPEG, BMP, TIFF o PNG).
Per caricarla, in AKVIS ArtSuite, selezionare <Texture utente>… nell'elenco.
- Scala (10-400). Il parametro imposta la dimensione del motivo. Per impostazione predefinita la Scala è impostata al 100%. Maggiore è il valore più grande è il disegno.

Scala = 20%
Scala = 200% - Ci sono le seguenti opzioni che definiscono il modo in cui la tela viene creata:
Ripetizione. Quando questa opzione è selezionata la texture viene creata dalla semplice ripetizione di un determinato motivo.

L’opzione "Ripetizione" è selezionataRiflesso. Quando questa opzione è selezionata, la texture viene generata dalla ripetizione di un determinato disegno. La differenza dalla modalità di Ripetizione è che le estremità dei motivi sono unite e si riflettono a specchio.

L’opzione "Riflesso" è selezionataAllineamento. Questa opzione aiuta quando la texture iniziale ha un trama irregolare. Se si applica la texture così com'è, si vedrà dove il motivo si unisce. Per evitare questo è opportuno selezionare l’opzione Allineamento texture.

L’opzione "Allineamento" è selezionata
2. Regolazione dei parametri della texture applicata:
- Fonte di luce. Utilizzare il cursore "+" sulla sfera per impostare la fonte di luce. La sua posizione influenza la creazione della trama. Per modificare la posizione della sorgente luminosa cliccare con il tasto sinistro del mouse sul punto desiderato della sfera, il cursore "+" automaticamente si sposterà.

- Luminosità (0-150). Il parametro cambia la luminosità della texture. Per impostazione predefinita la luminosità della texture è 90. Maggiore è il suo valore più chiara è la trama e di conseguenza l’immagine risulterà schiarita.

Luminosità = 10
Luminosità = 90 - Rilievo (0-150). Il parametro consente di dare rilievo alla texture. A 0 la texture è piatta, aumentandolo la trama si accentua.

Rilievo = 30
Rilievo = 150 - Evidenzia trama (0-40). Il parametro definisce in che misura la trama è visibile attraverso l'immagine. Più alto è il valore, maggiore è la visibilità della trama e minore l'immagine originale. Un suo valore elevato influenza la Luminosità ed il Contrasto della texture.

Evidenzia trama = 10
Evidenzia trama = 35 - Distorsione (0-50). Il parametro definisce la chiarezza dell'immagine. Maggiore è il valore più distorta e sfocata risulterà l’immagine.

Distorsione = 5
Distorsione = 50
Suggerimento: La maggior parte del tempo di elaborazione viene presa dalla prima fase (la generazione della texture). Pertanto è consigliabile, prima regolare le proprietà della texture, poi si potranno provare diverse impostazioni regolando i parametri di applicazione della texture.
ArtSuite v. 21.1 - 10-giorni di prova gratuita
