Print Images in AKVIS MultiBrush
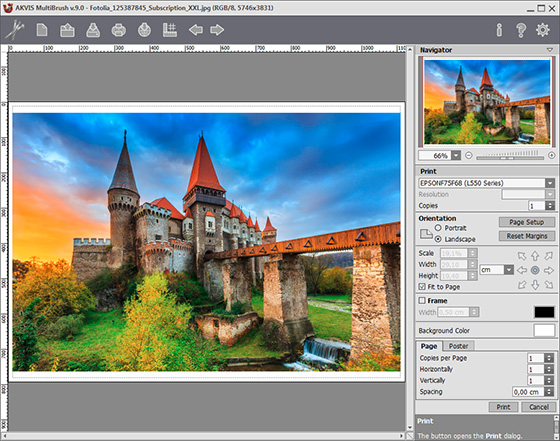
In the standalone version of AKVIS MultiBrush you can print the image. Press the button  to open the Print options.

Print Options in AKVIS MultiBrush
Adjust the parameters appearing in the Settings Panel:
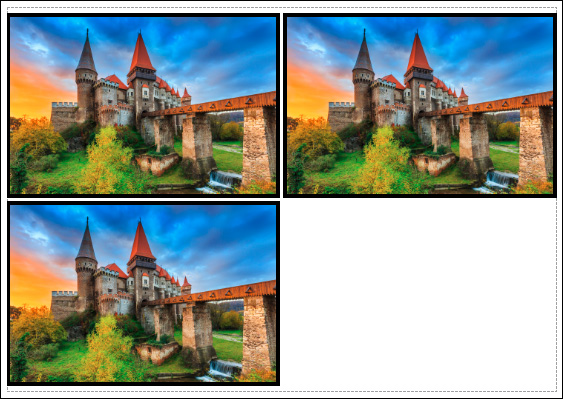
- Copies per Page. It lets you specify the number of copies of the image on one page.
- Horizontally and Vertically. These parameters indicate the number of rows and columns for the copies of the image on the page.
- Spacing. The parameter sets the margins between the copies of the image.
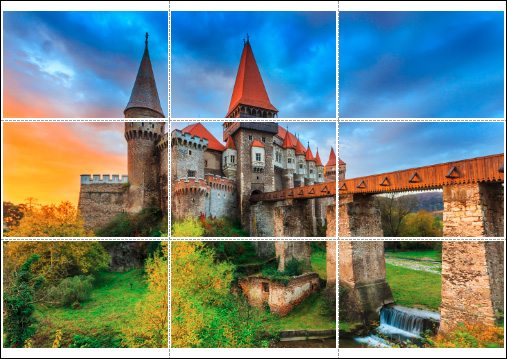
- Pages. If the check-box is enabled, you can specify the maximum number of the pages in which the image will be divided. The image scale will be adjusted to fit this number of the sheets. If the check-box is disabled, the program will automatically select the optimal number of the pages in accordance with the actual size of the image (scale = 100%).
- Glue Margins. If the check-box is enabled, you can adjust the width of the padding for bonding sheets. Margins will be added to the right and to the bottom of each part.
- Show Numbers. With the enabled check-box, a sequence number of each part, by a column and a row, will be printed in the margins.
- Lines of Cut. Activate the check-box to display the cut marks in the margins.
Choose a printer from the list of available devices, set the desired resolution, as well as the number of copies to print.
In the Orientation group, set the position of paper: Portrait (vertically) or Landscape (horizontally).
Click the Page Setup button to open a dialog box to choose the size of the paper and its orientation, as well as the print margins.
Press the Reset Margins button to return the page margins to the default size.
Change the size of the printed image adjusting the parameters Scale, Width, Height and Fit to Page. These parameters have no effect on the image itself, just on the print version. You can change the size of the printed image by entering any value in %, or by entering new values in Width and Height.
To adjust the size of the image to the paper size, select Fit to Page.
Move the image on the page with the mouse or align it using the arrow buttons.
You can activate Frame for the image and adjust its width and color.
Choose the Background Color by clicking on the color plate.
In the Page tab, you can adjust printing of the multiple copies of the image on a single sheet.

Print Page
In the Poster tab, it's possible to customize printing of the image on multiple pages for the subsequent junction into a large picture.

Print Poster
To print the image with the chosen parameters, press the Print button.
To cancel and close the printing options click on Cancel.
Click the Properties... button to open a system dialog box that enables you to access the advanced settings and send the document to print.