Tools in AKVIS Decorator
The tools in the program are divided into the groups: selection, post-processing, and additional tools. The tools' parameters are shown in the Settings Panel or in a pop-up box after right-clicking in the image window.

Toolbar
Hint:
Use the buttons  /
/ to undo/redo the operations made with the tools
 ![]() ,
, ![]() ,
, ![]() ,
, ![]() ,
, ![]() ,
, ![]() ,
, ![]() ,
, ![]() .
.
Selection Tools:
- Rectangular Selection
 lets selecting rectangular and square areas. Drag over the area you want to select with the left mouse button.
- Elliptical Selection
 lets selecting elliptical or circular areas.
- Lasso
 allows creating freehand selections. Draw a selection line around an object. When you release the left mouse button, the contour will be closed, the final point will be connected to the start one.
- Polygonal Lasso
 lets creating a freehand selection from straight segments. Move the cursor and left-click on each point, the program will automatically draw a straight line between two points. To close the contour bring the cursor to the first point or make a double-click in the final point.
Feather (0-250). The parameter lets blurring edges of the selection.
Anti-aliasing. The check-box lets smoothing the jagged edges of the selection. Enable this option before creating a selection!
From Center. The check-box lets creating a selection (a rectangle or an ellipse) using a start point, where the cursor is, as a center. Otherwise, selections are created from a corner.
Style. You can specify a size of a selection:
Normal. The size of a selection is determined by dragging the cursor.
Fixed Size. This option lets you create a selection with exact dimensions (height and width, in pixels).
Fixed Ratio. The ratio of height and width of a selection remains fixed.
- New
 . When creating a new selection, the previous selection disappears.
- Add
 . The selection area will be increased by adding new fragments. The mode is activated by holding the Ctrl key.
- Subtract
 . This mode lets removing the part of the selection. The mode is activated by holding the Alt key.
- Intersect
 . This mode lets keeping only the intersection area of the selections.
The Quick Selection tool ![]() selects an object by analyzing colors of neighboring pixels. Draw with this brush over the image, and the selection expands, automatically finding edges and filling areas.
selects an object by analyzing colors of neighboring pixels. Draw with this brush over the image, and the selection expands, automatically finding edges and filling areas.
Size. It's the diameter of the brush. All similar colors will be selected, considering the edges of the objects and the value of the Tolerance parameter.
Tolerance. When the value of this parameter is increased, more colors are included in the selected area. If it is set to 0 the brush selects only the areas where it's applied.
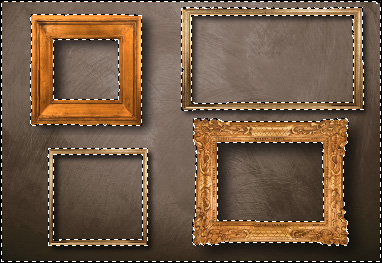
Using Quick Selection Tool
The standard selection tools are intended for creating geometric shapes and freeform selections.
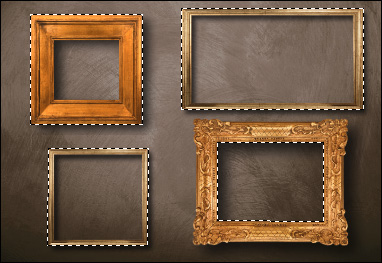
Using Rectangular Selection
Use the following tools options to adjust the selection:
Selection Mode defines the result of the interaction of selections:
Click on  and choose a command (what you want to do with the selection): Invert Selection (Ctrl+I) or Deselect (Ctrl+D).
The button ![]() activates the Eraser tool to edit a selection.
activates the Eraser tool to edit a selection.
- Smudge
 (Home Deluxe/Business). The tool is used to manually refine the image by removing paint and texture irregularities.
The tool's parameters:
Size (1-300). Diameter of the tool.
Hardness (0-100). The amount of blurriness of the outer edge. The higher the value, the harder the brush edge is.
Strength (1-100). The intensity of smearing the paint in the brush stroke. The higher the value, the more color is smeared.
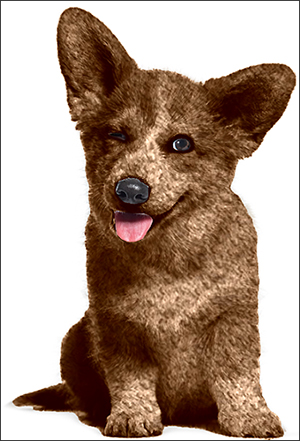
Before Using the Smudge Tool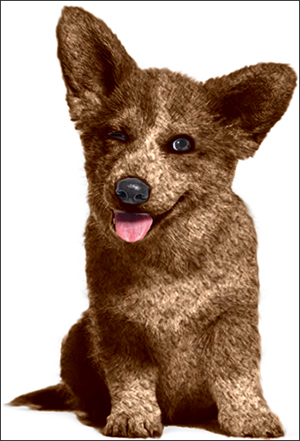
Using the Smudge Tool - History Brush
 (Home Deluxe/Business). The tool partially or fully restores the area to its original state.
The tool's parameters:
Size (1-1000). The maximum width of a line drawn with the brush.
Hardness (0-100). The blurriness of the tool's edges. The less the value the more blurry the tool's edges become. At value 100% the border between the brush's edges and the background is very distinct; at lower values the transition between these areas is smoother.
Strength (1-100). The degree of restoration to the original state. At lower values there will be less restoration and more blending with the effect; at values near 100% the original condition will be restored more completely.

Before Using the History Brush
After Using the History Brush
Additional Tools (available on both tabs, for all licenses):
- Hand
 lets you scroll the image when it does not fit within Image Window at the desired scale. To use it click on the button, bring the cursor over the image, and while keeping the left mouse button pressed move in the desired direction. The hot-key is H.
Double-clicking on the tool’s icon on the Toolbar makes the image fit the window.
- Zoom
 lets you change the image’s scale. To zoom in left click on the image. To zoom out left click with Alt on the image. The hot-key is Z.
Double-clicking on the tool’s icon makes the image scale to 100% (actual size).
- Crop
 (in the standalone version). The tool lets you cut off unwanted areas in the image. The tool is useful when you want to improve the image composition, straighten a crooked photo, turn a horizontal photo into a vertical one and contrariwise.
Note: This tool is applied to the original image! Use it before the effect.
You can change the crop area by dragging the sides and the angles of the bounding frame.
Use the buttons in the Settings Panel to control the tool:
To apply the result and remove the areas outside the frame, press OK or use Enter. To cancel the operation and exit the tool, press Cancel or use the Esc-key. To restore the original area keeping the tool active, press Reset button.
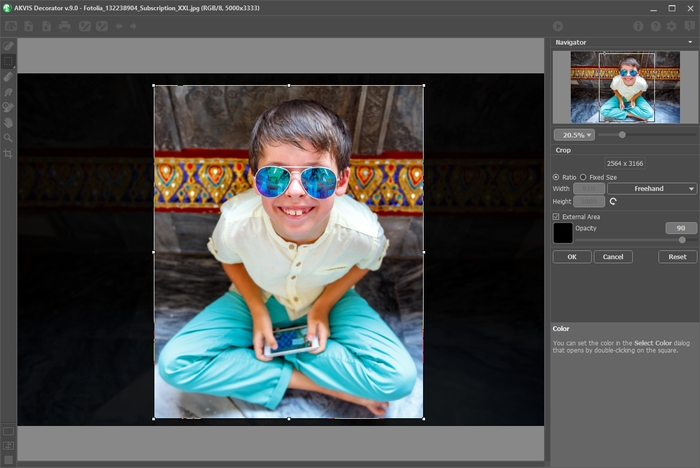
Crop ImageAdjust the crop parameters:
You can choose the size of the crop rectangle using the Ratio or Fixed Size options.
If the External Area check-box is enabled, you can change the color and opacity of the outer parts.
