A Little Girl
Die deutsche Version wird bald veröffentlicht werden.
The author of the tutorial is David Kelly.
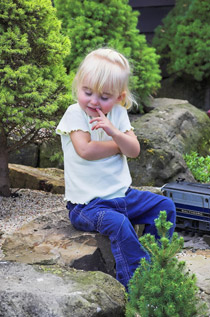 |
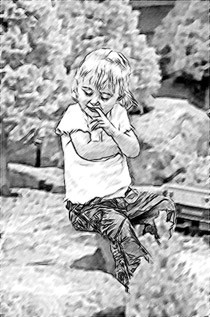 |
| Source image | Result |
This tutorial describes how to use AKVIS Sketch plug-in in conjunction with AliveColors to create a realistic looking black and white pencil sketch from an existing colour photograph.
If your favourite image editing program is "plug-in" compatible, to add interest to this tutorial why not download Image 01, the original colour photograph, plus AKVIS Sketch's unrestricted free ten-day trial and try out the photo with Sketch, inputting your own settings then comparing the tutorial's final pencil sketch result with your own.
Download the photo by right clicking it then selecting Save Picture As. Save it to your hard drive, remembering where you saved it. To go to the downloads page for AKVIS Sketch’s unrestricted free ten-day trial, please left click here.
- Step 1. Open the original photo in AliveColors.
- Step 2. Use Polygonal Lasso to carefully select the young girl.
-
Step 3. Invert the selection, Ctrl+ShiftT+I. The selected background and foreground image area can now be edited separately from the young girl. See the image below.
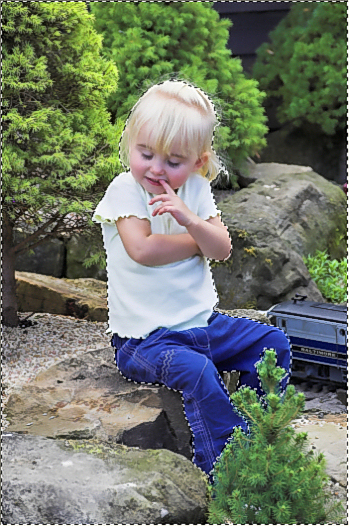
Image 02, selection inverted -
Step 4. Select Effects -> Blur -> Gaussian Blur, then enter this setting, Radius = 2.0.
Click OK to apply the blur effect to the image.
Note: Unlike the human eye AKVIS Sketch does not divide photo details into important and less important areas. All clear details are drawn sharply. Depending on the original photograph there could be times when not enough separation occurs between the principal subject and less important background or foreground objects. To avoid this apply a Gaussian "blur" effect to these areas before running Sketch. This helps with subject separation in the final sketch.
-
Step 5. Remove the selection, Ctrl+D. See Image 03 below.
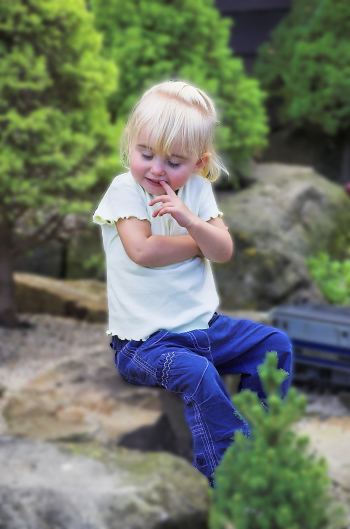
Image 03, selection removed - Step 6. Call AKVIS Sketch from within Effects -> AKVIS -> Sketch.
-
Step 7. Left click Sketch "Run" button
 to apply its default settings.
-
Step 8. Switch between the Before and After views. In this example, having previously prepared the photo in AliveColors, applying Sketch's default settings has created an acceptable black and white pencil sketch. See Image 04 below.
If the pencil sketch isn't to your liking play about with Sketch's Effects and Strokes slider controls until you are happy with the result. Remembering of course to left click Sketch's "Run" button after each adjustment to apply that changed parameter value to the image.
-
Step 9. When you're satisfied with how the pencil sketch looks, left click Sketch's "Apply" button
 . This closes Sketch to reveal AliveColors workspace containing your finished black and white pencil sketch.
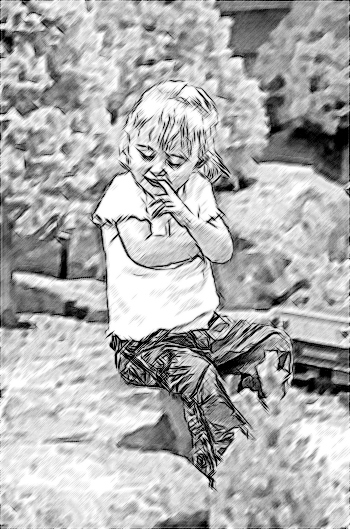
Image 04, the final pencil sketch - Step 10. Name then save the completed black and white pencil sketch in your preferred non-lossy image file format.

Image 01, original photograph, © D. Kelly
Although this example was created with AKVIS Sketch plug-in used in conjunction with AliveColors, similar results can be obtained with other plug-in compatible image-editing software packages.
Conclusion
AKVIS Sketch is a creative, addictive plug-in that will enable you to create your own personal, quality artwork from colour or black and white photographs with the minimum of effort.
