A romantic photo
Colorization of a simple black and white photo won't take long. You will need to outline every object you want to colorize with the color you've chosen for it. The vital thing is to choose the right colors for the photo to look natural. You will love the result!
-
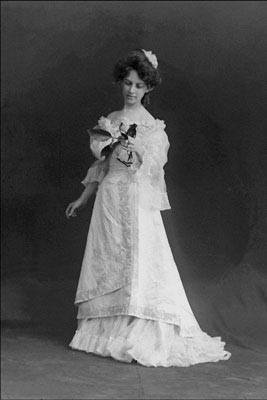
Step 1. Open a black and white photo of a girl with a lilac in your photo editor.
- Step 2. Call the plug-in AKVIS Coloriage AI. For this purpose in AliveColors select the menu item Effects –> AKVIS –> Coloriage AI; in Adobe Photoshop or in Adobe Photoshop Elements select the item Filter –> AKVIS –> Coloriage AI; and in Corel Photo-Paint - the menu item Effects –> AKVIS –> Coloriage AI.
-
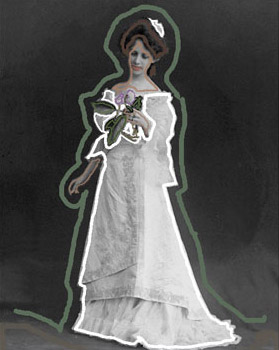
Step 3. Use the Pencil tool
 to select a color and to draw an outline with the chosen color in the appropriate object.
Do not forget to assign a color to the small details, for example, to the stem and the petals of the lilac in the girl's hands. Otherwise, they will be colorized into the color of the adjacent areas, in this case - the color of the dress.
Select colors for the lips, skin and hair from the Color Library.
-
Step 4. Press the button
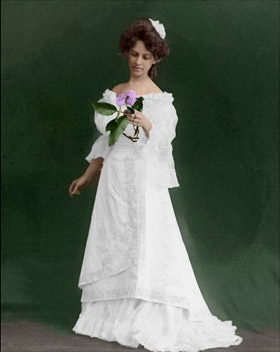
 . The colorization result will be shown in the After tab.
-
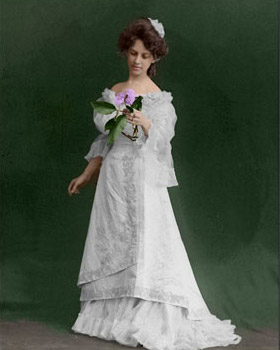
Step 5. The colorized photo looks good, but we are not happy with the color of the dress. We set a white color for it, but it came out dirty gray. It happened because the program adjusts the chosen color to the grayscale of the original image.
To paint the dress white we should change the brightness range of the white strokes.
Select the white color from the Color / Swatches palette (or click with the Eyedropper tool
 on one of the white strokes on the image), then move the black marker on the lower gradient under the Color Library to the right.

Activate the Magic Tube
 tool and click on any stroke of the dress. Now the strokes have the same color but a new brightness range.
-
Step 6. Press the button . Now the dress has a white color indeed. As we didn't set a very light color for the black marker, the folds and shades are well seen.
-
Step 7. Press the button
 to apply the colorization result to the picture.
 |
 |
Coloriage AI v. 15.7 - 10日間の評価期間
