Plugins in PSE unter Mac installieren
Befolgen Sie die Anweisungen, um AKVIS-Plugins in Photoshop Elements unter Mac zu installieren.
Methode 1.
Kopieren Sie das Plugin (zB AKVIS Sketch PlugIn) von der dmg-Datei in den Plug-Ins Ordner von Photoshop Elements.
- Adobe Photoshop Elements 2024:
in Application/Adobe Photoshop Elements 2024/Support Files/Plug-Ins - Adobe Photoshop Elements 2023:
in Application/Adobe Photoshop Elements 2023/Support Files/Plug-Ins - Adobe Photoshop Elements 2022:
in Application/Adobe Photoshop Elements 2022/Support Files/Plug-Ins - Adobe Photoshop Elements 2021:
in Application/Adobe Photoshop Elements 2021/Support Files/Plug-Ins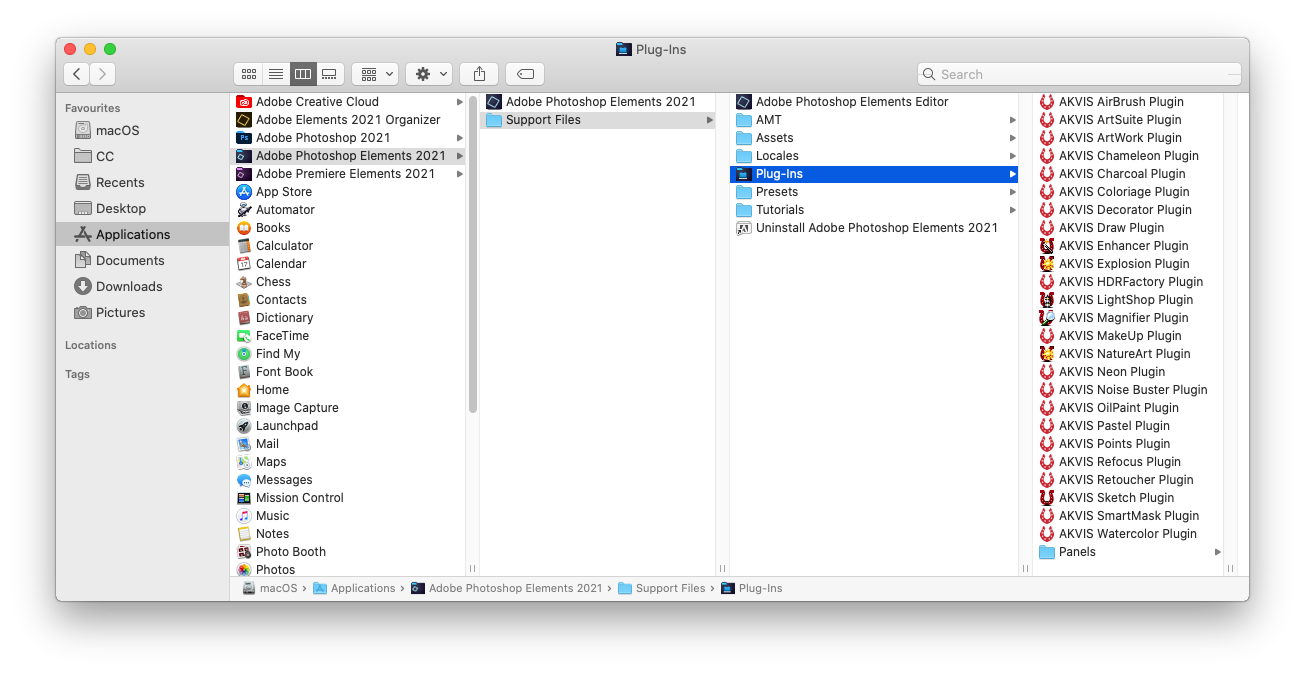
- Adobe Photoshop Elements 2020:
in Application/Adobe Photoshop Elements 2020/Support Files/Plug-Ins - Adobe Photoshop Elements 2019:
in Application/Adobe Photoshop Elements 2019/Support Files/Plug-Ins - Adobe Photoshop Elements 2018:
in Application/Adobe Photoshop Elements 2018/Support Files/Plug-Ins - Adobe Photoshop Elements 15:
in Application/Adobe Photoshop Elements 15/Support Files/Plug-Ins - Adobe Photoshop Elements 14:
in Application/Adobe Photoshop Elements 14/Support Files/Plug-Ins
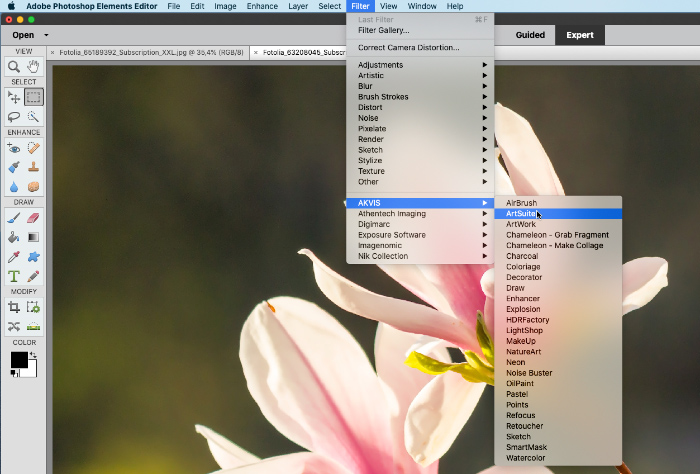
Starten Sie Photoshop Elements neu und rufen Sie das Plugin auf: Filter -> AKVIS -> Sketch.
Methode 2.
Installation über das Menü:
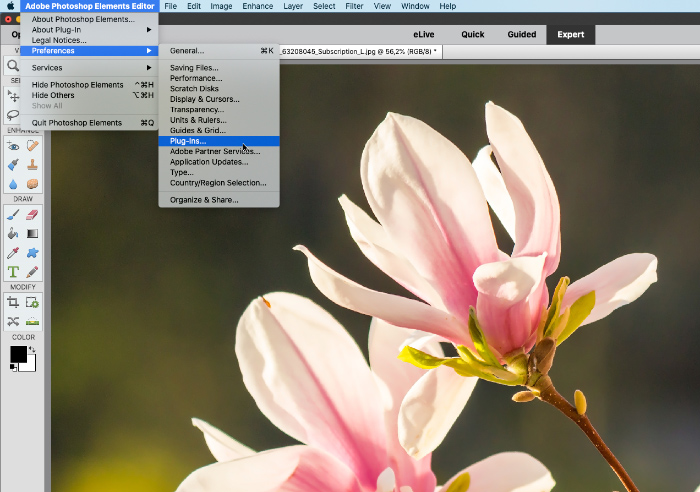
- Wählen Sie im Editor-Menü Einstellungen -> Plug-Ins... aus.
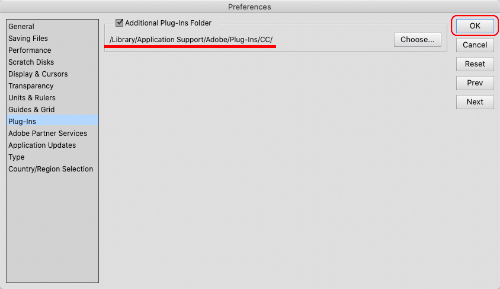
- Aktivieren Sie das Kontrollkästchen Zusätzlicher Zusatzmodule-Ordner und klicken Sie anschließend auf die Schaltfläche Auswählen....
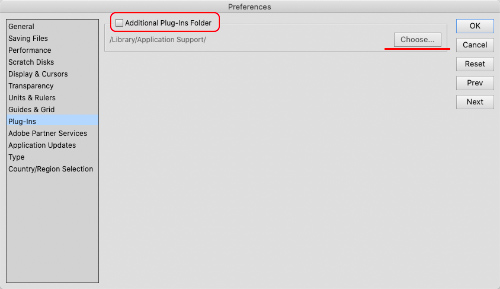
- Legen Sie den Ordner mit AKVIS-Plugins fest, z.B. Library/Application Support/Adobe/Plug-Ins/CC. Klicken Sie auf die Schaltfläche Auswählen.
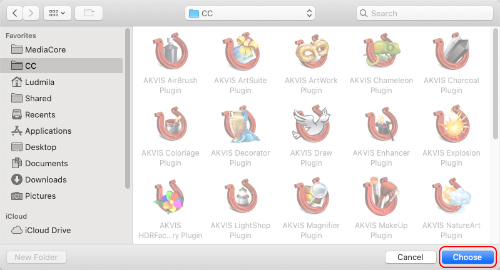
- Klicken Sie auf OK, um die Änderungen zu speichern.
- Starten Sie Photoshop Elements neu und rufen Sie das Plugin auf: Filter -> AKVIS -> Sketch.
