A technique of reiterative colorization
The example has been made by S.I Serikov in Adobe Photoshop.
This tutorial describes a method of colorization with AKVIS Coloriage where a photo is colorized twice: first the whole photo, then certain parts of it.
The author applied this technique to colorize a photo of a young girl.
 |
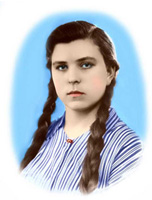 |
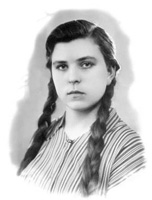
Below you can see two photos.
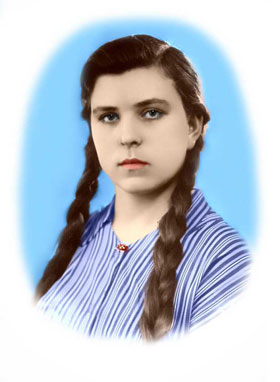
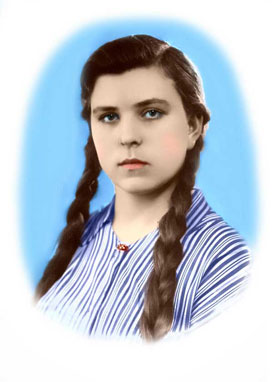
On the left is the photo of a girl after the first colorization with AKVIS Coloriage and a touch-up in Adobe Photoshop (creation of the smooth blue oval with the Brush tool).
On the right is the same portrait after the second processing with the AKVIS Coloriage plug-in and the use of the Replace Color command. On the right photo the girl's complexion is more vivid: the cheeks are rosy and the eyes are bright. Besides, the Replace Color command allowed the light color of the stripes on the dress to be replaced with white.
-
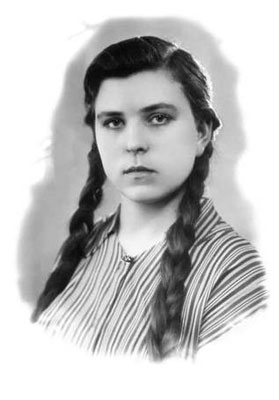
Step 1. Open the portrait in your photo editing software and call the AKVIS Coloriage plug-in.
-
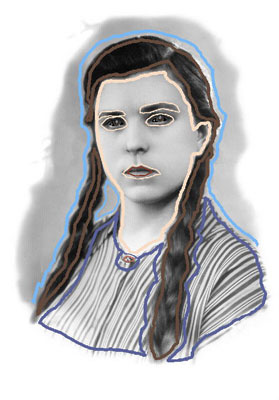
Step 2. Assign a color for every object by drawing color strokes.
-
Step 3. Start the colorization process by pressing the button
 .
.
- Step 4. Apply the result of the colorization to the picture.
- Step 5. Use the Brush tool in Adobe Photoshop to expand the background to form a regular oval.
- Step 6. Call the AKVIS Coloriage plug-in once again.
-
Step 7. Activate the Keep Color Pencil
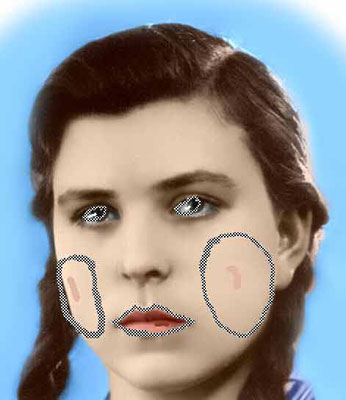
 and draw an outline around the eyes of the girl in such a way that it includes a part of the pupil and a part of the white of the eye. You should take into account that only the tones of the average luminosity will be tinted, while the dark and light areas will stay almost the same.
Activate the Eyedropper tool
 and select a light blue color, as if the girl's eyes reflected the color of the sky or of the walls of the photographic studio.
Activate the Pencil tool
 and draw strokes inside the "keep-color" outlines. You should remember that the larger the stroke and the closer it is to the "keep-color" outline, the sharper are the borders of the colorized area.
- Step 8. Bearing these tips in mind we will draw closed contours on the cheeks and draw color strokes inside of the contours with the color chosen from the Color Library. We have chosen a rosy color from the group "People - Skin".
-
Step 9. To touch up the portrait, we tint the lips a little bit.
-
Step 10. Start the colorization process. If you want to change something, you can go back to the Before tab and choose other colors, increase or reduce the thickness of the strokes and their shape, or change the shape of the "keep-color" contour.
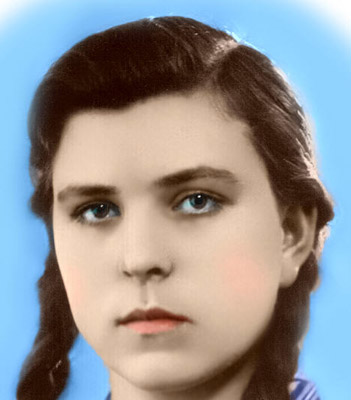
- Step 11. Apply the result to the picture.
-
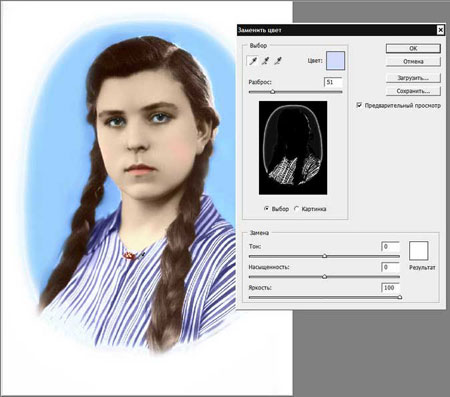
Step 12. Finally, we use the Replace Color tool to whiten the stripes of the dress:
- Call the command Image - Adjustments - Replace Color in Adobe Photoshop;
- Click with the Eyedropper on a stripe of the dress that should become white;
- Adjust the Fuzziness parameter in such a way, that the Selection window shows only the dress's stripes;
- Move the Lightness slider to the right end.
- Press the button OK to make the stripes white.
-
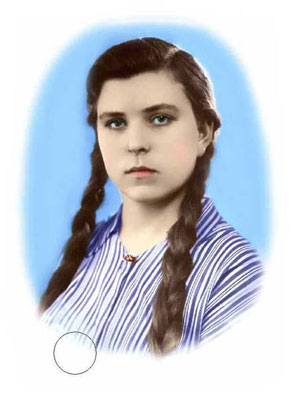
Step 13. Restore the "spoiled" blue contour with the History Brush of Adobe Photoshop setting the hardness to 0.
Follow the instructions below:
