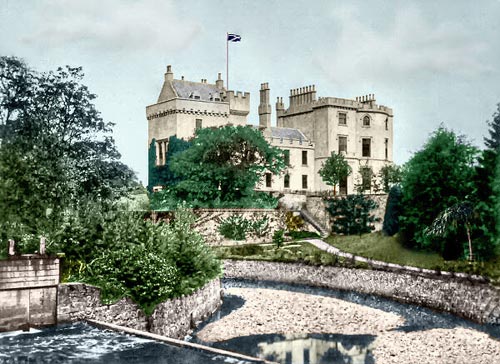
A Castle in Scotland: colourizing an old photo
La version française sera bientôt affichée.
In this tutorial David Kelly colourizes a photo of a castle in Scotland. The copyright for the original photo is held by the University of Strathclyde, Glasgow, and is used with their permission.
FOREWORD
Previous photographs colourized using AKVIS Coloriage plug-in in conjunction with AliveColors were typical head and shoulder portraits containing few detailed areas, which made colourizing straightforward.
Using photo editor on its own it was possible with selections, layers, and masks, etc., to successfully colourize photographs that contained small, detailed areas. Could using Coloriage to colour this type of image produce acceptable results? To find out I used an 1870 sepia-toned photograph of a stately Scottish family home, Crossbasket House.
 |
 |
THE ORIGINAL PHOTOGRAPH
The original 1870 sepia-toned Crossbasket House photograph is shown below, Image 01.
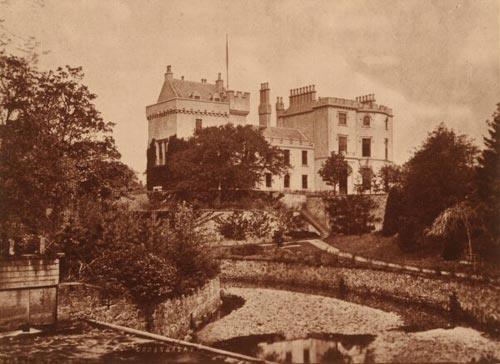
Image 01. Crossbasket House, 1870. Photo by Thomas Annan
Copyright © University of Strathclyde
HOW IT WAS DONE
The steps below explain how AliveColors, in conjunction with AKVIS plug-ins, Noise Buster and Enhancer, was used to convert the original sepia-toned photo into a black and white image suitable for colourizing.
- Step 1. Original photo loaded into AliveColors.
- Step 2. Reduced noise levels: Effects -> AKVIS -> Noise Buster. Noise Buster's one-button-click Automatic Filtering feature was used to reduce the photo's noise levels.
- Step 3. Converted to grayscale: Image -> Mode -> Grayscale.
- Step 4. Increased colour depth: Image -> Mode -> 16 bits/channel.
- Step 5. Increased brightness and contrast: Image -> Adjustment -> Brightness/Contrast.
- Step 6. Enhancer was used to improve detail: Effects -> AKVIS -> Enhancer.
THE BLACK & WHITE PHOTOGRAPH
The editing steps 02 to 06 produced the black and white photograph below, Image 02.
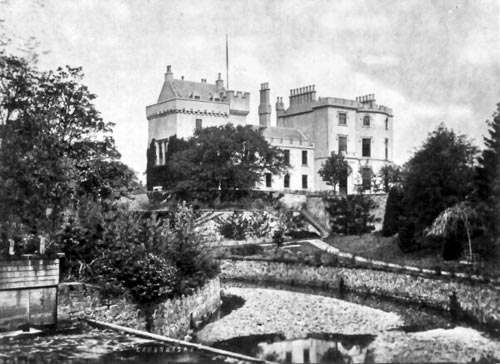
Image 02
- Step 7. AliveColors tools were used to create then add a new flagpole.
-
Step 8. Clone Stamp tool
 was used to remove the Crossbasket name, just visible bottom-middle-left.
- Step 9. AKVIS Coloriage plug-in was called from: Effects -> AKVIS -> Coloriage. Next, suitable coloured strokes were drawn around the photo's various sections. Image 03 below shows how the black and white photo, complete with its new flagpole looked after the strokes were added. For a comprehensive Coloriage tutorial please click here.
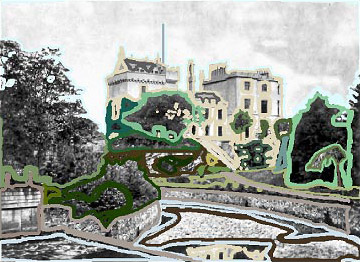
Image 03
-
Step 10. The button
 located top-left was clicked to preview the finished coloured version inside Coloriage's workspace. See Image 04.
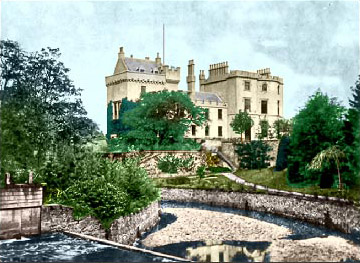
Image 04
- Step 11. After previewing, and being happy with the results, the stroke file was named and saved. It could now be reloaded at any time and changed as necessary.
-
Step 12. Finally the button
 , top-right, was clicked to colourize the black and white photo. This closed the Coloriage plug-in to reveal editor workspace that now contained the newly colourized Crossbasket House photograph.
- Step 13. AliveColors tools in conjunction with layers were used to improve the blue sky plus fix a few other slight imperfections, add a couple of wispy clouds, and as a finishing touch a new flag was attached to the house's flagpole.
- Step 14. Enhancer was used to improve overall detail levels.
- Step 15. Finally the house's part reflection seen in the water, bottom-middle-right, had its colour saturation level reduced.
THE COMPLETED PHOTOGRAPH
The edited, colourized photo is shown below.
