Corrección de la exposición
En el siguiente tutorial David Kelly nos muestra cómo corregir una foto tomada con una exposición incorrecta.
A medida que el sitio web de AKVIS ya contiene tutoriales de usuario Enhancer integrales, este artículo se centra en los resultados obtenidos cuando tres fotografías con problemas de exposición fueron procesadas mediante AKVIS Enhancer.
Las fotos
Las fotografías utilizadas como ejemplos fueron tomadas con una cámara digital compacta de 2 mega píxeles, debido a sus evidentes problemas de exposición eran una buena opción para demostrar la capacidad y la mejora de recuperar detalles ocultos de la imagen. Enhancer se usa junto con Corel PaintShop Pro 9. Como se puede ver, las fotos originales y sus equivalentes procesados por Enhancer son notablemente diferentes.


AKVIS Enhancer + PaintShop Pro 9
Aquí está una captura de pantalla de Enhancer cargado en PaintShop Pro 9:
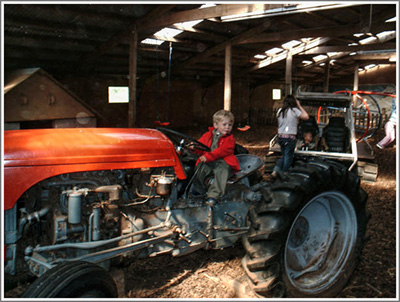
Imagen 1, Enhancer + PaintShop Pro 9
AKVIS Enhancer + AKVIS Retoucher
La fotografía original del tractor (Imagen 02), después de haber sido procesado con Enhancer también se recogen utilizando la herramienta de clonación AKVIS Retoucher que también se utiliza para eliminar la fecha de las dos fotos de las vacaciones, además de sustituir la esquina faltante inferior derecha de la fotografía de la cueva de mar de Goa.
La foto original del tractor más la versión Enhancer
Antes de utilizar Enhancer y PSP9, use el filtro de la Cámara Digital con Eliminación de ruidos. Este filtro se aplica a la foto original del tractor para disminuir sus niveles de ruido. Para ver la versión ya procesada con Enhancer haga clic en la imagen 03.
Note: AKVIS ha lanzado su propio producto de reducción de ruido digital, Noise Buster, para comprobarlo, por favor haga clic here.
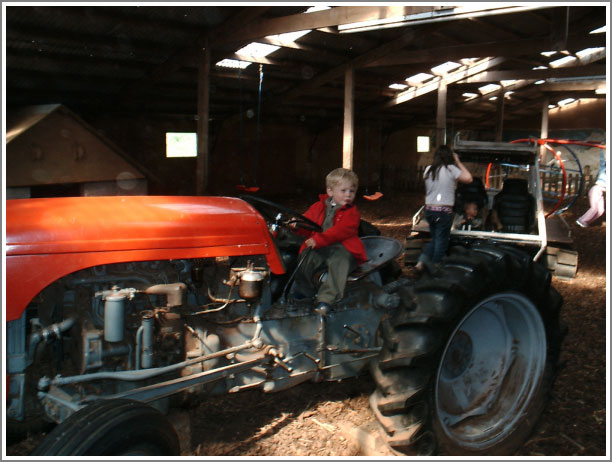
Imagen 02, Versión original
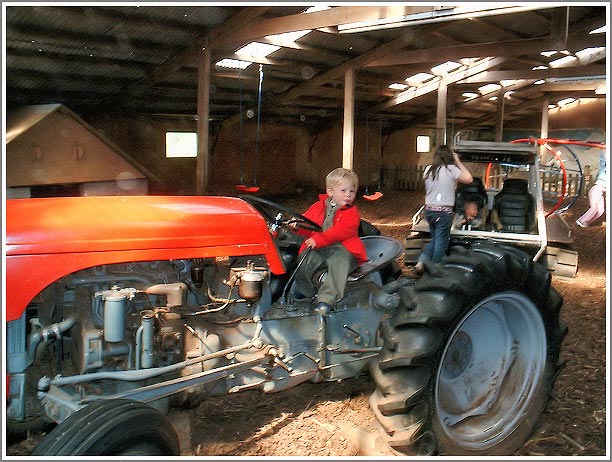
Imagen 03, Versión Enhancer
Haga clic en una imagen para ver una versión más grande
Observe en la imagen 03, de la versión Enhancer, previamente se han revelado detalles ocultos, particularmente en las áreas subexpuestas de la foto. Lamentablemente, con esta particular instantánea hay un inconveniente: ¡han aparecido luz de halos grises y manchas blancas! En su mayor parte invisible hasta que Enhancer utilizó su magia, ya están bastante evidentes. Afortunadamente AKVIS Retoucher está disponible para resolver este nuevo problema.
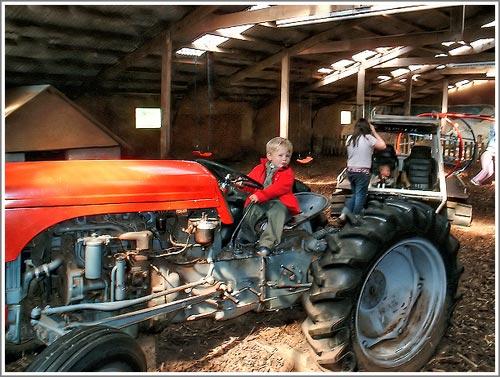
Imagen 04, Enhancer + Retoucher
Enhancer + Retoucher
En imagen 04 verá cómo la versión Enhancer y después Retoucher fueron utilizadas para eliminar las aureolas y manchas blancas. Para comparar la misma sección de la foto del tractor original con su equivalente Enhancer + Retoucher, eche un vistazo a imagen 05. Los resultados hablan por sí mismos.
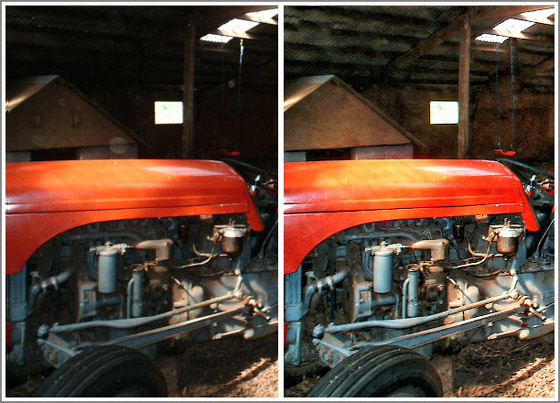
Imagen 05, Comparación lado a lado
Fotos originales de las vacaciones
Cuando haces clic en las imágenes 06 y 07 para ver los originales de la cueva de mar de Goa y la fotografía del paisaje marino de Sicilia, verás que ambos mostraban problemas de exposición similares a la foto original del tractor resultando un detalle perdido, otra vez en las áreas subexpuestas.

Imagen original 06, Cueva de mar en Goa

Imagen original 07, Paisaje marino de Sicilia
Haga clic en una imagen para ver una versión más grande
Enhancer + Retoucher fotos de las vacaciones
Haga clic en imagen 08 abajo para ver cómo Enhancer ha revelado detalles ocultos de la cueva de mar sin estropear su entrada y salida bañadas por el sol. AKVIS Retoucher también fue utilizado para eliminar la fecha y reemplazar la sección de la esquina inferior derecha de la foto que falta. La capacidad del sello de mezclar perfectamente parches clonados con el objetivo de fondo hizo posible sustituir a la desaparecida sección con el efecto "onda de aguas blancas".
La foto de las vacaciones con el paisaje marino de Sicilia también se benefició de la habilidad de Enhancer para revelar detalles ocultos, mientras y al mismo tiempo añadía profundidad y claridad. Otra vez Retoucher fue utilizado para quitar perfectamente la fecha de la foto. Haga clic en la imagen 09 para ver los resultados impresionantes.

Imagen 08,
Enhancer en la cueva de mar de Goa
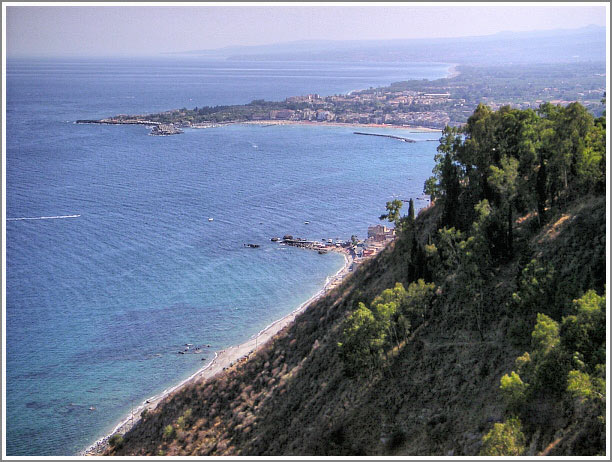
Imagen 09,
Enhancer en el paisaje marino de Sicilia
Haga clic en una imagen para ver una versión más grande
Conclusión:
Cuando las fotos originales son comparadas con sus equivalentes de AKVIS Enhancer puede ver que no sólo se han revelado detalles previamente ocultos, si no que también han mejorado en claridad y profundidad de color en cada foto.
¿Por qué luchar con los controles de nivel y curvas de su programa de edición de imágenes para arreglar tus fotos subexpuestas o sobreexpuestas cuando AKVIS Enhancer proporciona un rápido y eficaz detalle de recuperación con mayor claridad y prácticamente sin ningún esfuerzo?
AKVIS Enhancer es un producto que hace exactamente lo que dice en la caja. No sólo es un valioso añadido a la caja de herramientas de cualquier entusiasta de la imagen digital, también resulta muy útil a la cámara digital snapper con software compatible en la edición de imágenes.
Enhancer v. 17.8 - Prueba gratuita de 10 días
