Convert Vector Drawing to Sketch
La version française sera bientôt affichée.
The author of the tutorial is Michael W. Foutty.
AKVIS Sketch plugin works like a charm from within Xara Xtreme vector/bitmap program.
This tutorial demonstrates the powerful use of Sketch in conjunction with Xara Xtreme fast and easy "live effects" and "transparency" tools to create fantastic images within minutes! A big twist to this example is that we are working the Sketch plugin on a vector image!
 |
 |
To begin, from within Xara Xtreme, load or compose your own vector drawing. [note: in this tutorial the vector image was selected from Xara's 'clip art' gallery and can be located in the folder People/Blond girl]. Depending on you skill level in Xara Xtreme you might want to utilize the use of the 'layers' gallery, but this is not essential for this example.
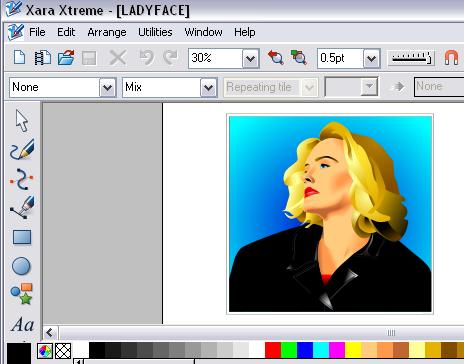
Resize the image if necessary, then perform the following 'shortcut' sequence:
-
Copy [Ctrl+C]
- Paste in place [Ctrl+Shift+V].
An identical vector copy now rests perfectly atop the original vector image. Vector editing can and should be done at this stage to either of the two images if desired.
With the top image selected it's time to access the Sketch plugin and allow it to perform it's wonders.
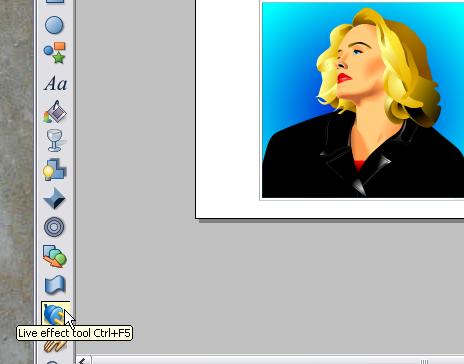
This is accomplished by selecting the Live effects tool found in Xara 'Xtreme's' menu.
Hit New/Add new effect and scroll the menu to locate the Sketch plugin.
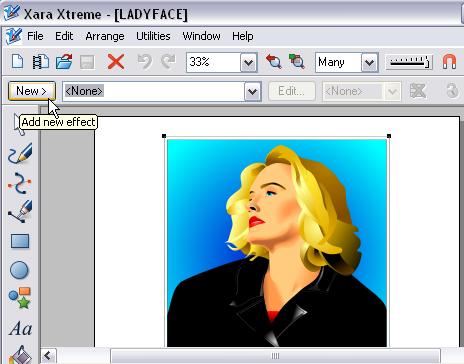
As an added incentive/tip you will notice that AKVIS plugin's Coloriage, Enhancer, MultiBrush (ex Stamp), and others also work within Xara Xtreme!
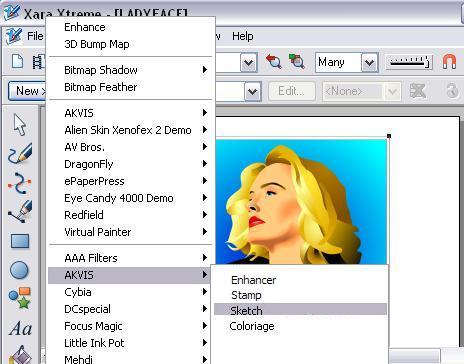
Once within Sketch you discover a wide variety of menu items that will allow for various results.
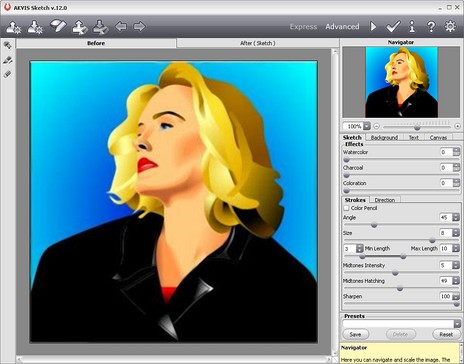
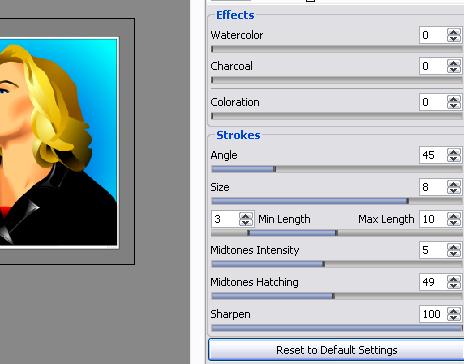
Our example uses the following settings. Plenty of room for play and experimentation!
After processing you immediately see the results from Sketch...excellent!
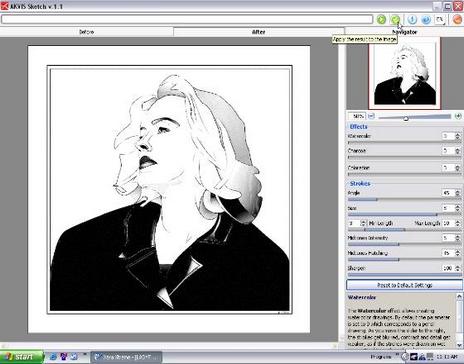
Once you are satisfied with the results hit the 'arrow key' ![]() . The Sketch processed image now returns to Xara 'Xtreme's workspace.
. The Sketch processed image now returns to Xara 'Xtreme's workspace.
Notice that you only see the Sketch results. This is because you processed the top layer [clone] only. This layer has now been transformed into a bitmap image [note: the underlying layer still remains a vector image...thus, still fully editable!].
Now, using Xara's Transparency tool, additional dramatic effects can easily be added to the image composition.
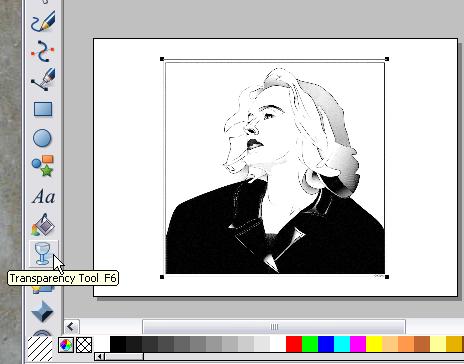
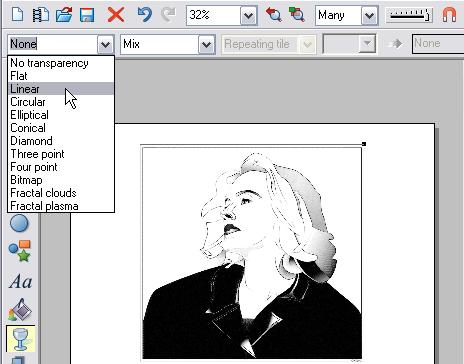
Adjust the transparency effect as you wish and experiment with different settings. Here we used a Simple-Linear-Mix which provided a smooth transition from a b&w 'Sketch' to color.
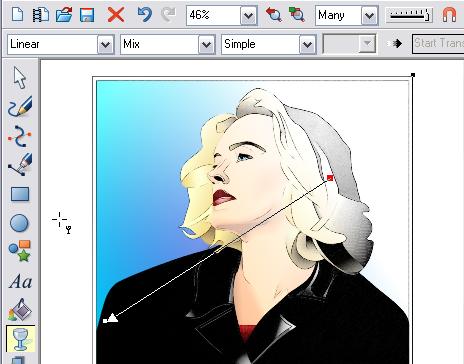
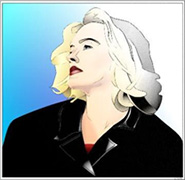
Here is a closer view of our results. Save the project as a Xara file for future edits/modifications. Then export the image in your bitmap format of choice.

This basic tutorial completely overlooks the vast array of additional image enhancements/modifications that are possible through the use of multiple layers/overlays and multiple effects and vector editing. Hopefully you will see the potential!
The combined forces of AKVIS Sketch plugin and Xara Xtreme offer a creative edge for all your image explorations.......especially when vectors are involved!
