Portrait of a Lady
La version française sera bientôt affichée.
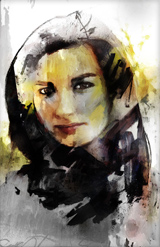
This tutorial created by Andre Villanueva illustrates (no pun intended) a workflow for using AKVIS ArtWork to give your editor collage work a stunning, hand-painted look with literally just a couple of clicks.
Materials needed:
- - AKVIS ArtWork software (This tutorial assumes you have installed as a plug-in);
- - AliveColors software;
- - Model photo;
- - Mixed media scans or imagery.

- Step 1. Open up AliveColors. Start off with a model photo. You can use your own photograph, or grab a photo from a royalty-free library such as www.sxc.hu.
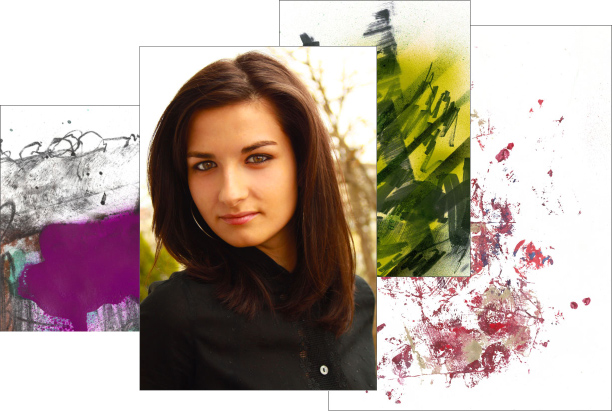
Source Images - Step 2. Start gradually adding your mixed-media scans or texture photos as layers above your base model layer. An excellent free source for texture assets is mediamilitia.com, particularly Mixed Media Pack. For each of these scans/textures, cycle through the layer blending modes so it will blend with the base model photo.
Tip:
- If a scan/texture layer is too strong or doesn't look right in a particular area, apply a layer mask:
- With the appropriate layer active, press the button
 at the bottom of the Layers panel.
Layers Palette- Using a soft-edged brush with black as your foreground color, paint out the areas you don't want. Black will completely hide areas, while shades of gray will provide varying levels of transparency.
- Don't worry if you accidentally mask out an area you DO want to keep: just switch your foreground color to white and re-paint the area back in.
- If a scan/texture layer is too strong or doesn't look right in a particular area, apply a layer mask:
- Step 3. Once you are finished with the collage portion, it will be time to use AKVIS ArtWork to deliver the coup d'grace.
- Create a new layer at the top of your stacking order.
- Use commands: Ctrl+A, Ctrl+Shift+C, Ctrl+V. This will stamp all visible layers onto that new layer.
- Step 4. With the stamped layer still active, we will now use AKVIS ArtWork:
- Go to Effects -> AKVIS -> ArtWork.
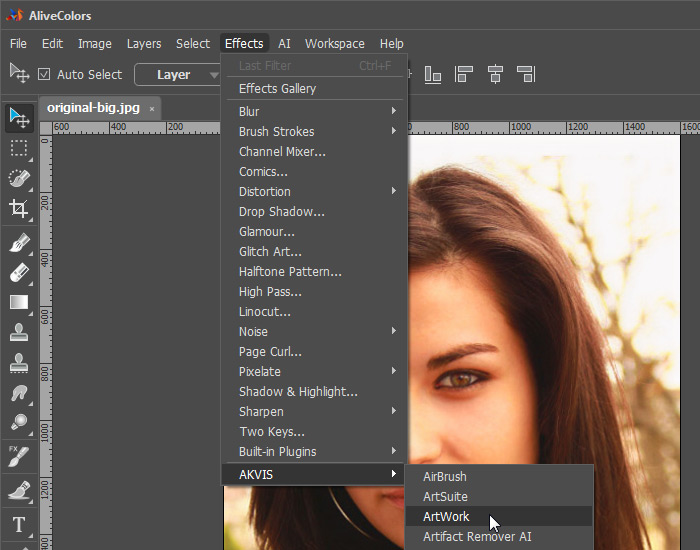
Call AKVIS ArtWork Plug-in- Experiment with the myriad styles and settings - it's fun! The author is especially impressed with the Oil - Expressive style. This is what was used for the example piece.
- Click the After tab to process the image and see it with the current settings applied.
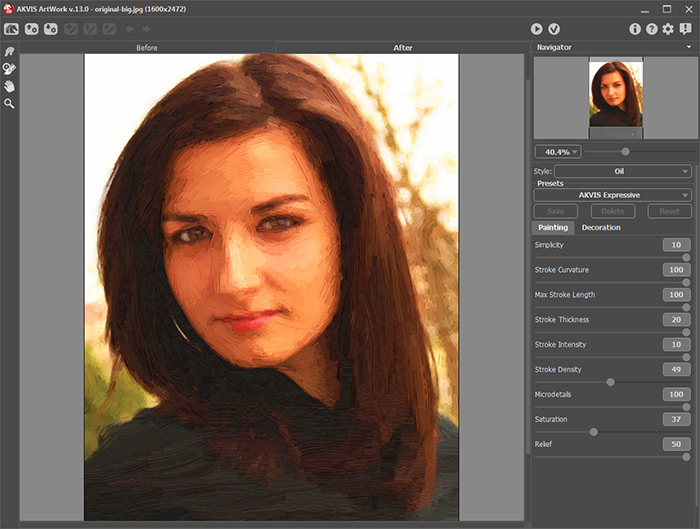
Oil Painting (Expressive Preset)- If you are satisfied with the results, click the button
 at the top. If you want to experiment further, keep adjusting the sliders.
- After clicking that button, you will be taken back to editor, and the layer will now have the AKVIS ArtWork filter applied to it. Cool!
- For added realism, create a new layer above the stamped layer and add some organic brush strokes using the Color Brush
 tool, and blend colors with the Smudge
  tool.
tool.
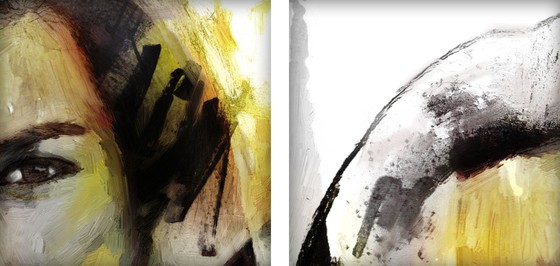
Organic Brush Strokes - Step 5. Taking it further: You could make multiple copies of the stamp layer, apply different AKVIS ArtWork settings to each one, then use layer masks and blending modes to blend them together. The possibilities really are endless!

